Fought At Fulda Gap
2440 days 19 hours 23 minutes ago
Battle Report
A/1-18 CAV vs 400MRR recon Company
50 POINTSDisclaimer: I use Team Yankee to train Lieutenants. So we adapt the rules to meet training requirements. A few differences.
1 inch = 100 meters (We use max effective ranges per World Wide Equipment Guide (WEG)).
Turn = 10 minutes (More or less)
We use spotting rules, see command decision.
Non moving units get over watch fire.
The LTs have to do a full OPORD and overlay for the fight. We put the graphic control measures on the board. If there is no graphic, they can't do it or are penalized. Cowboys and Indians maneuvering is a no go. However, as part of the orders process, they develop a Decision Support Template (DST). If conditions are met in Soviet turn, they get to interrupt the Soviet player and execute a specific action per the graphics.
Units in Battle Positions are in command regardless of separation distance.
All indirect and direct fires by US forces have to be spoken in doctrinal fire commands and calls for fire or it misses.
Each PL executes his plan while the other two PLs act as the section leaders. Once the game starts all discussions between leaders must be spoken as if on the radio in less than 10 seconds. Failure to do so gets a free enemy indirect mission on top of the offending leader.
Failure to send contact, spot, and sitrep reports per Troop SOP results in loss of a supporting asset for one turn. Nothing worse than losing an asset because subordinate fails to report to PL or PL to Troop Commander.
When possible we get the BN S2 to run the soviets, or the troop XO in a pinch. The Troop commander is responsible for documenting the lessons learned and leading the after action review. I set the scenarios, do the classes, and officiate.
For those that feel this is not in the spirt of the global campaign, please comment. We have no issue if the results are not used or included in the global results. I have gotten some query's over the years on the web forums on how we play. This is an example. Please accept it in that spirt.
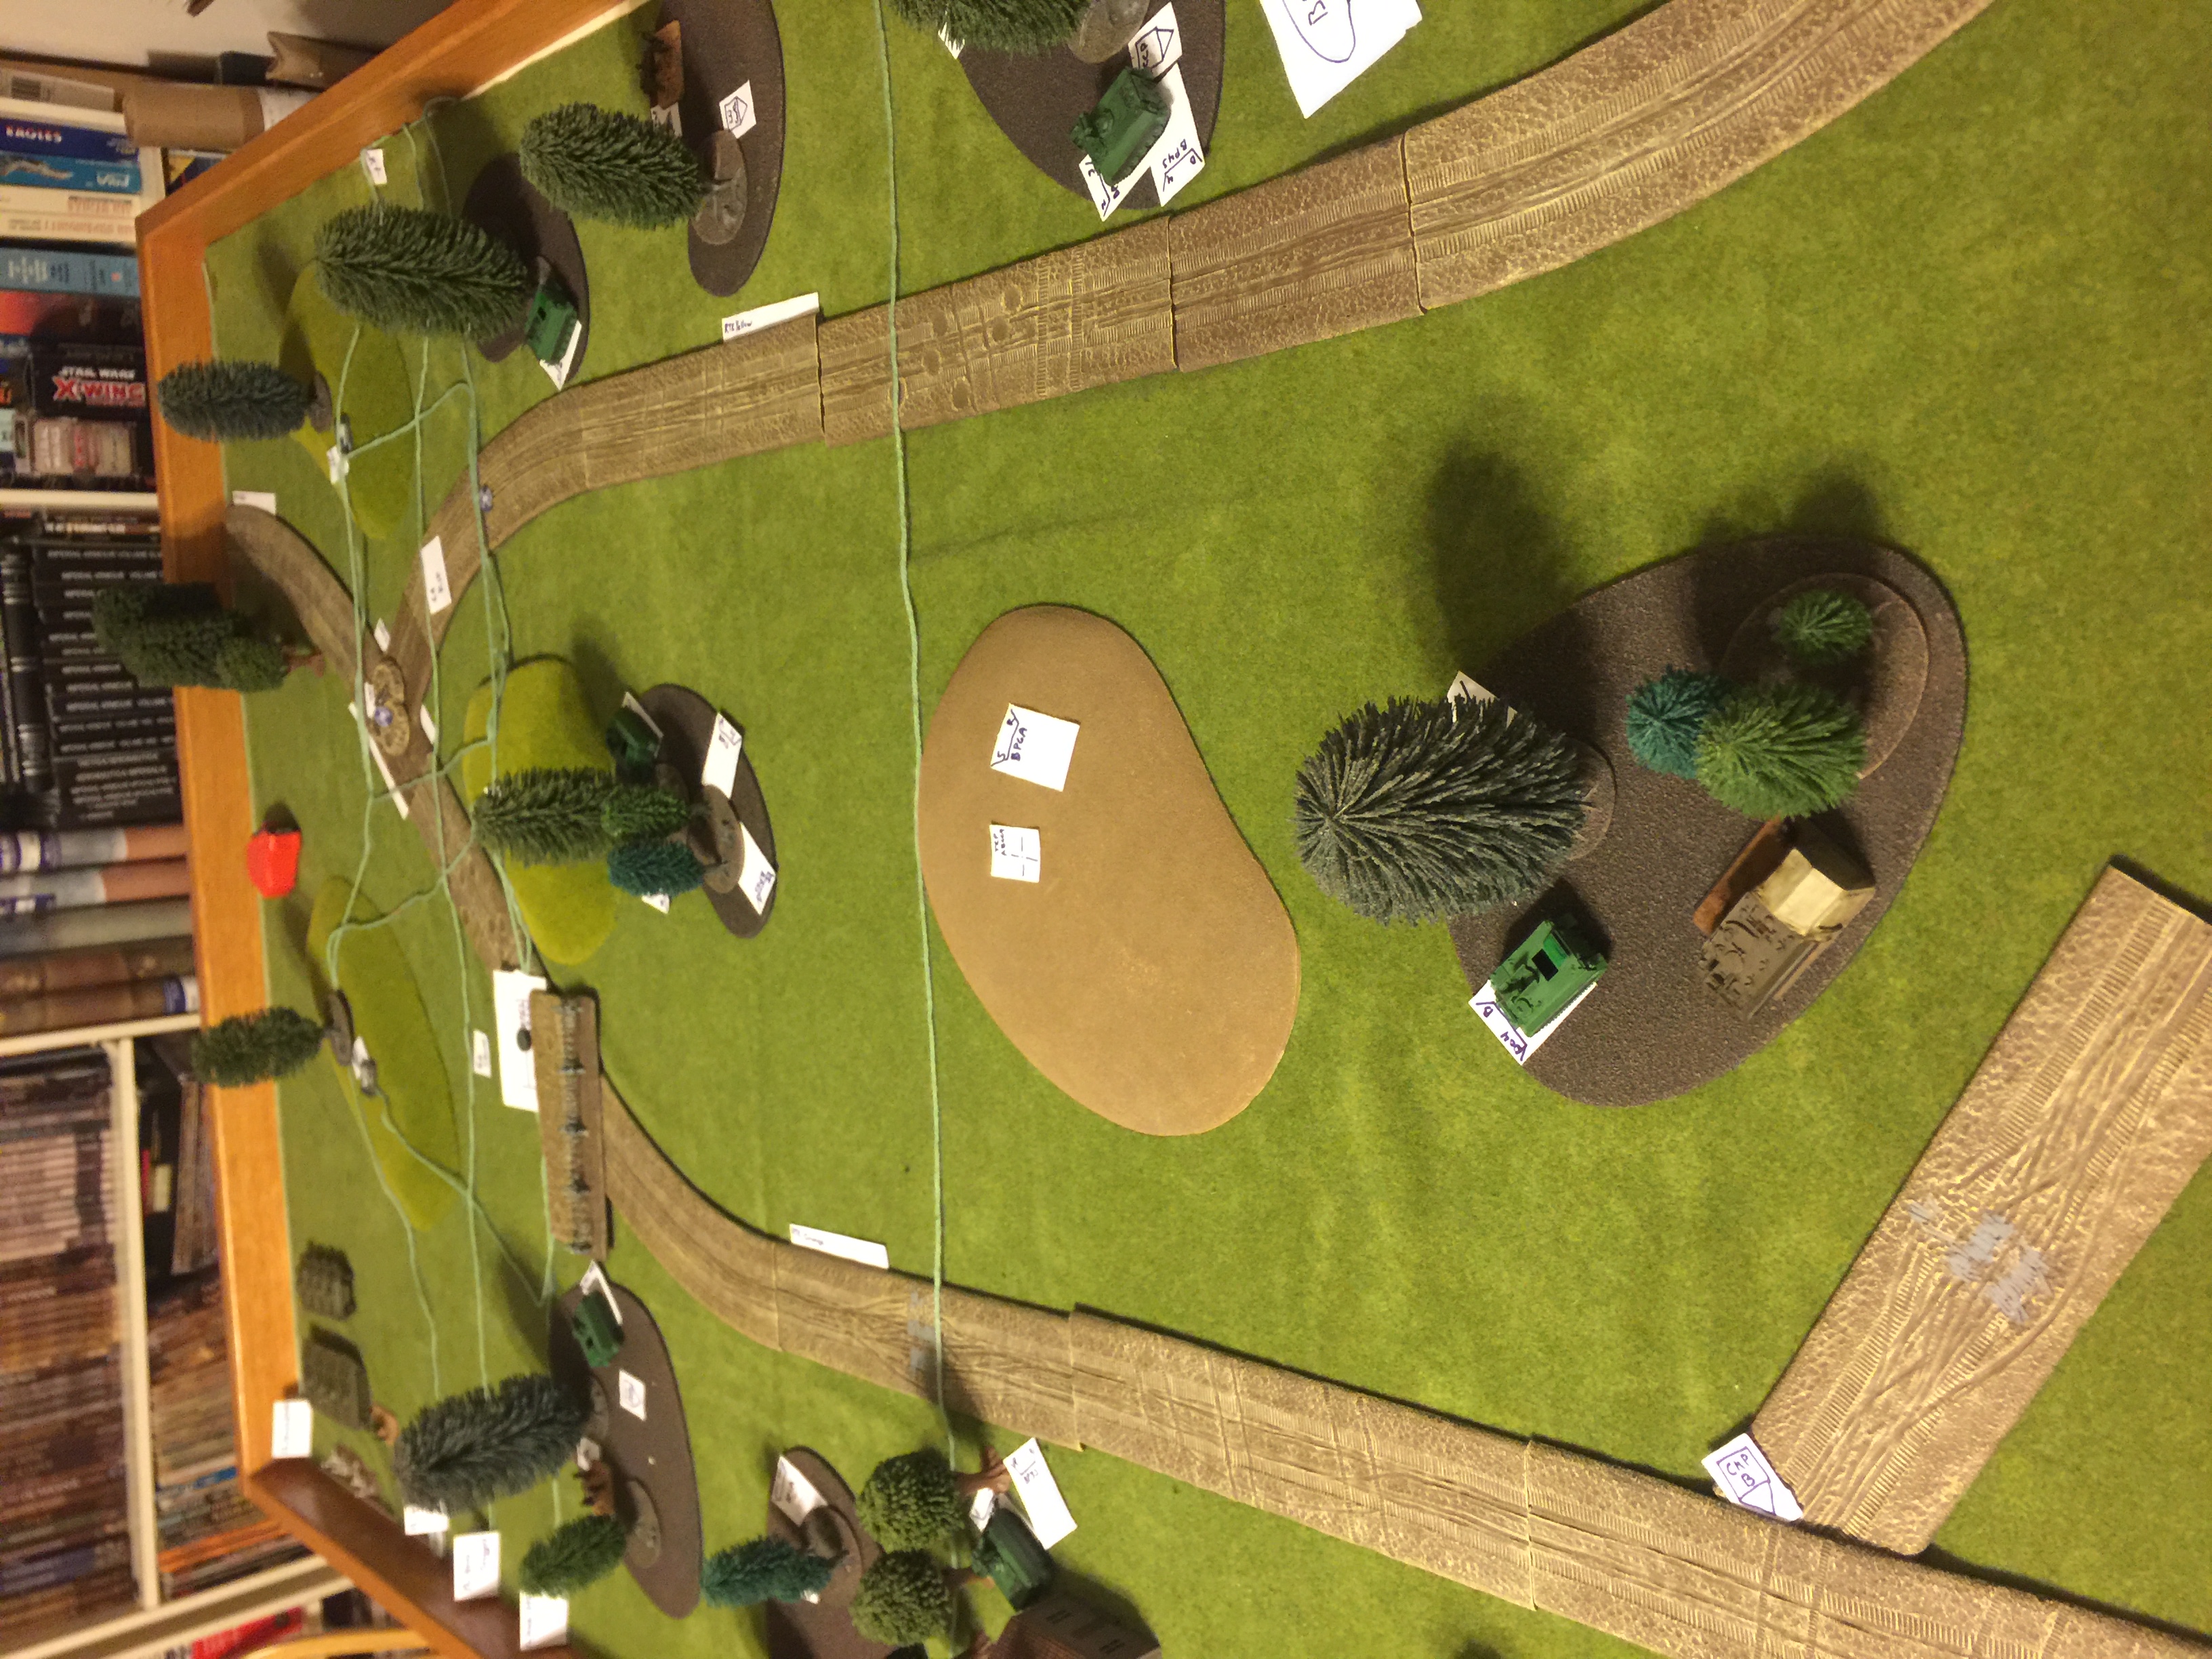
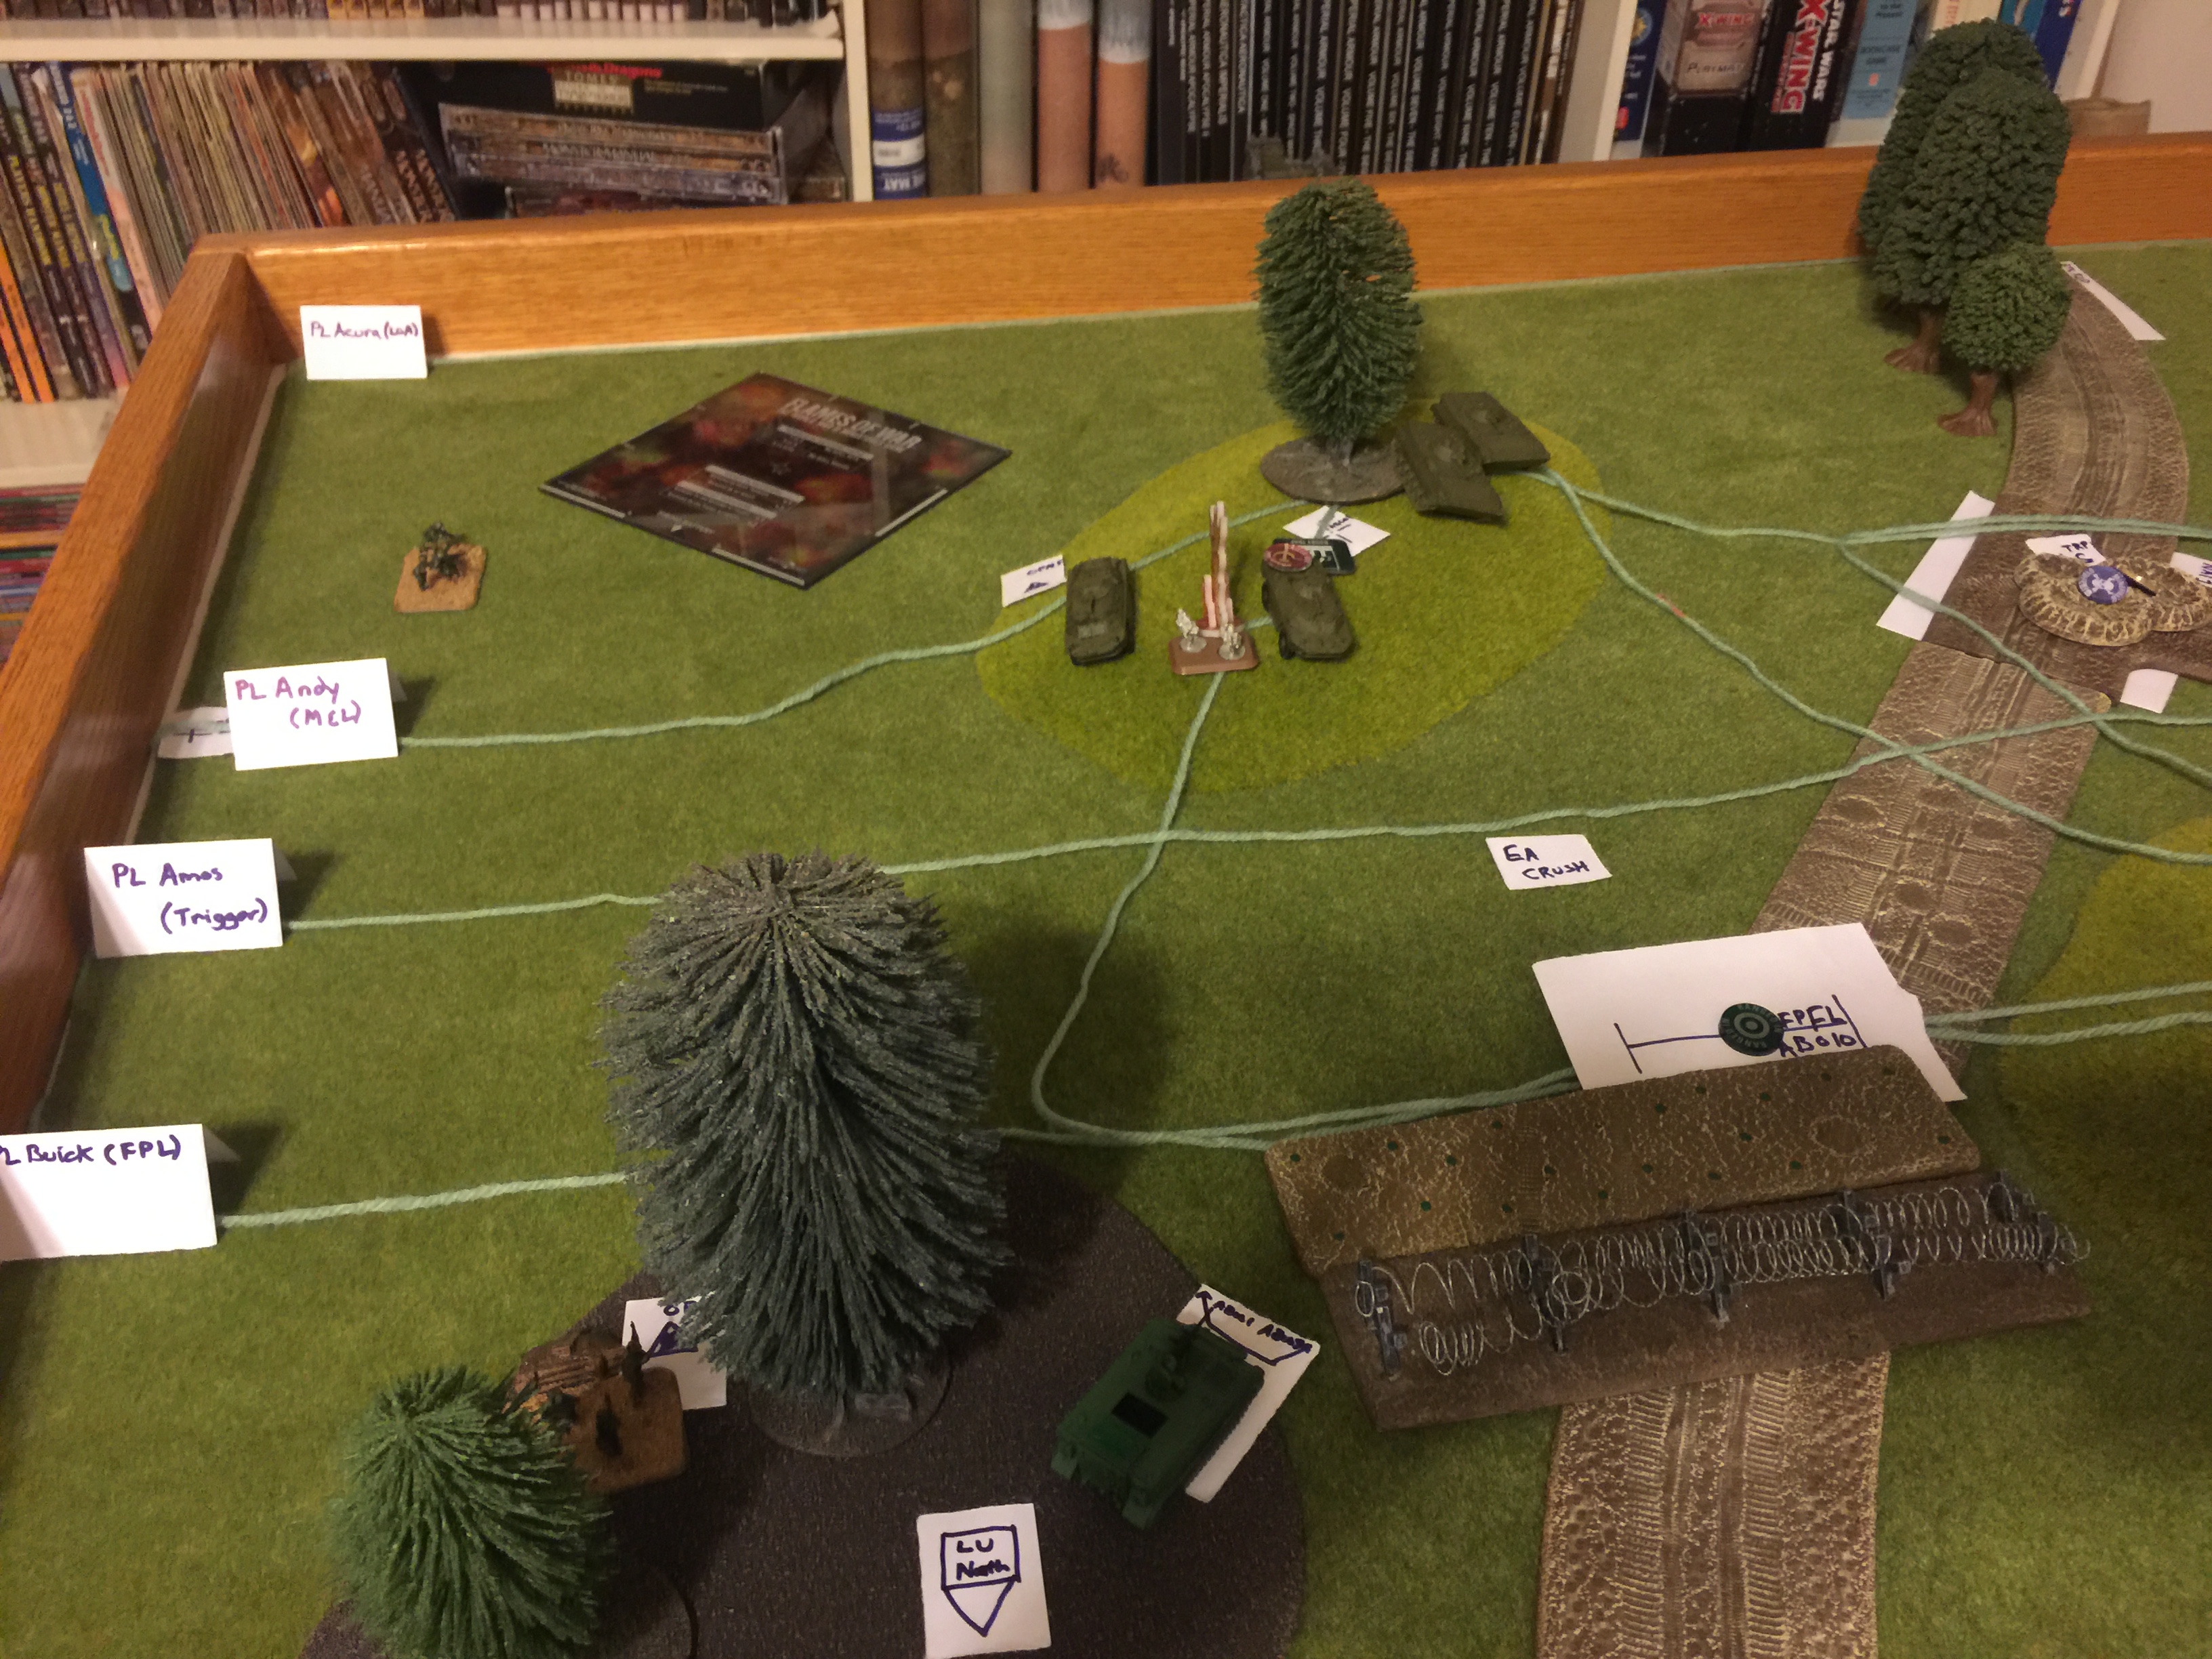
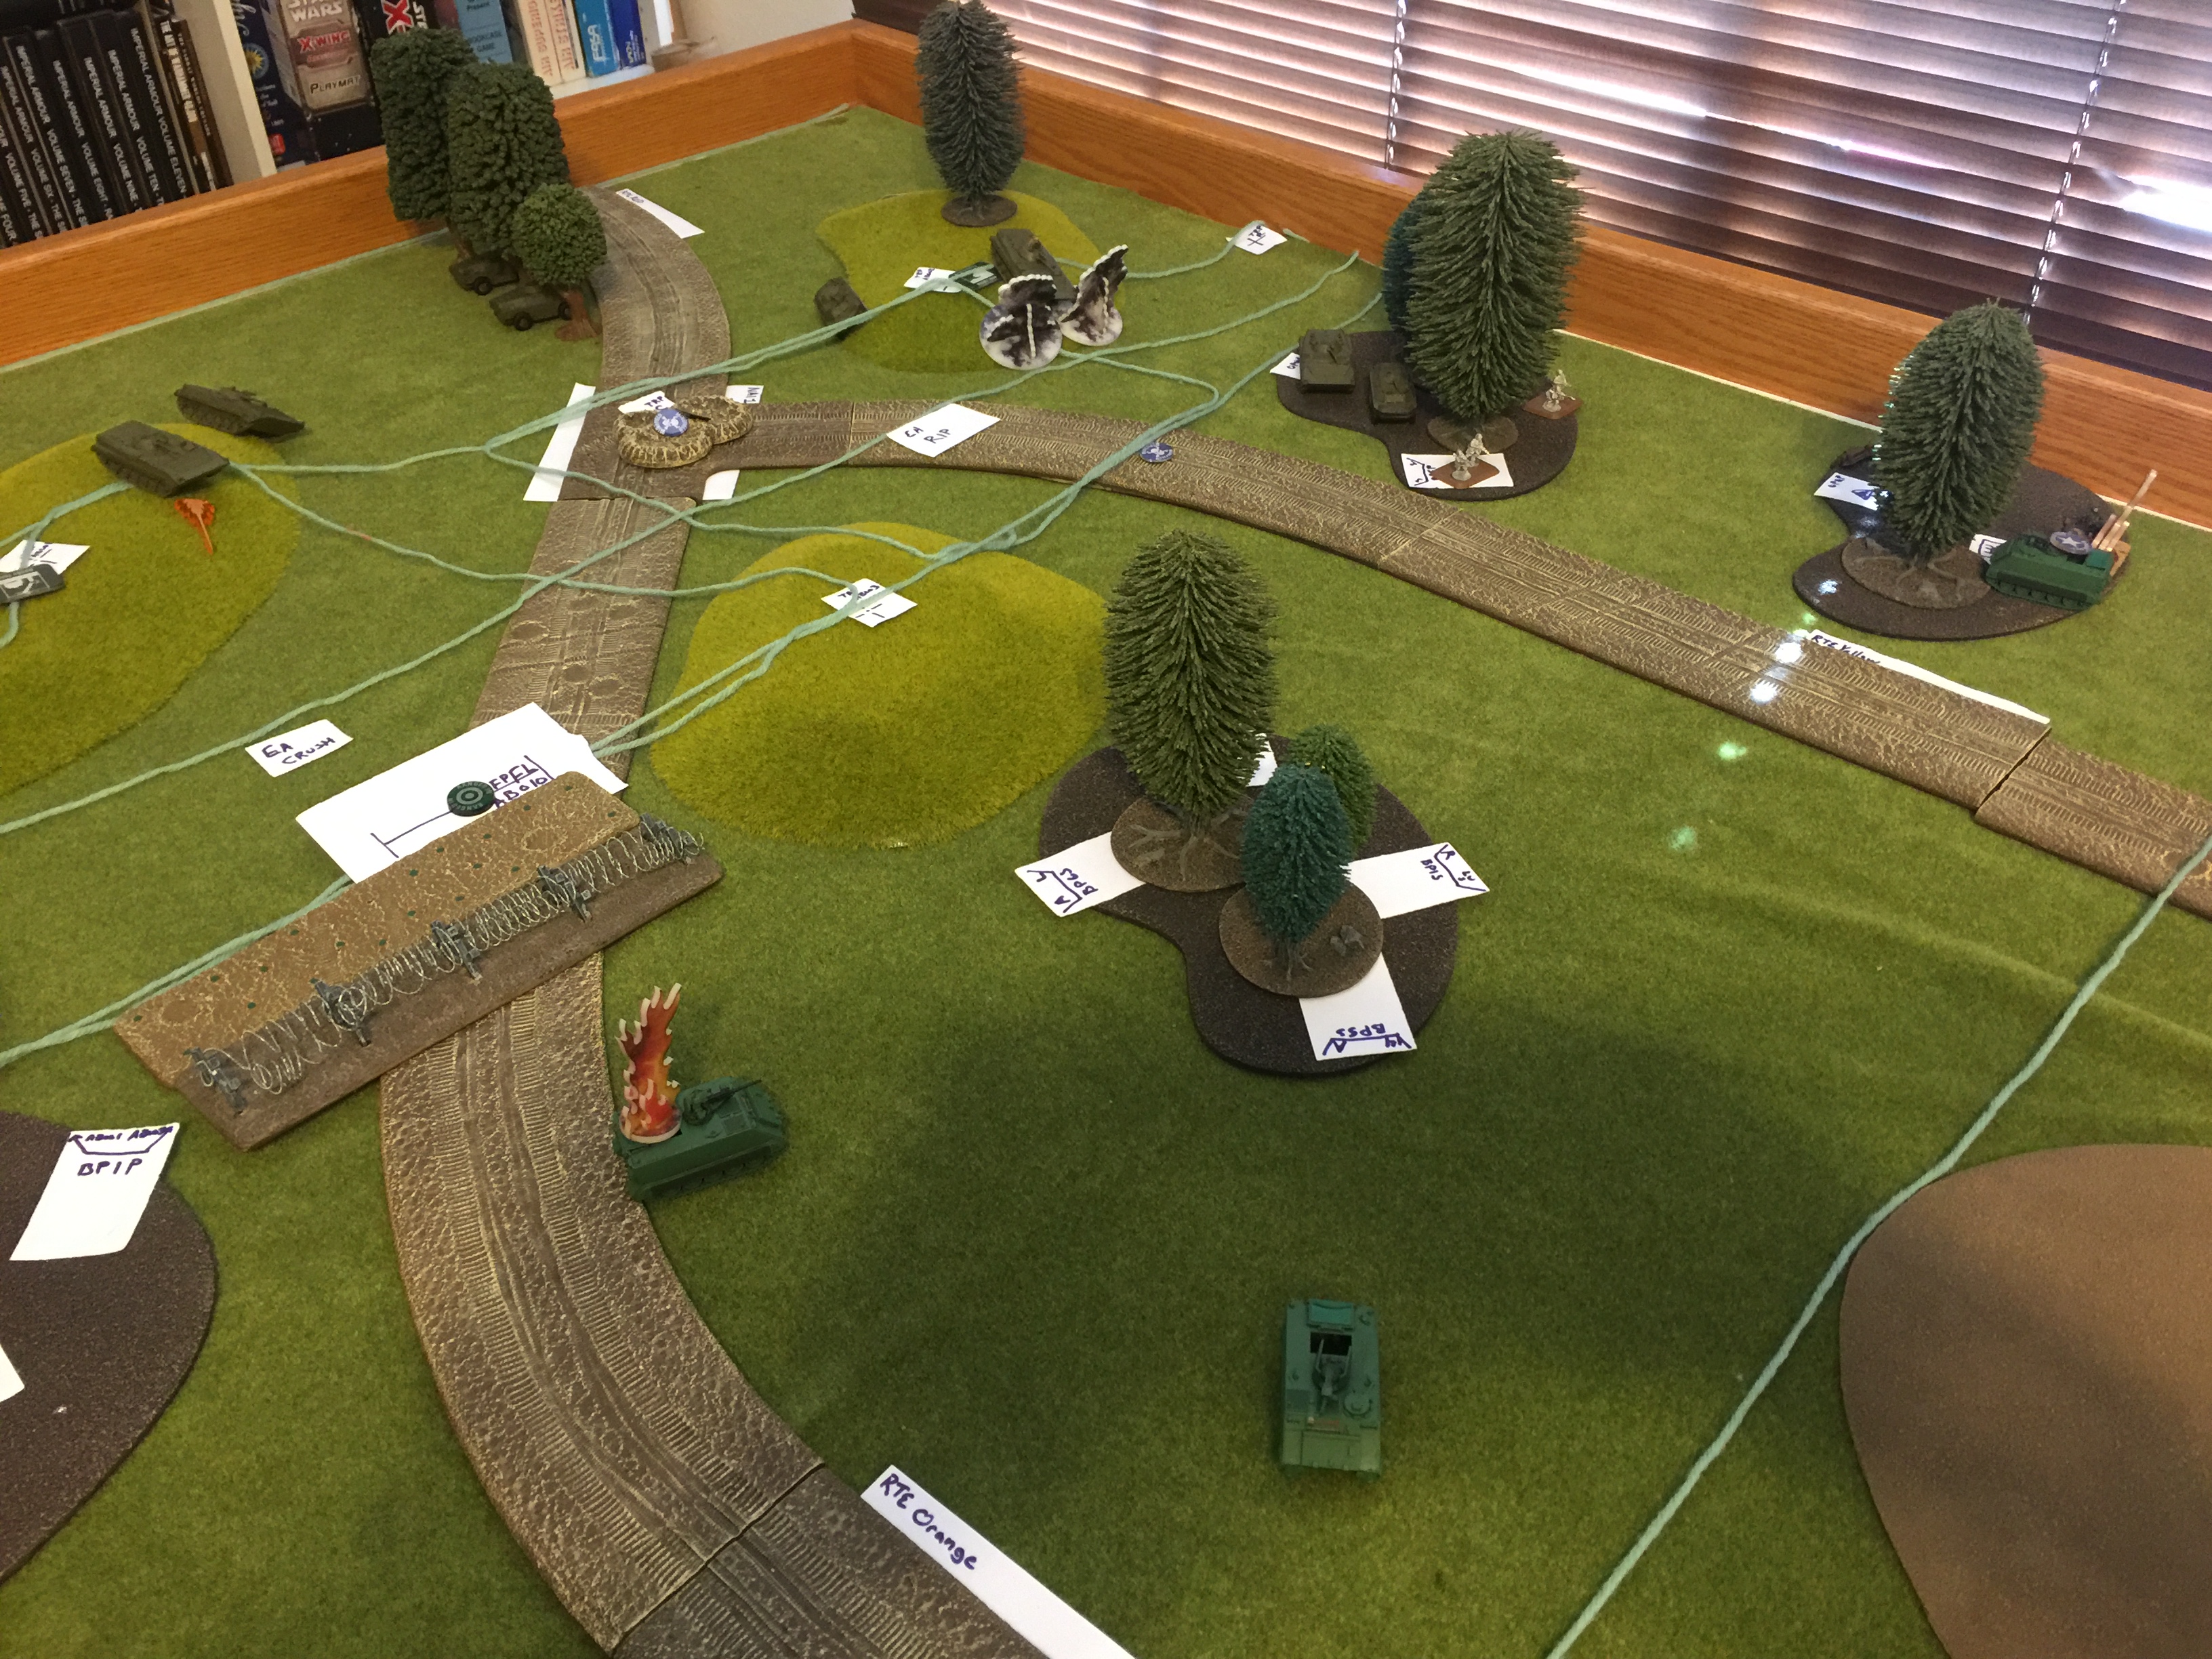
2/A/1-18 CAV (White Platoon) Screens from PL Acura to PL Dodge to provide early warning to the 79th IBCT, determine enemy axis of advance, and attrit enemy recon elements.
400th Recon Company of the 400th MRR conducts route recon of RTE Orange and RTE Yellow to facilitate the rapid movement of the advance guard to OBJ Sparrow.
2/A/1-18 CAV
A Section
1 x M113 with .50 CAL (White 1 Platoon Leader and PL FSO)
1x M113 with MK 19 (White 2 Senior Scout)
1x M901 ITV (White 3)
B Section
1 x M901 (White 4 Platoon Sergeant)
1 x M113 with .50 cal (White 5)
1 x M113 with Mk 19 (White 6)
In Support: A/143 FA (155mm) (6 x 155mm Howitzers), Mtr PLt A/1-18 CAV (2 x 107mm Mortars), One Section Cobra Attack Helo, One flight A10.
400th Recon Company (Task Organized)
Recon One (commanded by BMP PL)
2 x BRDM
2 x BMP1
1 x Motorcycle (Proxied by unpainted RPG team)
Recon Two (commanded by company commander)
1 x BRM 1
1 x BMP 1
2 x BRDM
2 x Motorcycle (Proxied by unpainted RPG teams)
In Support 1 Battalion 122mm Howitzers (3 x Batteries each of 6 tubes)
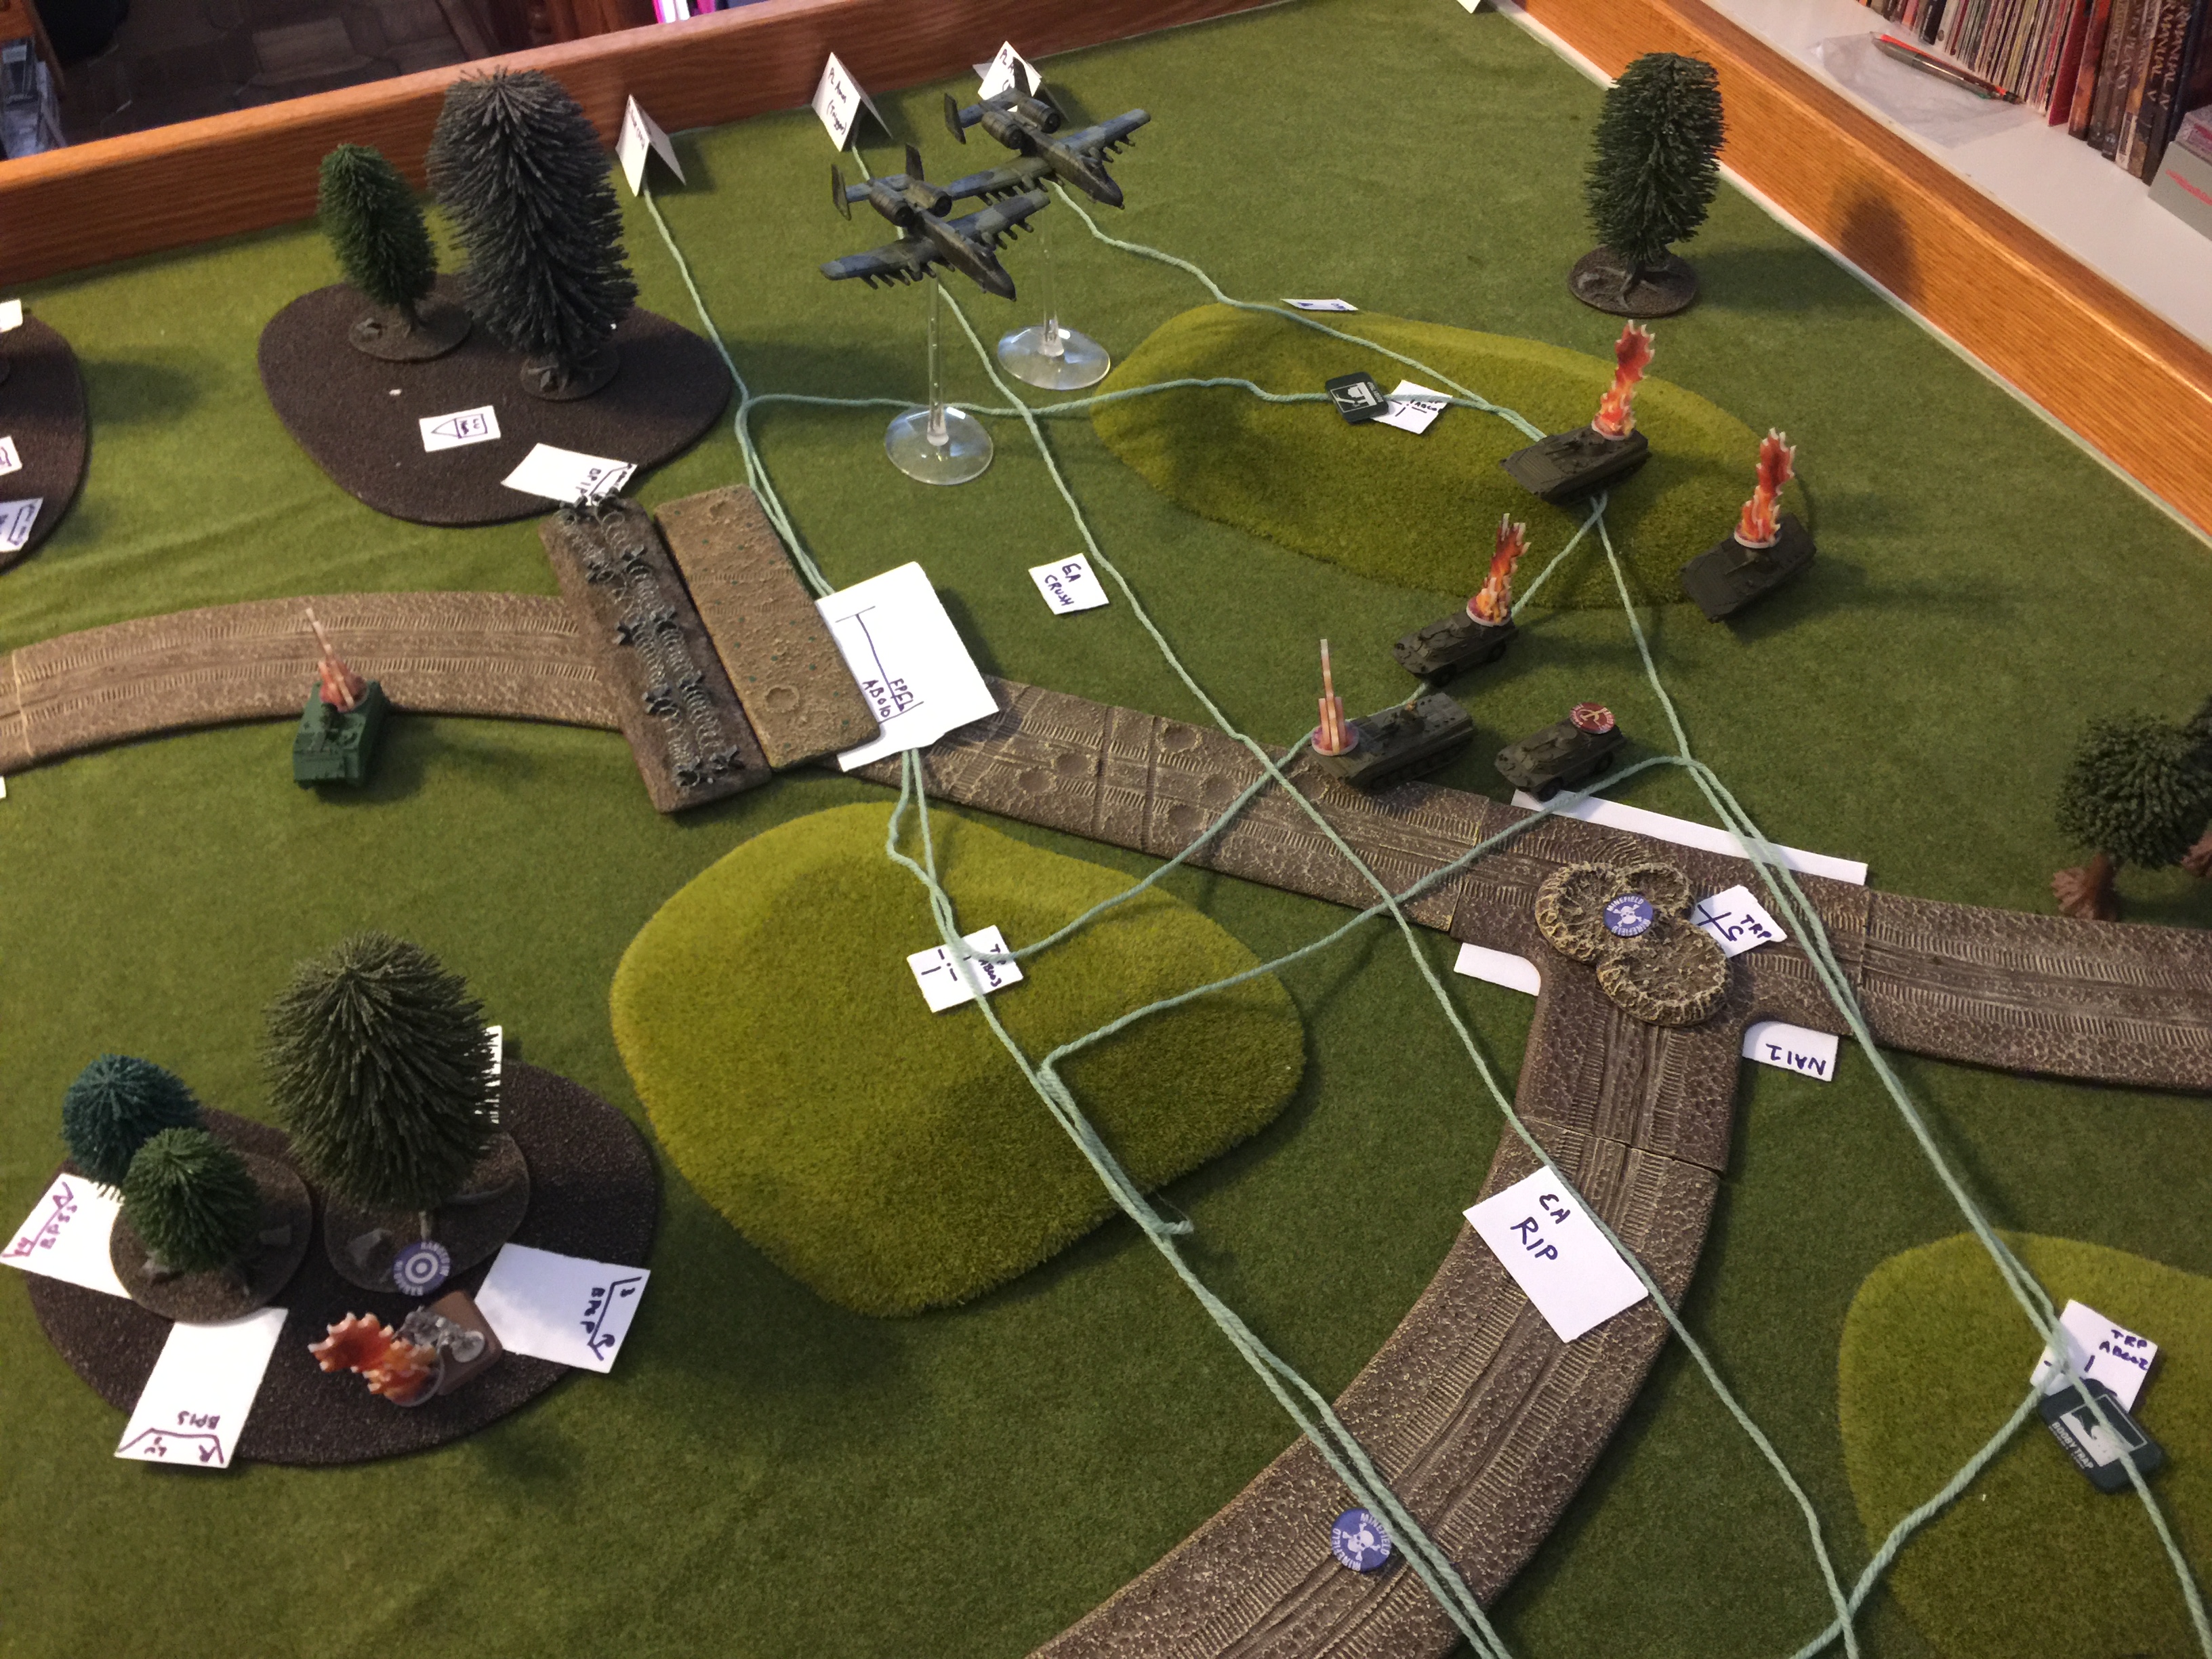
Soviet first turn
Recon one crosses PL Acura and occupies Hill vic TRP 1. Misses Booby Trap
Recon two crosses PL Acura and occupies Hill vic TRP 2. Hits Booby Trap (Hornet Mine) No Casualties.
Soviet does not spot US forces. Spots road crater at NAI 1. Spots Barbed wire vic PL Buick on RTE Orange.
US Spots BMPs and BRDMs on hills vic TRP 1 and 2.
US first turn
Section A calls for fire155mm Battery
Priority of Fires: A Section
Location: AB 001
Observer: White 1
Trigger: 2 vehicles cross PL Andy (Maximum Engagement Line (MEL))
Communication: Digital Squadron Fires Net
Restrictions: None
Effects: one BRDM Bailed, one motorcycle destroyed.
Section B calls for fire 107mm mortar section
Priority of Fires: B Section
Location: AB 002
Observer: White 6
Trigger: 2 vehicles cross PL Andy (Maximum Engagement Line (MEL))
Communication: Voice Co Fires Net
Restrictions: None
Effects: None
US Decision Point:
If more than 3 Vehicles cross PL Andy (MEL) request attack helos to Battle Position 1 (BP1).
Soviet Second Turn
Soviet decides to bypass obstacles on RTE Orange.
Recon 1 BRDM recovers
Recon 2 bounds motorcycle teams forward to clear wood line (blitz move) vic Link Up Point North (LUN) and spots White 5.
US decision point if enemy crosses PL Amos (Trigger Line) displace to alternate positions
White 5 displaces to alternate position via LU S to pick up OP. (per Decision Support Template generated at rehearsal)
Upon spotting non-moving units get over watch fires.
Recon 2 one BMP 1 fires on White 5 with 73mm gun. Miss
Recon one 2 BMP1 fire saggers at White 5. Miss.
American Decision Point interrupts sequence of play (per DST)
White 6 calls for immediate suppression on TRP 2
P: Section B L: AB 002 O: White 6 Trigger: direct fire on US unit C: Co Fires Net R: None Method: Smoke: Effect contact broken with White 5
Soviet loses contact with White 5
Recon one BRDMs back off hill and shift to south
One battery 122mm fires at White 5s former location no unit in impact area.
One battery 122mm fires vic White 1 Hit and save.
American Decision Point. If in impact area of indirect fire, switch to alternate position. (Per DST) White chooses to not execute
One battery 122mm fires vic TRP 3. No units in impact area.
US Second Turn
Attack Helos move to BP1
White 1 repeats 155 fire on TRP 1 PLOT-CR, no change, DPCIM in effect. No effects.
US Loses contact with motorcycles in woods.

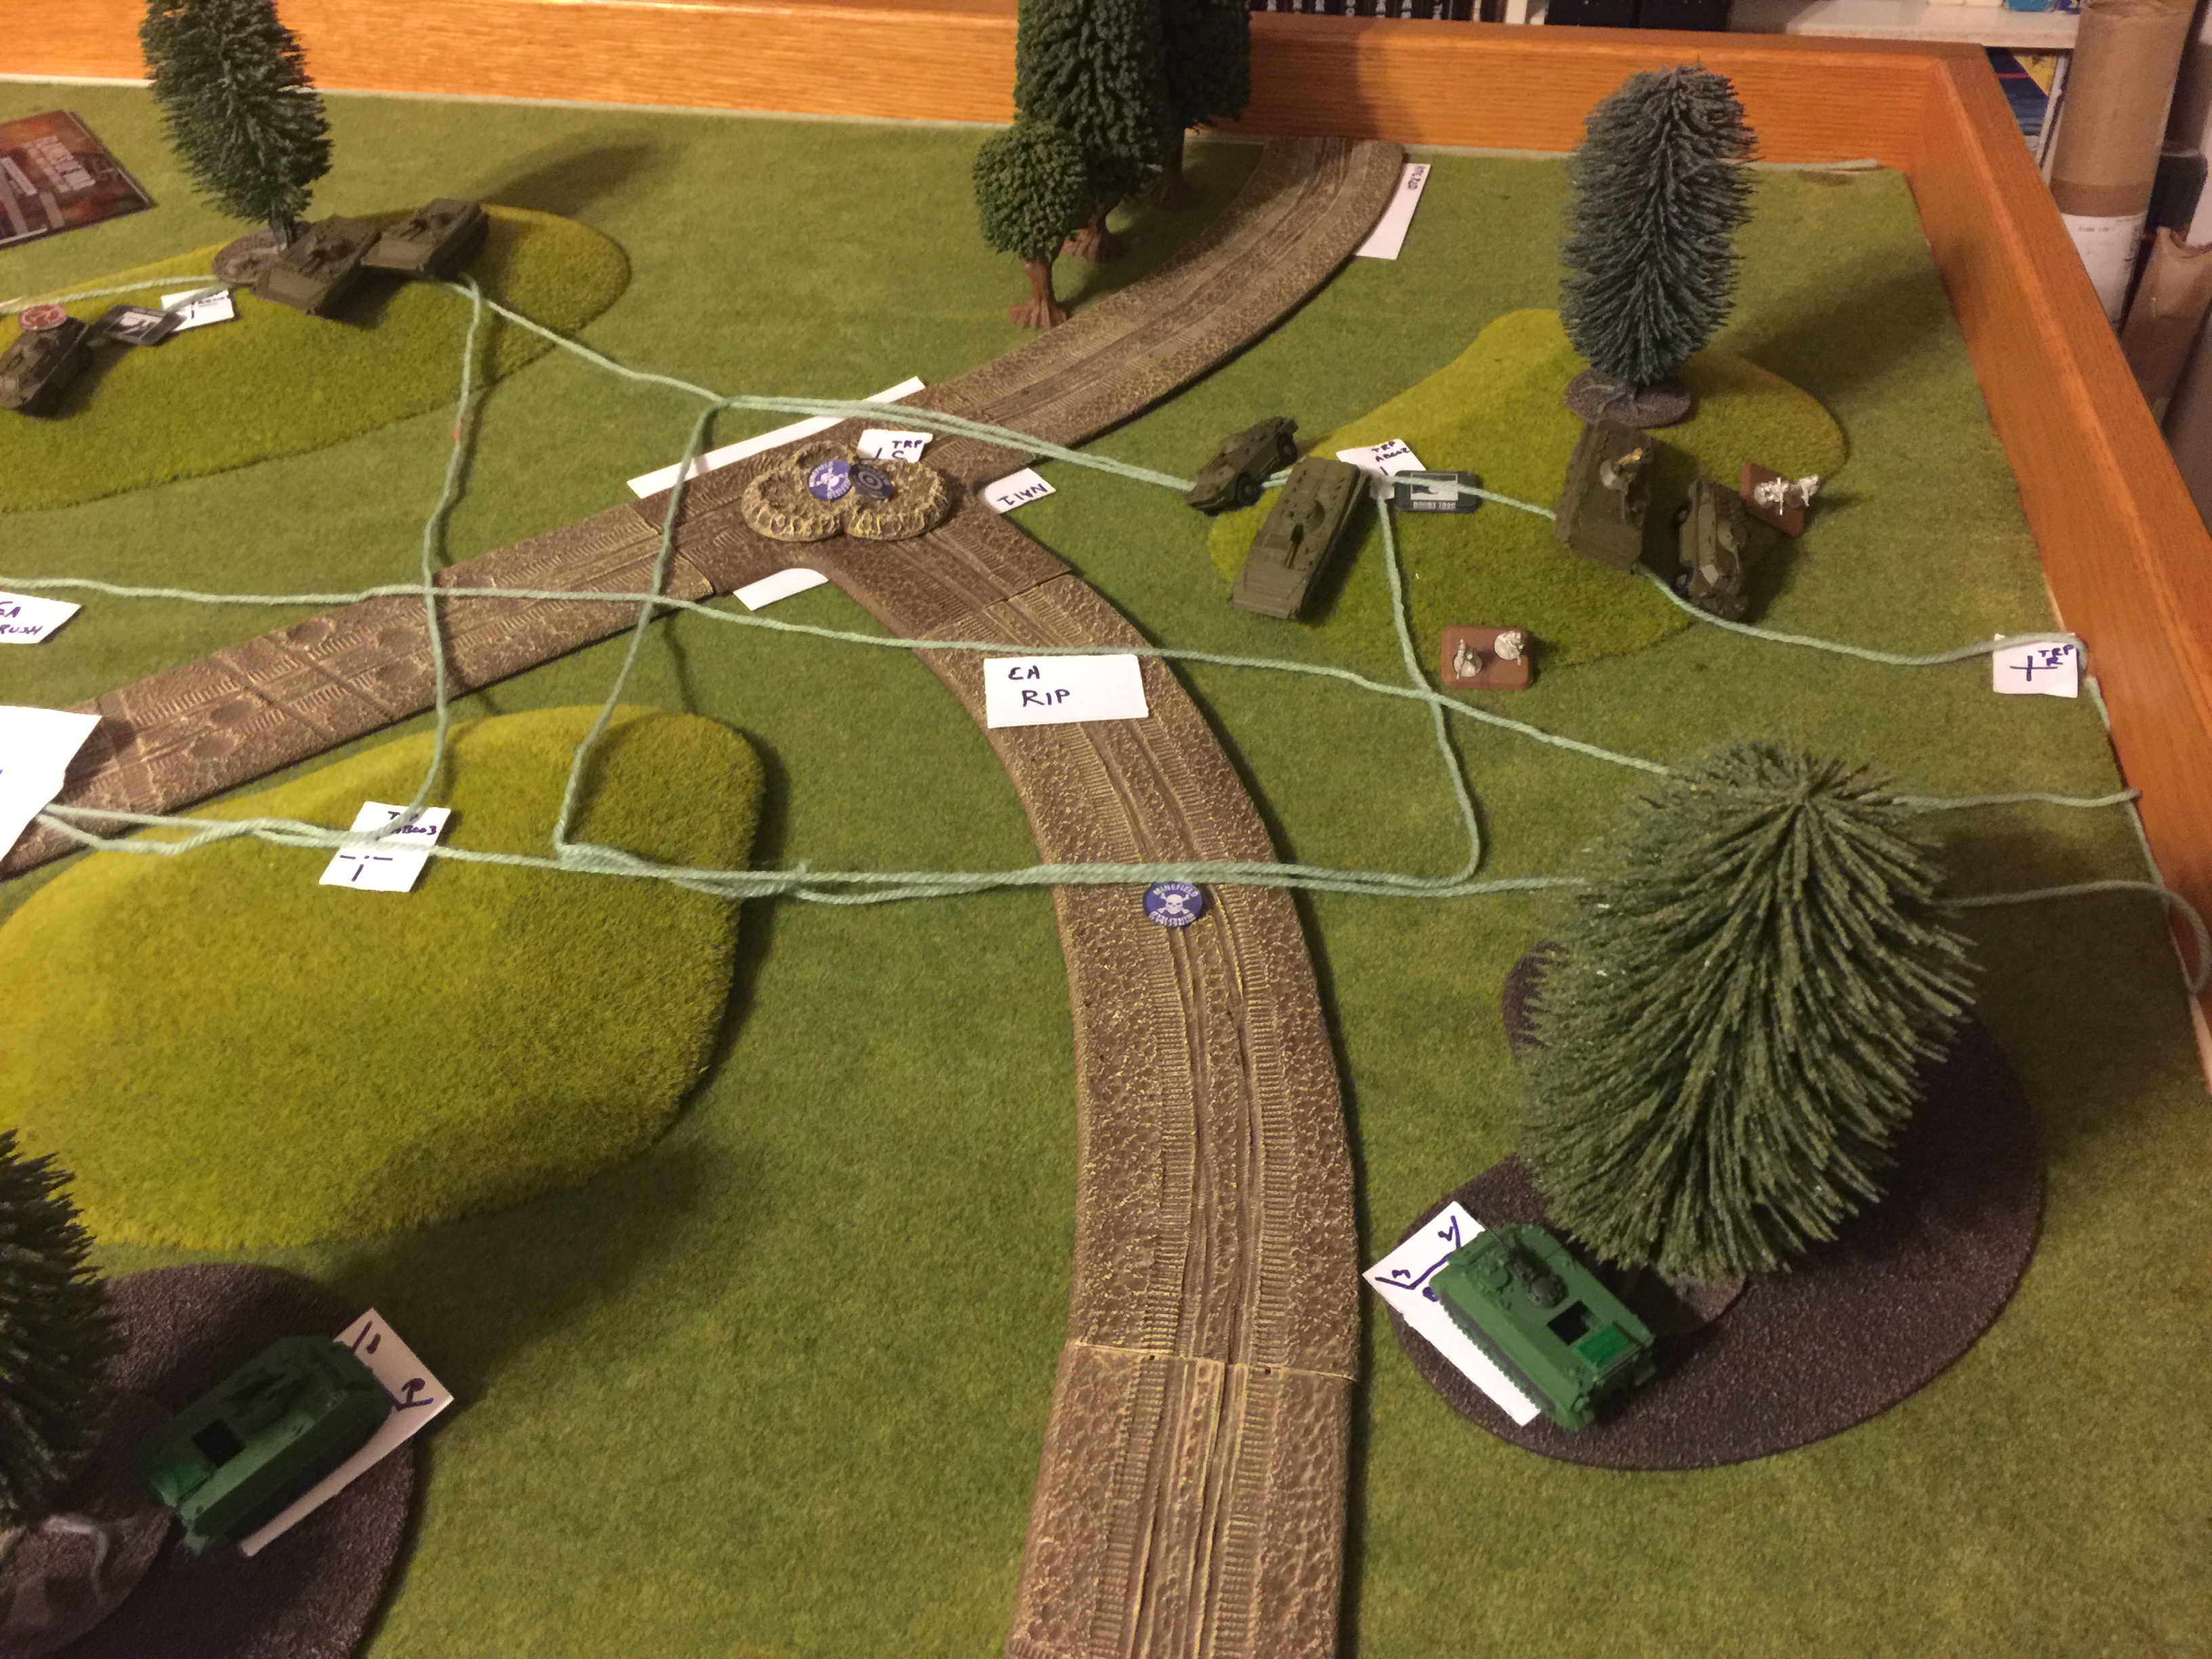
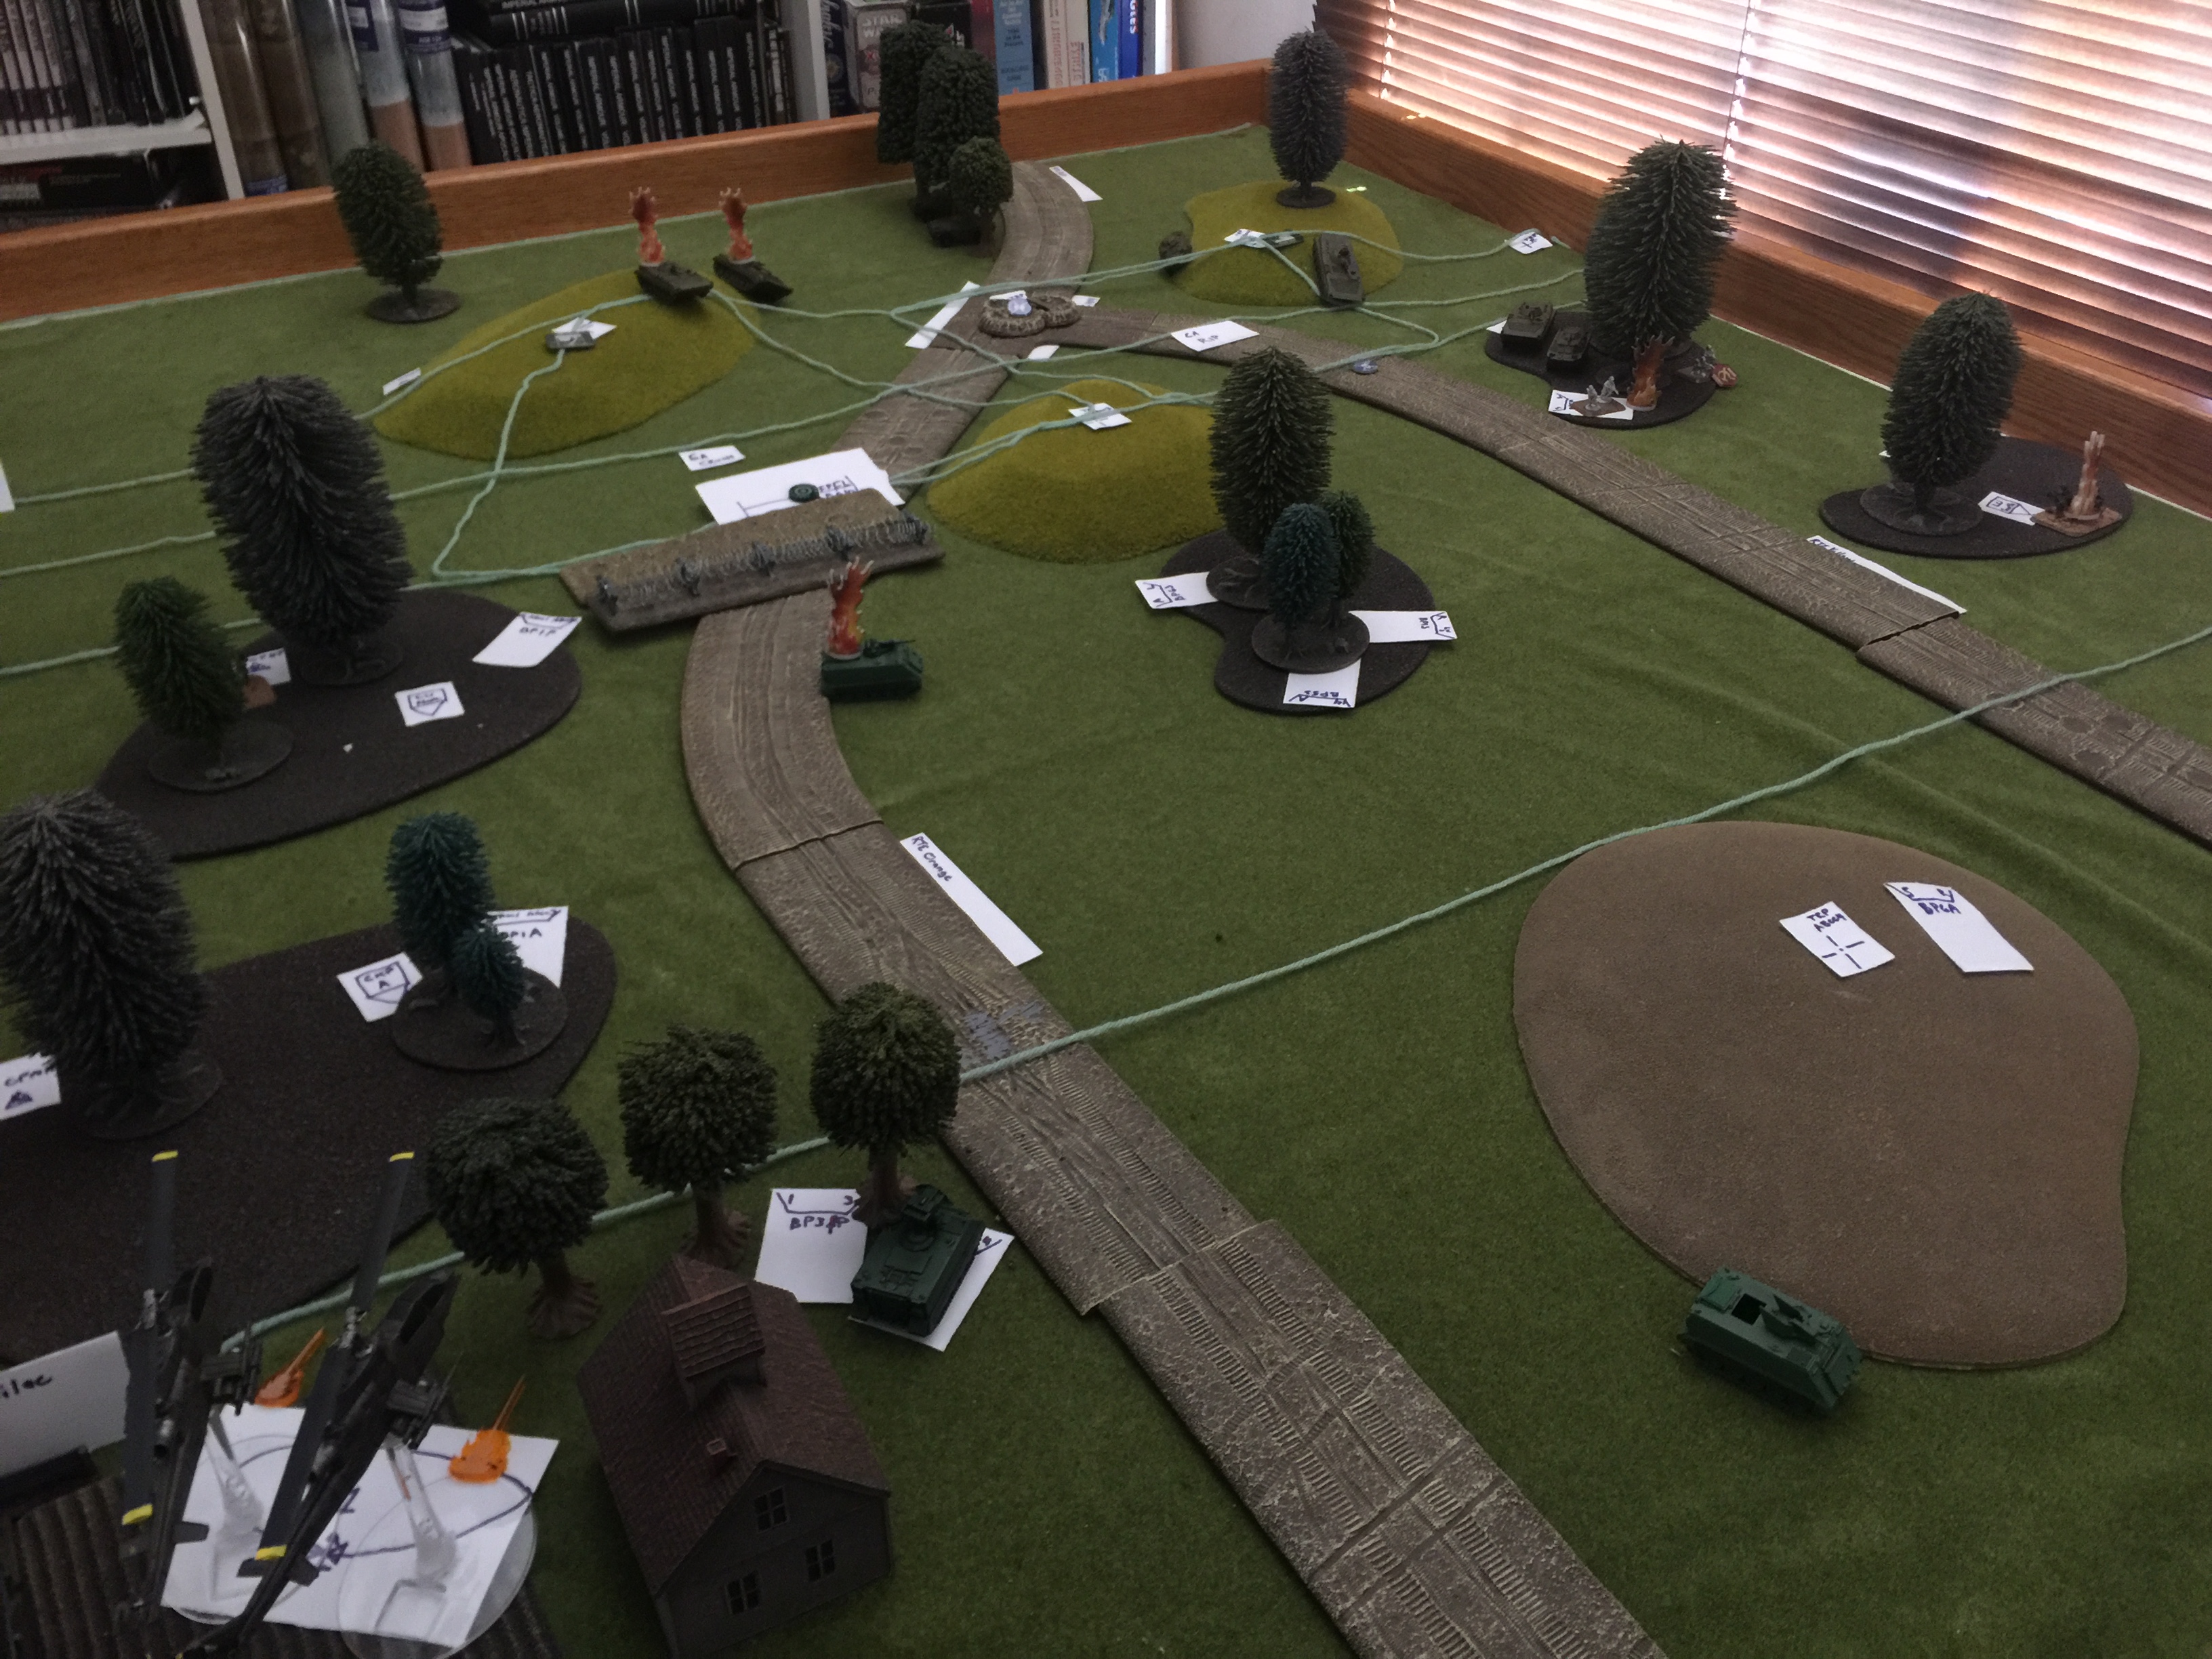
Soviet Turn Three
Recon two moves motorcycles up to edge of woods. Spotted. Spots OP QP. Moves 1 BMP and 1 BRDM to woods exploiting US Smoke.
American decision point. When BMP crosses PL BUICK (Final Protective Line (FPL)) move to supplementary positions. White 1 moves across open field, not following rehearsal route. Spotted by Recon 1. BMP sagger hits and kills White 1. PL out of game. B Section Leader (Platoon Sergeant) takes over. Loses FSO. Loses digital fires comms. Can only call fires on voice company FM fires. Means platoon can only call one fire mission at a time and 155mm missions are delayed.
White 2 displaces to supplementary position.
White 3 displaces to supplementary position.
Recon 2 moves 1 BMP to edge of wooded hill exploiting US Smoke.
One battery 122mm fires vic LUS. Hit and kill OP QP. Hit and bail White 5.
One battery 122mm fires vic White 6. Miss.
American Decision Point. If in impact area of indirect fire, switch to alternate position. (Per DST) White 6 displaces following rehearsed route. Gains spotting modifier and is not spotted.
One battery 122mm fires vic OP NP. Hit and pinned.
American Turn 3.
White 5 recovers.
OP NP stays pinned.
White 6 continues to fool the enemy by running away. Gains call sign Sir Robin. Continues move along route to alternate position. (Yes, this equates to a double move).
White 5 continues move and occupies alternate position.
Platoon Sergeant (PS) shifts priority of 155mm fires to B Section.
Smoke lifts.
One section mortars (107mm) fires at motorcycle in woods. P: B Section. L: Shift from known location, TRP 2 drop 1500 meters. O: White 4. C: Company fires net. R: None. Effects. One motorcycle killed, one pinned.
155mm howitzers are out of contact with observer. Troop commander shifts priority away from White platoon. White loses use of 155mm battery.
Direct fire Attack Helos fire at Recon 1. Snake 6, TOW, 2 BMPS Engagement Area (EA) CRUSH. Frontal, Fire at your command. 2 BMPs hit and killed.
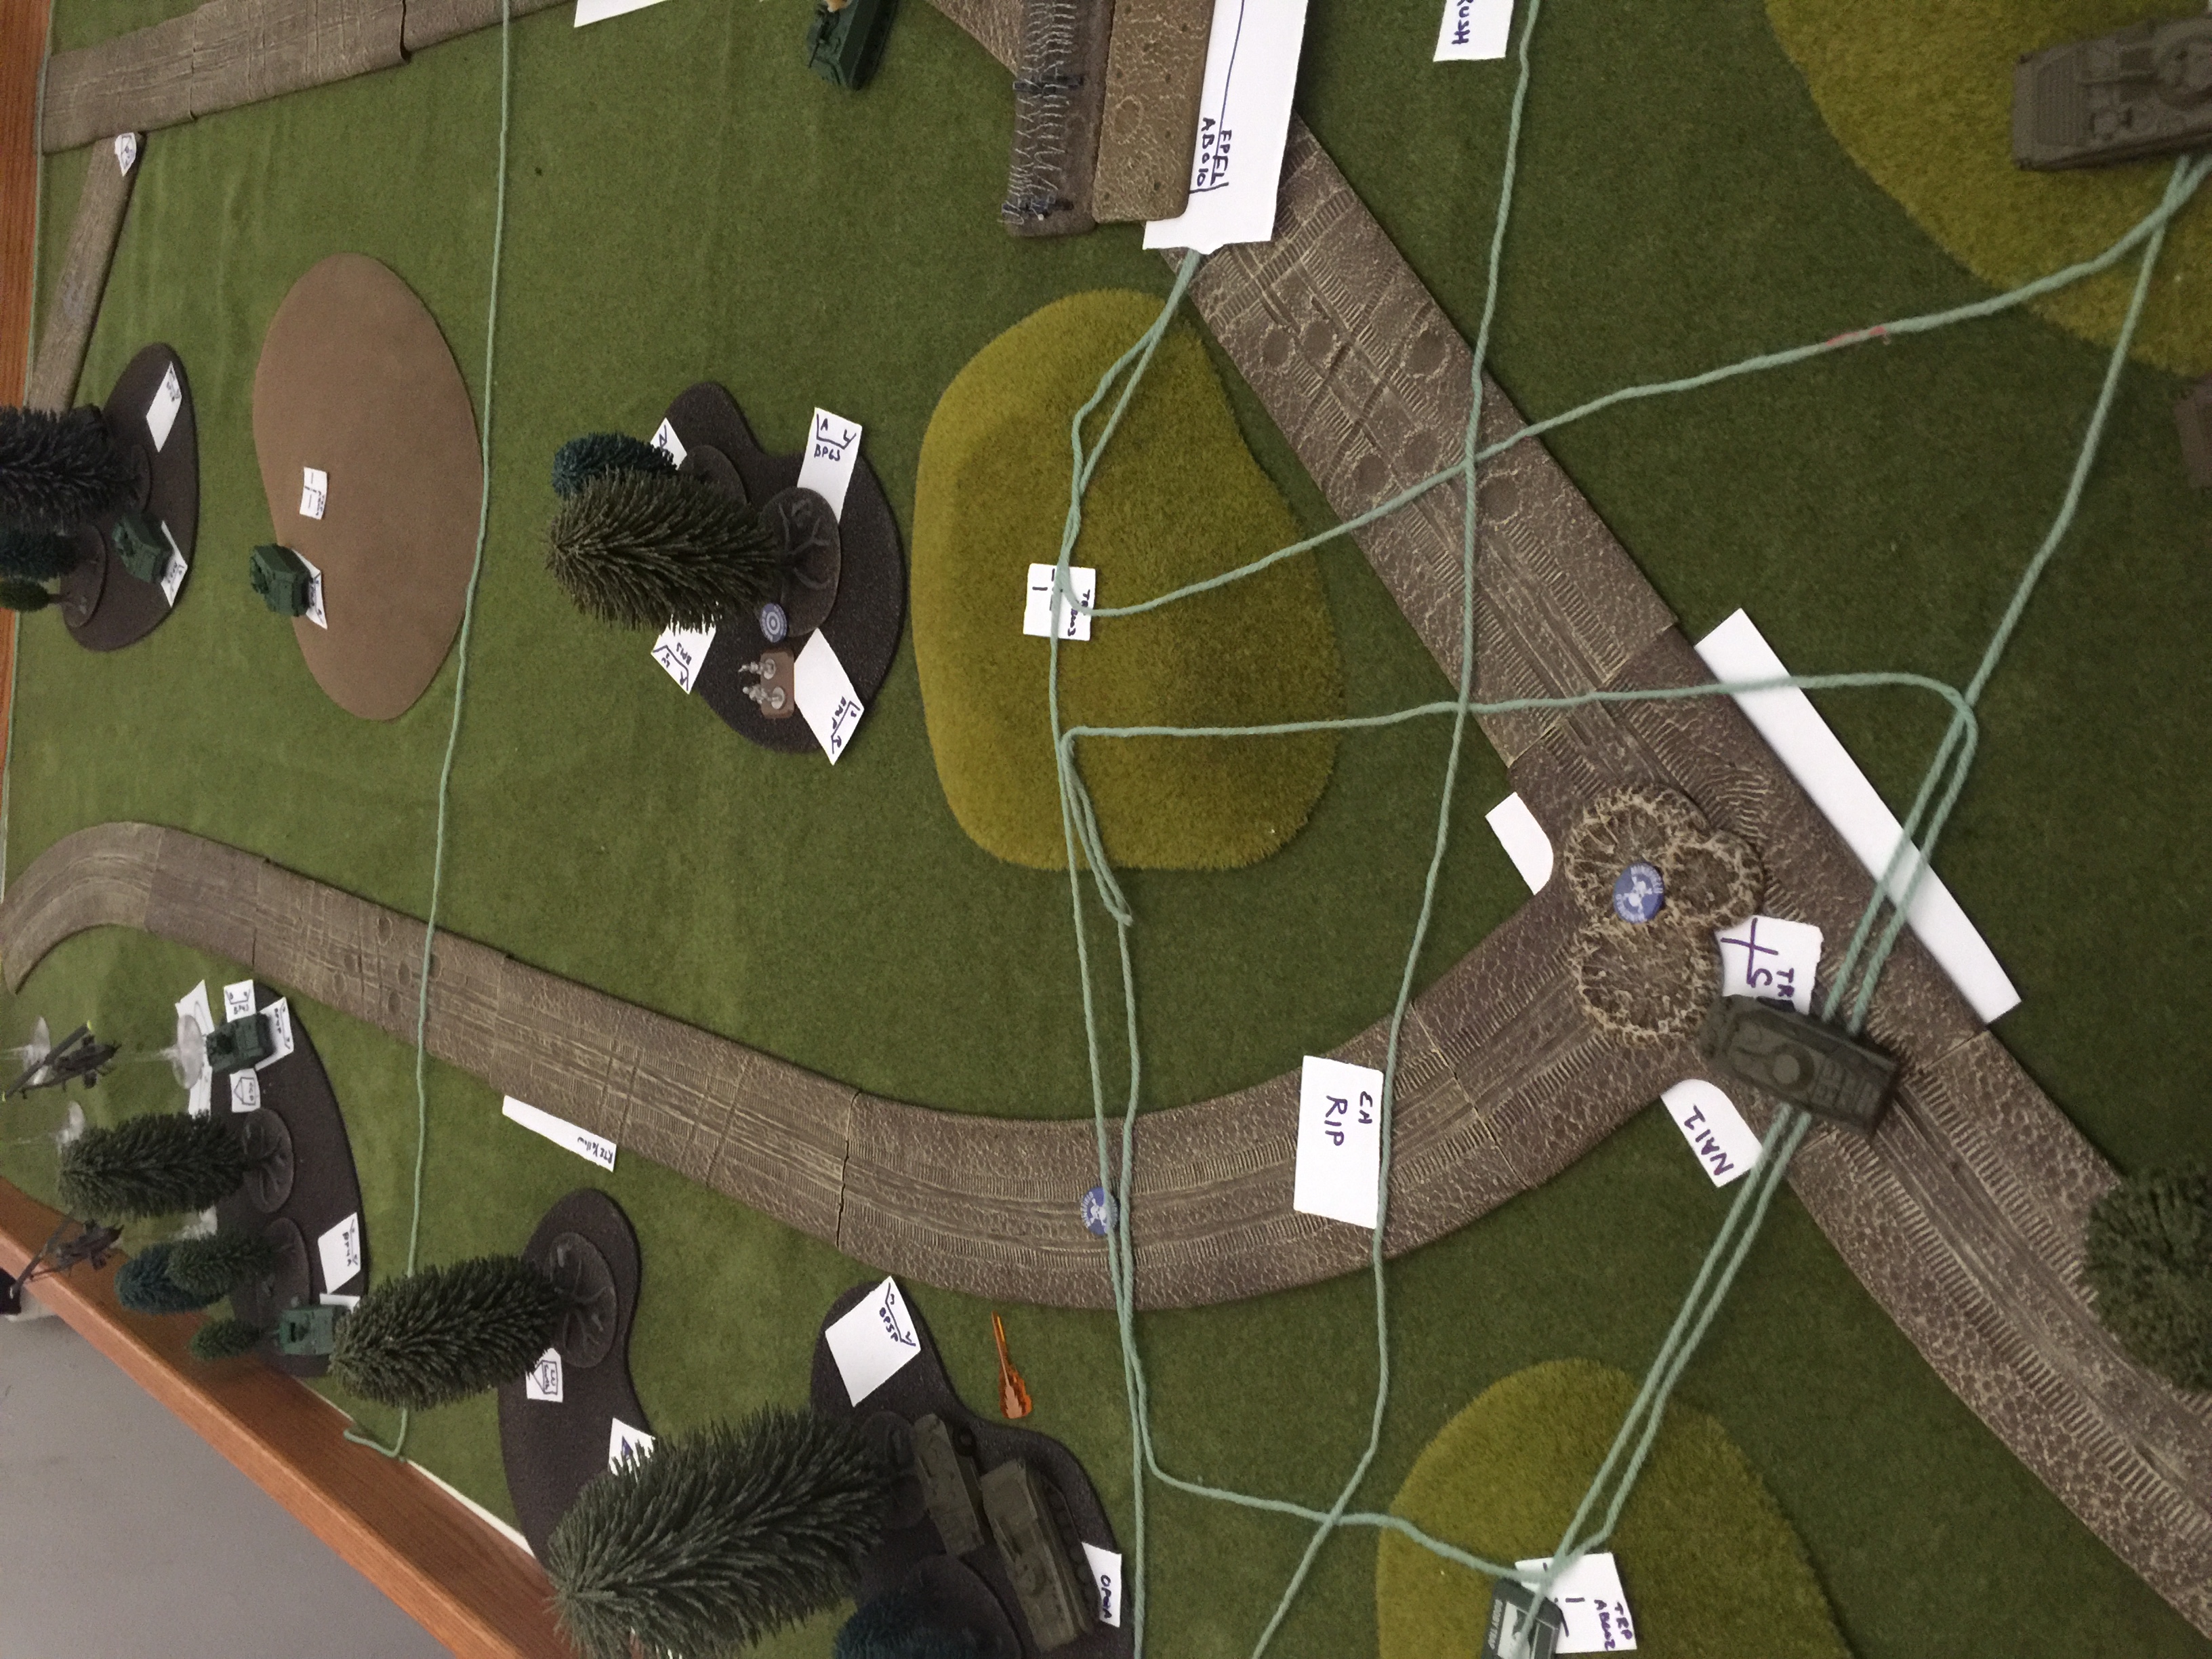
Soviet Turn 4:
Unpin motorcycle.
Company commander designates BRDM PL leader of Recon 2.
Company commander moves to remaining BRDMs of Recon 1.
Recon 2 motorcycle moves to central woods and clear them. Spotted by White 4.
Recon 2 BRDM moves to crater TRP C. Spots MOPMs minefield. Spotted by White 4.
American Decision point. If Soviet vehicles enter EA RIP bring CAS on station. (Per DST)
Recon 2 BMP and BRDM spot MOPM minefield on Route Yellow. Spot Attack Helos. Spot maintained by attack helos on them.
Recon 2 fires 1 Sagger at attack helo. Hit and saved.
One battery 122mm Fire vic OP QP old position. No unit in impact area.
One battery 122mm Fire vic OP NP. OP NP, Hit, saved, passes moral check.
One Battery 122mm Fire vic Attack Helos. No effects.
American Decision Point. If in impact area of indirect fire, switch to alternate position. (Per DST) Attack Helos displace to BP2. Contact lost with Recon 2s BMP and BRDM in the woods.
US Turn 4.
OP NP rallies.
CAS reaches Initial Point (IP)
White 6 completes movement to BP.
Indirect Fire Mission. One Section mortars (107mm) on motorcycle. PLOT-CR, no change, drop 400, left 1000, repeat fire mission. No effects.
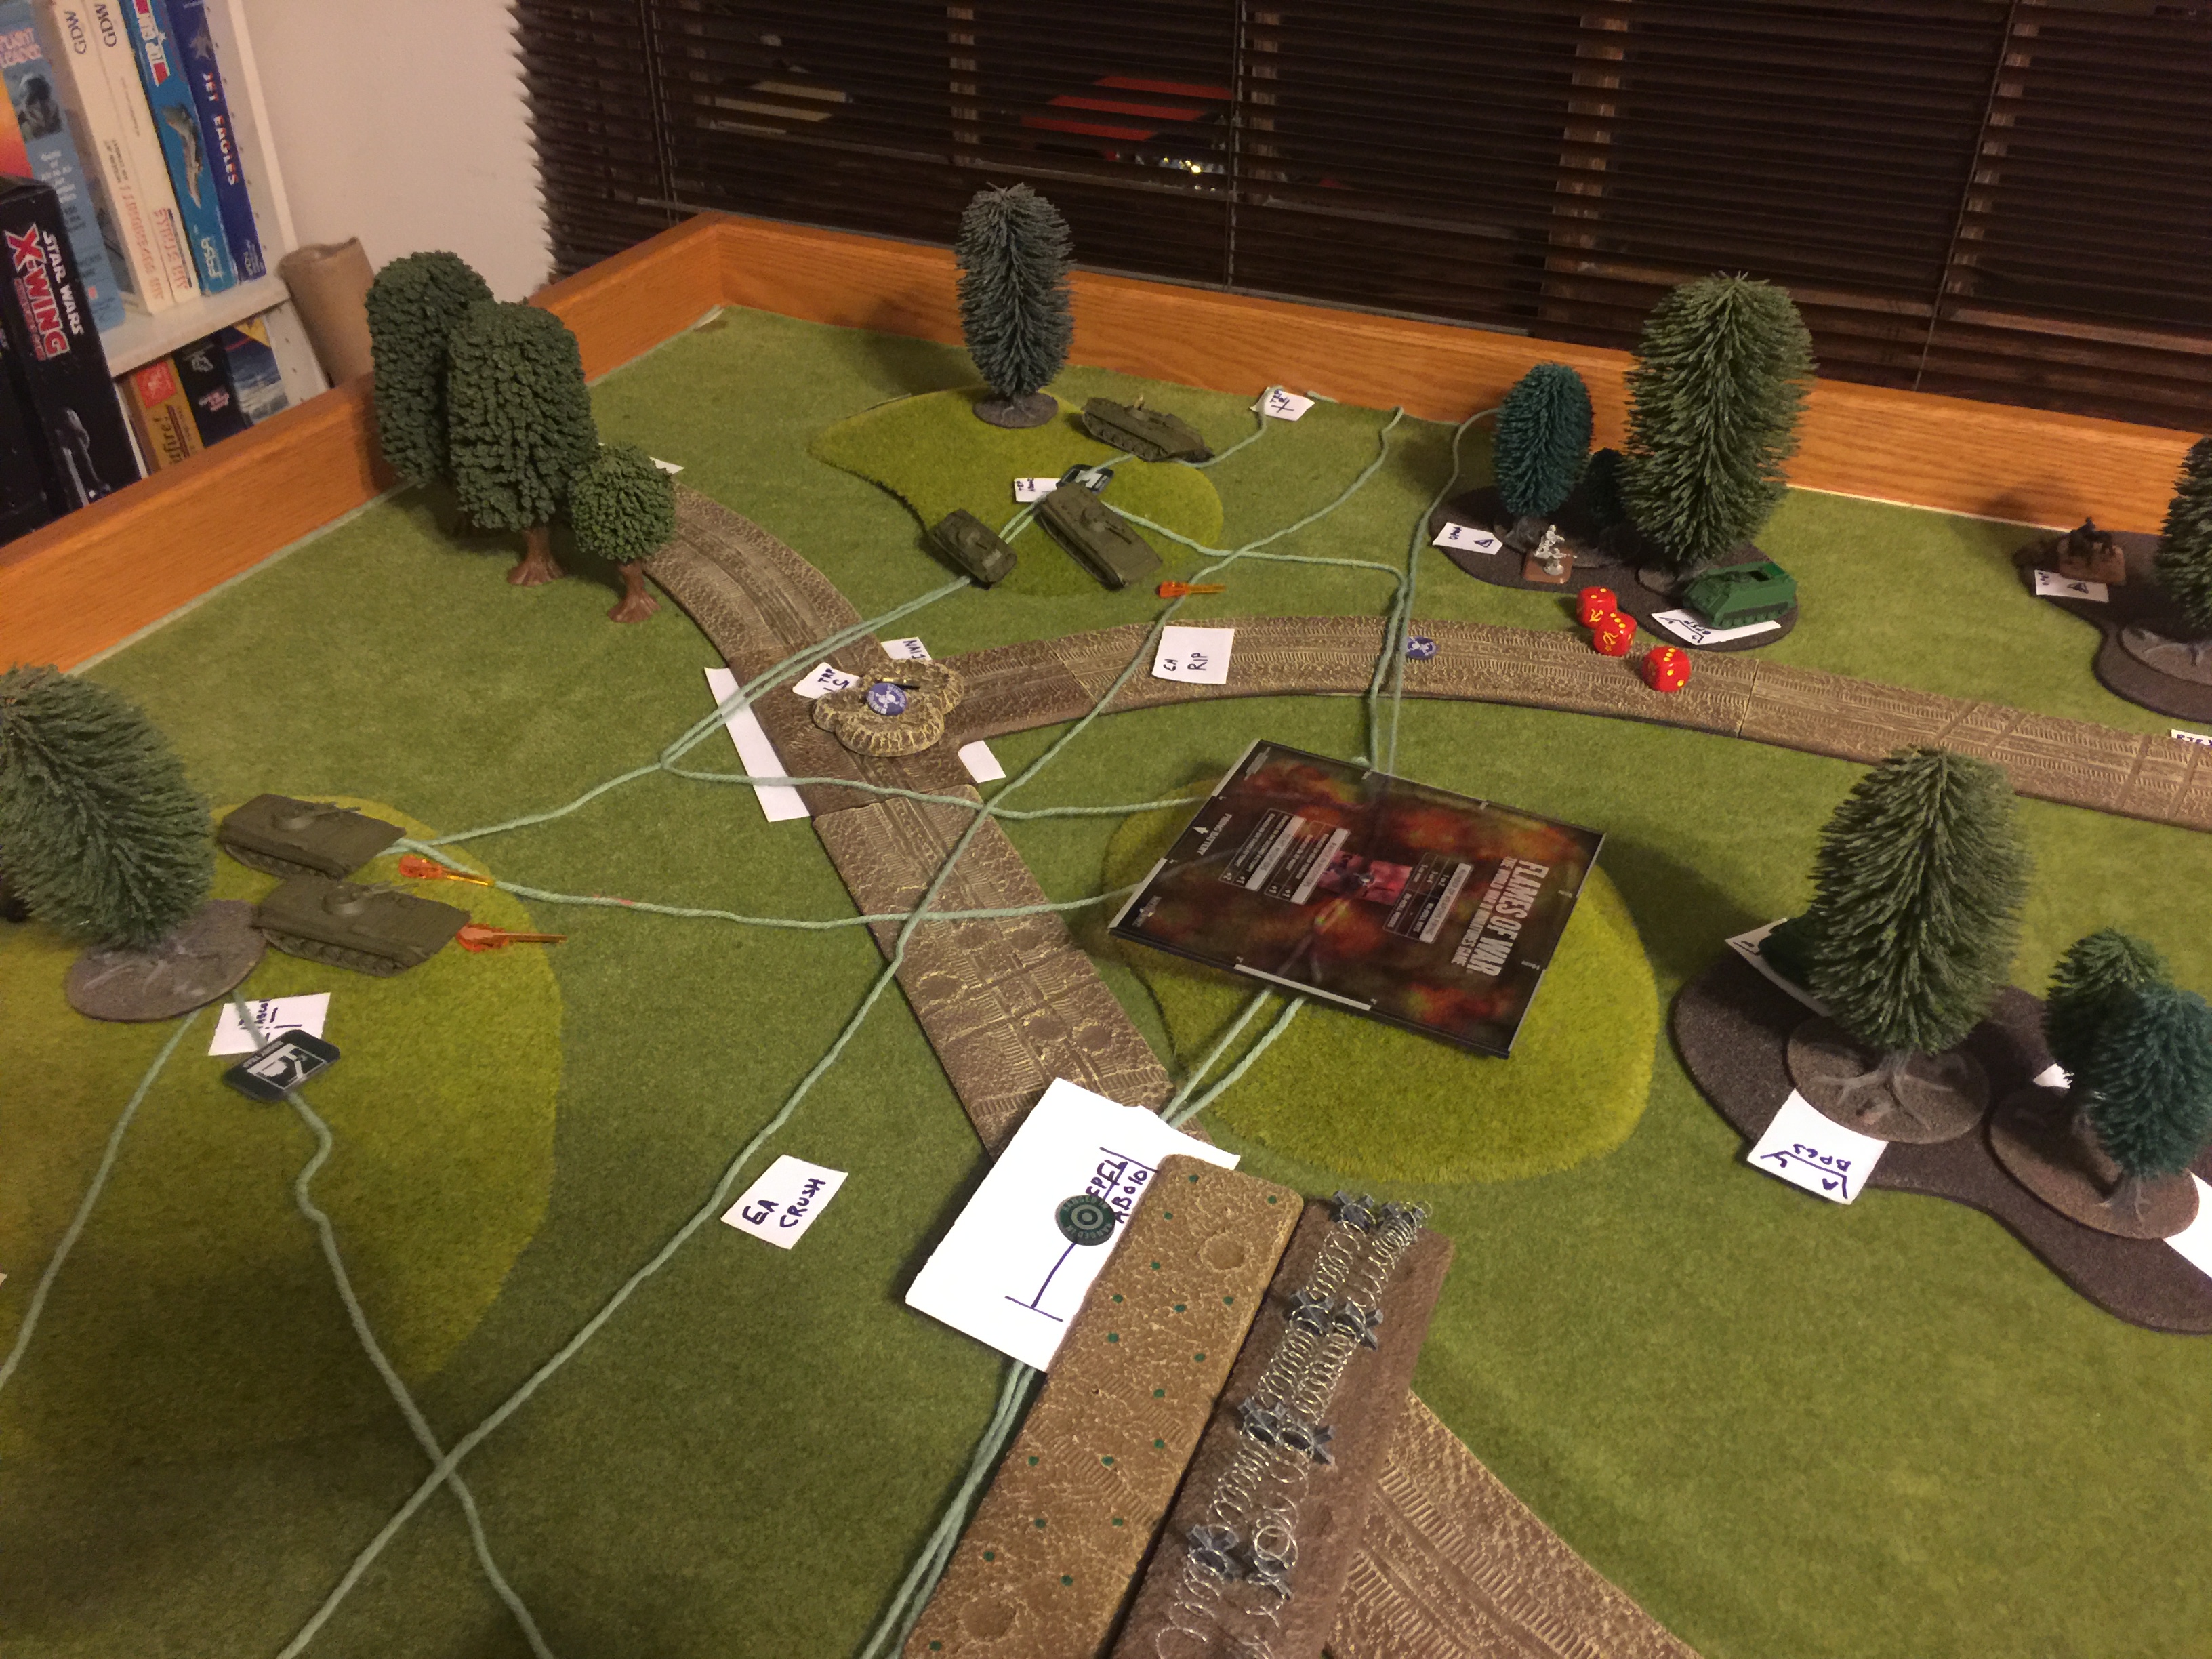
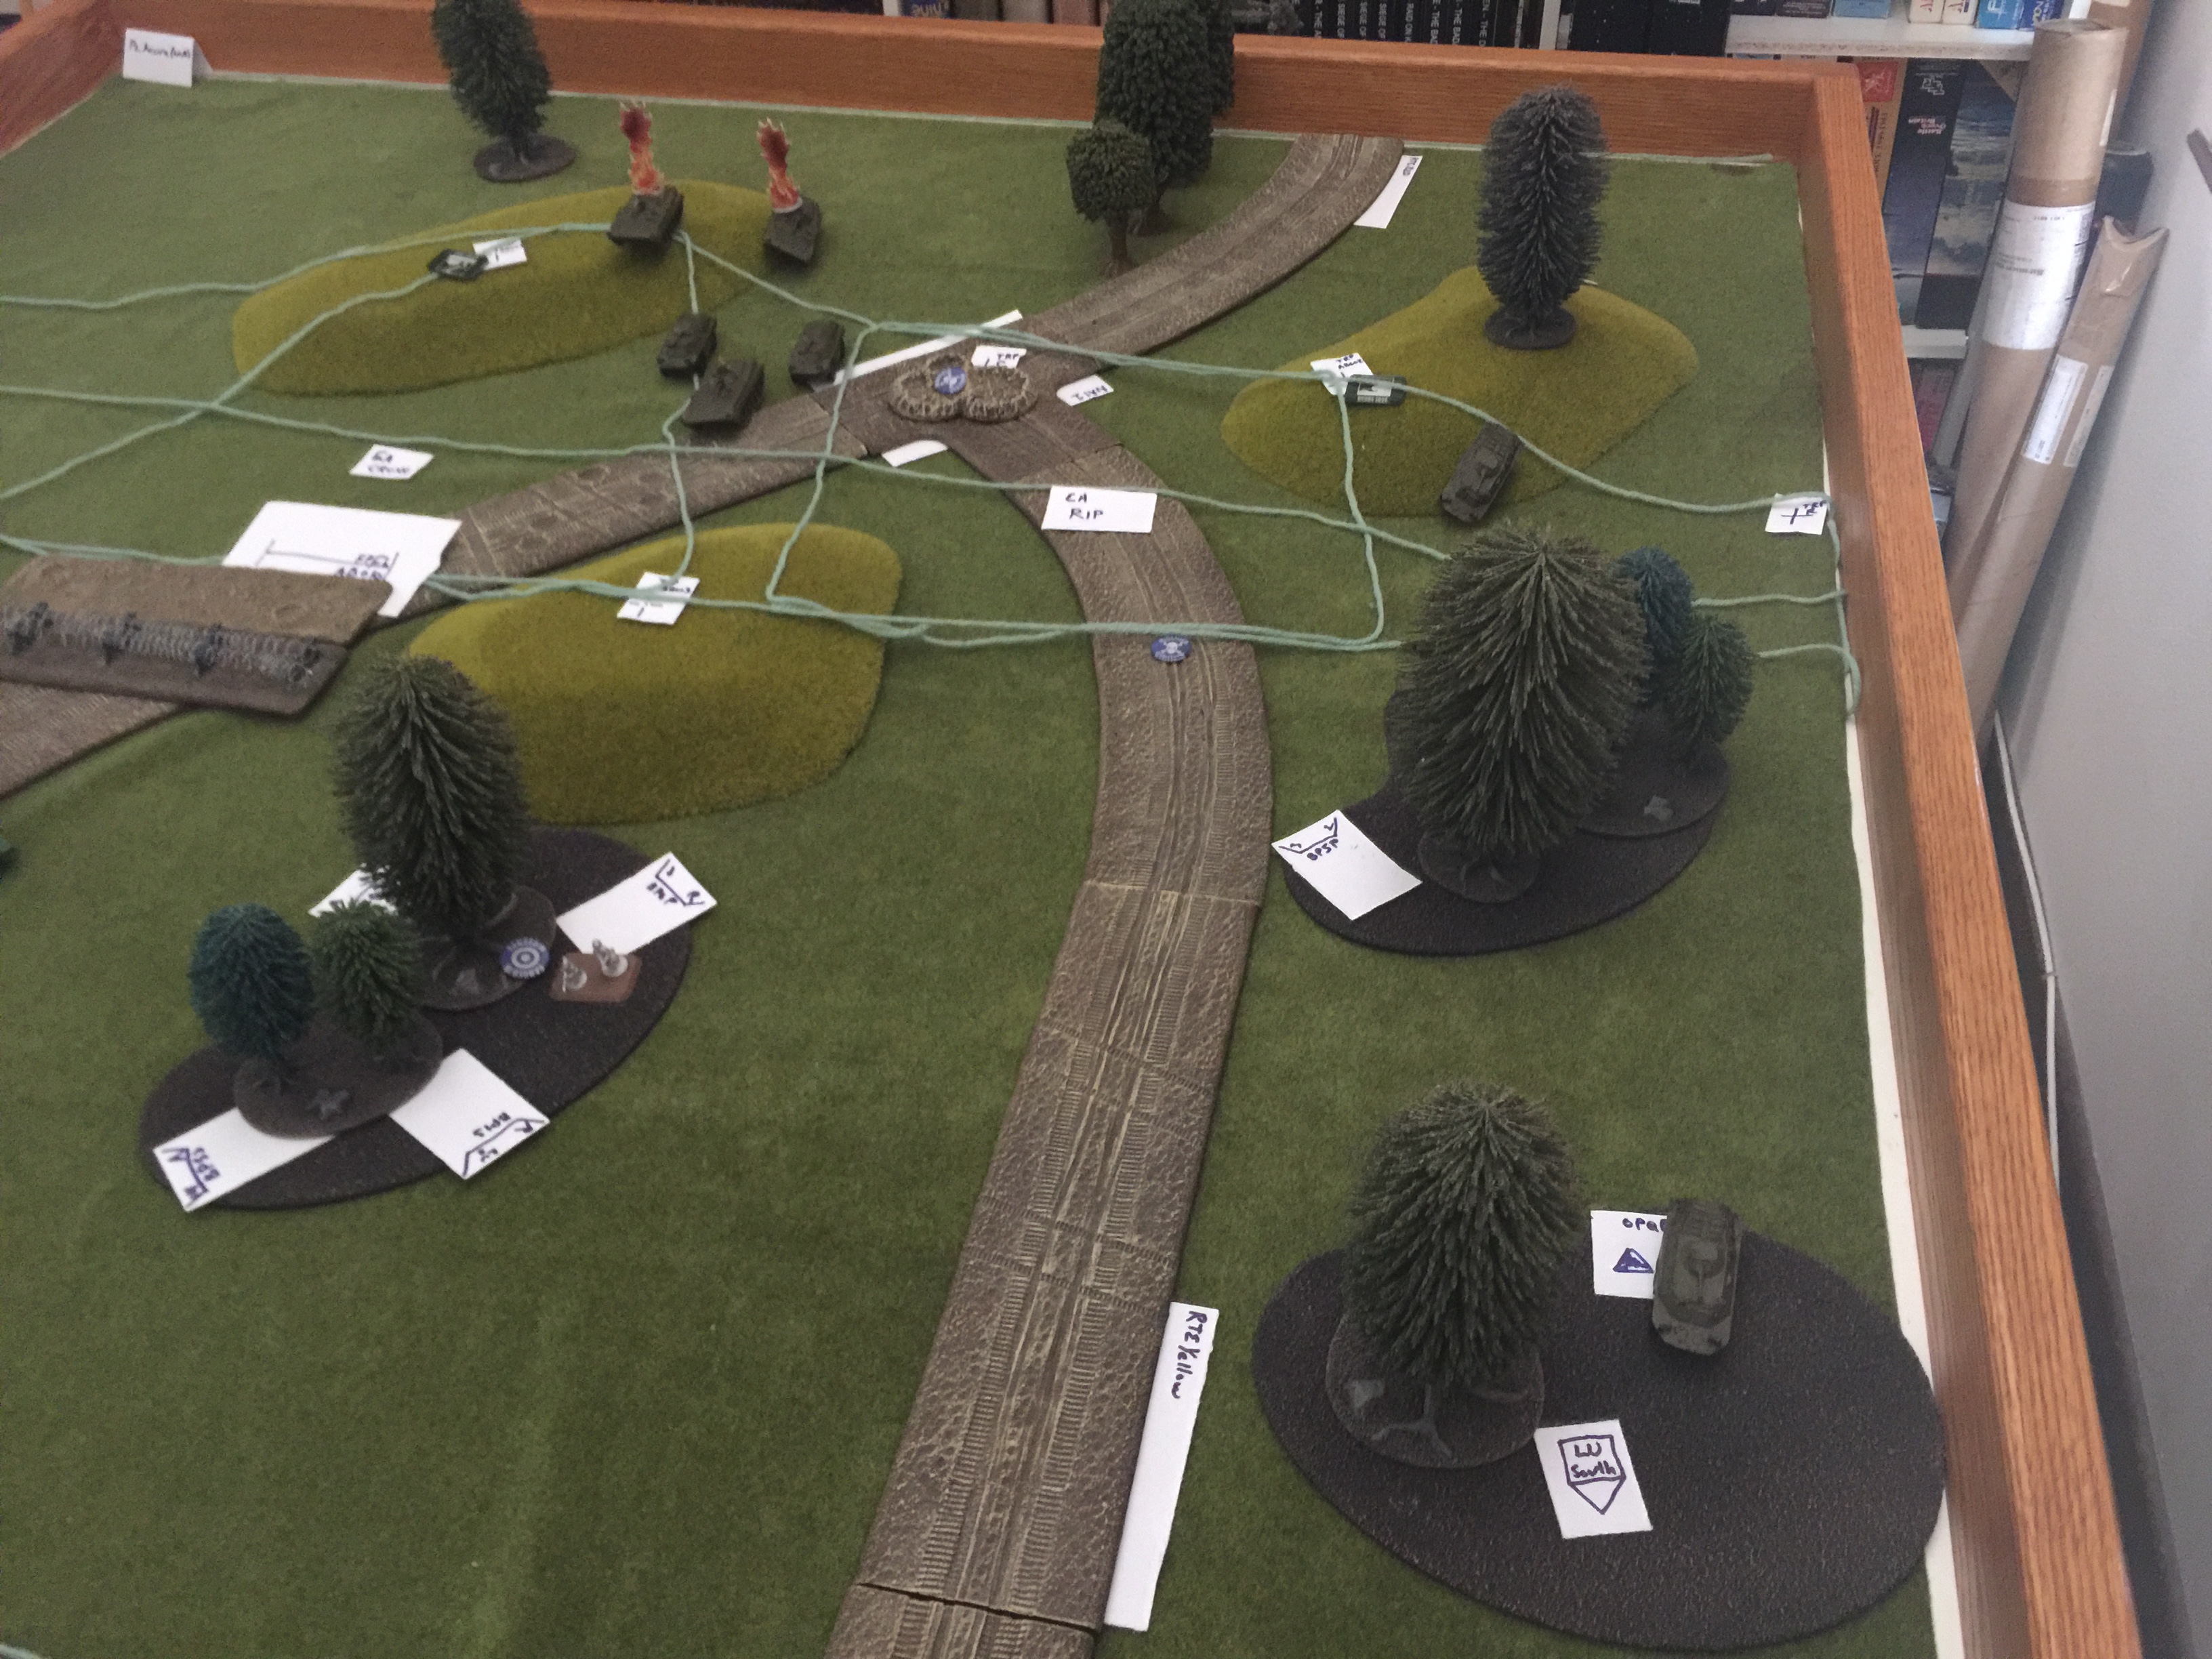
Soviet Turn 5
Soviet company commander assumes command of Recon 1
Recon 1 moves to set on hill vic TRP 3, in the middle of engagement areas...
Recon 2 moves BRDM (PL) to clear woods to west. Moves other BRDM to link up with BMP.
One battery 122mm vic farm. No units in impact area.
One battery 122mm vic Hill TRP 4. White 6 hit, saved.
One Battery 122mm vic Wood with White 5, 6, and Casualty Collection Point (CCP). Only White 4 in impact area. Miss.
US Turn 5.
Indirect Fire Mission (SEAD) one battery 155mm. P: Section B L: AB011 (Each fire mission generates a new TRP. This was location of last fire mission for Mortars). O: White 4 C: Company Fires Net R: No fires or effects East of PL Buick. Max Ord 10000. Motorcycle hit and killed.
Airstrike one pair A10s on recon 1. HOG, Soviet Armor, EA RIP, Type 1 coordination in effect, no ada, cleared hot. 3 hits. 1 BMP (Company commander) and 1 BRDM destroyed, one BRDM bailed. Fails moral check. Platoon removed. (Later Company fails moral check, this is end of scenario.)
Improves
1. Cowboys and Indians will get you killed. White 1s choice to accept risk and move his track by the most direct means to the supplementary position rather than the scouted route from the rehearsal did not work. He did not understand the impact of losing the FSO and digital fire communication to his organization. He did not think thru the implications of driving thru the Attack Helicopters sectors of fire and the fratricide risks involved.
2. Thinking in time and space. White 1 did not think thru the amount of time it would take for him to maneuver between BPs, his sole focus was fields of fire. Consequently, when time came to move he was forced into a difficult choice and had to accept risk to either survivability or firepower.
3. The Red commander grew impatient and rushed his command into an engagement area thinking he was safe since he was no longer spotted. He did not realize CAS was on station and was surprised when it came in and wrecked Recon 1. Anything you do can get you killed, including doing nothing. But some things will tend to get you killed more faster (doctrinal expression). Case in point, the appropriate maneuver technique when in contact is to maneuver by bounds, not in tight groups. Don't rush to failure.
Sustains.
1. No direct fire from the scouts. By concentrating on maintaining observation and using indirect and supporting direct fires, the soviets had a hard time concentrating direct fires to get effects. Indirect map fire by itself is not overly effective.
2. Very effective DST. All of the basic decisions were covered and allowed White to flexibly maneuver to maintain observation and lose enemy spotting before destruction. The Soviets were continuously frustrated in their ability to fix US forces with fires. This frustration led to the later movement of the entire Recon 1 into EA RIP.
3. Good fires and obstacle integration. East of PL Buick all calls for fire were onto established TRPs. The obstacles influenced the Soviets to move down route yellow which allowed the early notification to the troop commander of the enemy Axis of advance. The entire purpose of this mission. Essentially the US player won the game in turn two when the Soviet player committed to Yellow and the PL reported it. This would have given plenty of time for the 79th BDE Commander to flex his reserve to Yellow in support of the infantry BN defending that Avenue of Approach. Further, the culmination of the Soviet Recon company would have forced the early deployment of the regiment prior to really reaching the main line of resistance, further slowing and reducing the inertia of his attack. This gained time would have allowed more attrition from surviving screening elements from supporting fires as they moved thru the security area.
However... White 1s family will be receiving the wrong type of visit at their home from a representative of the US military. White 4 will be hand receipted a new 2LT from storage. DRAW.

Very interesting gaming technique, new and refreshing 🙂
Keep it up Commander!
Well done on getting the featured battle report! Well deserved.
Impressive an exercise as it is innovative. Better to learn and fail faster on the game board than in the field. Nice stuff!
Great AAR
Wow! Impressed by your mods & game “kriegspell” protocols. Well done!
Wow. Great report.
I think it’s awesome that you guys are playing with us! So please stay on board and keep playing. My son, who is thinking about going the officer route, is giving y’all some serious cool points. I can’t wait to read about your next game.
From the Soviet Side.
Sustain.
1. Executing the movement to contact with the smallest element. By consistently using his motorcycles to clear inter visibility (IV) lines he minimized risk to the balance of his force. Also he used the BMPs as over watch as opposed to leading, resisting the temptation to use them as substitute tanks.
2. He isolated the crater before he moved up to recon it. By securing and clearing the surrounding IV lines he created a reasonably safe environment to recon the crater and he did find all the minefields. The US used the barbed wire and minefield on RTE Orange as a turning obstacle to try and get the Soviet to commit to RTE Yellow. That worked. However the Soviet did not fall for the bait of zooming up to the crater and the massed effects of direct, indirect, and obstacles. He also found the second MOPMs minefield along RTE Yellow. At no time did he blunder into them. All in all, he was doing a good job, until he got impatient with Recon 1.
3. Gain and maintain contact. Even though the US player kept breaking contact, the Soviet continued to press and really had the initiative for most of the action. Only the US DST decisions kept him in the game and the US was running out of options. He was out of major decisions and he had not planned for actions further west of PL BUICK. His ability to keep reacting to Soviet moves was running out and eventually he would have gotten pinned down and lost his freedom to maneuver. Very, very bad for a Cavalry unit.
Improves.
1. Patience was covered above.
2. Task organization. A US platoon can execute a RTE recon on a single route at a time. It requires 3 sections. One to cover the right of the road, one to cover the left, and one to sit in over watch and do the detail work of recording route conditions. Actions on contact are for the contacted element to break contact, one section to suppress and then break contact once the first element is safe. The third element stays quiet and maintains visual contact and calls for fire. The Soviets are not really organized this way, but even accepting they will send a single vehicle out where the US never sends one vehicle, a wingman pair is a minimum, the Soviet player never really worked his units that way. He did try in task organization to set up something similar with BRDMs, BMPs, and motorcycles in two mixed platoons, one for each RTE. However he did not execute that way as he struggled to exploit the terrain to allow himself the ability to maneuver. All in all it would have been more apparent if he had not abandoned RTE Orange on turn 2. Chalk this up to an MI officer not having a lot of maneuver experience.
3. Use of indirect. He maneuvered his indirect fires fairly well and had a solid idea for them. He did not realize that his indirect would flush the US units out of their positions, so he did not set up over watch elements to catch the flushed elements and destroy them. White 1s destruction was an example of this effect. However the original RTE for White 1 had it pulling back along the north board edge, behind BP1 before cutting over to the middle of the board. Consequently, White did have a plan to mitigate it, but by being impatient he got killed. This became a real issue when he abandoned RTE Orange and allowed the US to pull White 6 out and back to its alternate position. If a BMP had been positioned to the North in the vicinity of White 1s initial position, then it would have probably been lit up as well. Indirect fire could have set the conditions to either get the US to die from pulling back, or fixed them in place until they were spotted in cover and overwhelmed by direct fire. Either way, indirect and direct fire need to work together.
I really enjoyed what you did with this battle.
I’d like to hear the AAR form the other side