Fought At Fulda Gap
2444 days 11 hours 51 minutes ago
Battle Report
1/A/1-18 CAV vs 401st MRR Recon Company
50 POINTSDisclaimer: I use Team Yankee to train Lieutenants. So we adapt the rules to meet training requirements. A few differences.
1 inch = 100 meters (We use max effective ranges per World Wide Equipment Guide (WEG)).
Turn = 10 minutes (More or less)
We use spotting rules, see command decision.
Non moving units get over watch fire.
The LTs have to do a full OPORD and overlay for the fight. We put the graphic control measures on the board. If there is no graphic, they can't do it or are penalized. Cowboys and Indians maneuvering is a no go. However, as part of the orders process, they develop a Decision Support Template (DST). If conditions are met in Soviet turn, they get to interrupt the Soviet player and execute a specific action per the graphics.
Units in Battle Positions are in command regardless of separation distance.
All indirect and direct fires by US forces have to be spoken in doctrinal fire commands and calls for fire or it misses.
Each PL executes his plan while the other two PLs act as the section leaders. Once the game starts all discussions between leaders must be spoken as if on the radio in less than 10 seconds. Failure to do so gets a free enemy indirect mission on top of the offending leader.
Failure to send contact, spot, and sitrep reports per Troop SOP results in loss of a supporting asset for one turn. Nothing worse than losing an asset because subordinate fails to report to PL or PL to Troop Commander.
When possible we get the BN S2 to run the soviets, or the troop XO in a pinch. The Troop commander is responsible for documenting the lessons learned and leading the after action review. I set the scenarios, do the classes, and officiate.
For those that feel this is not in the spirt of the global campaign, please comment. We have no issue if the results are not used or included in the global results. I have gotten some query's over the years on the web forums on how we play. This is an example. Please accept it in that spirt.
This is the same scenario as the previous report A/1-18 CAV vs 400th MRR. However in this run thru a different PL presents his plan and executes the mission. He chooses a dramatically different approach. As a side note he came to the squadron after being trained as an infantry officer. He is still in the process of absorbing the roles and missions of the Cavalry and how it differs from Armor or Infantry. In comparing the two approaches there is no better example of the old Army saying, Cavalry, its not a branch, its a state of mind.
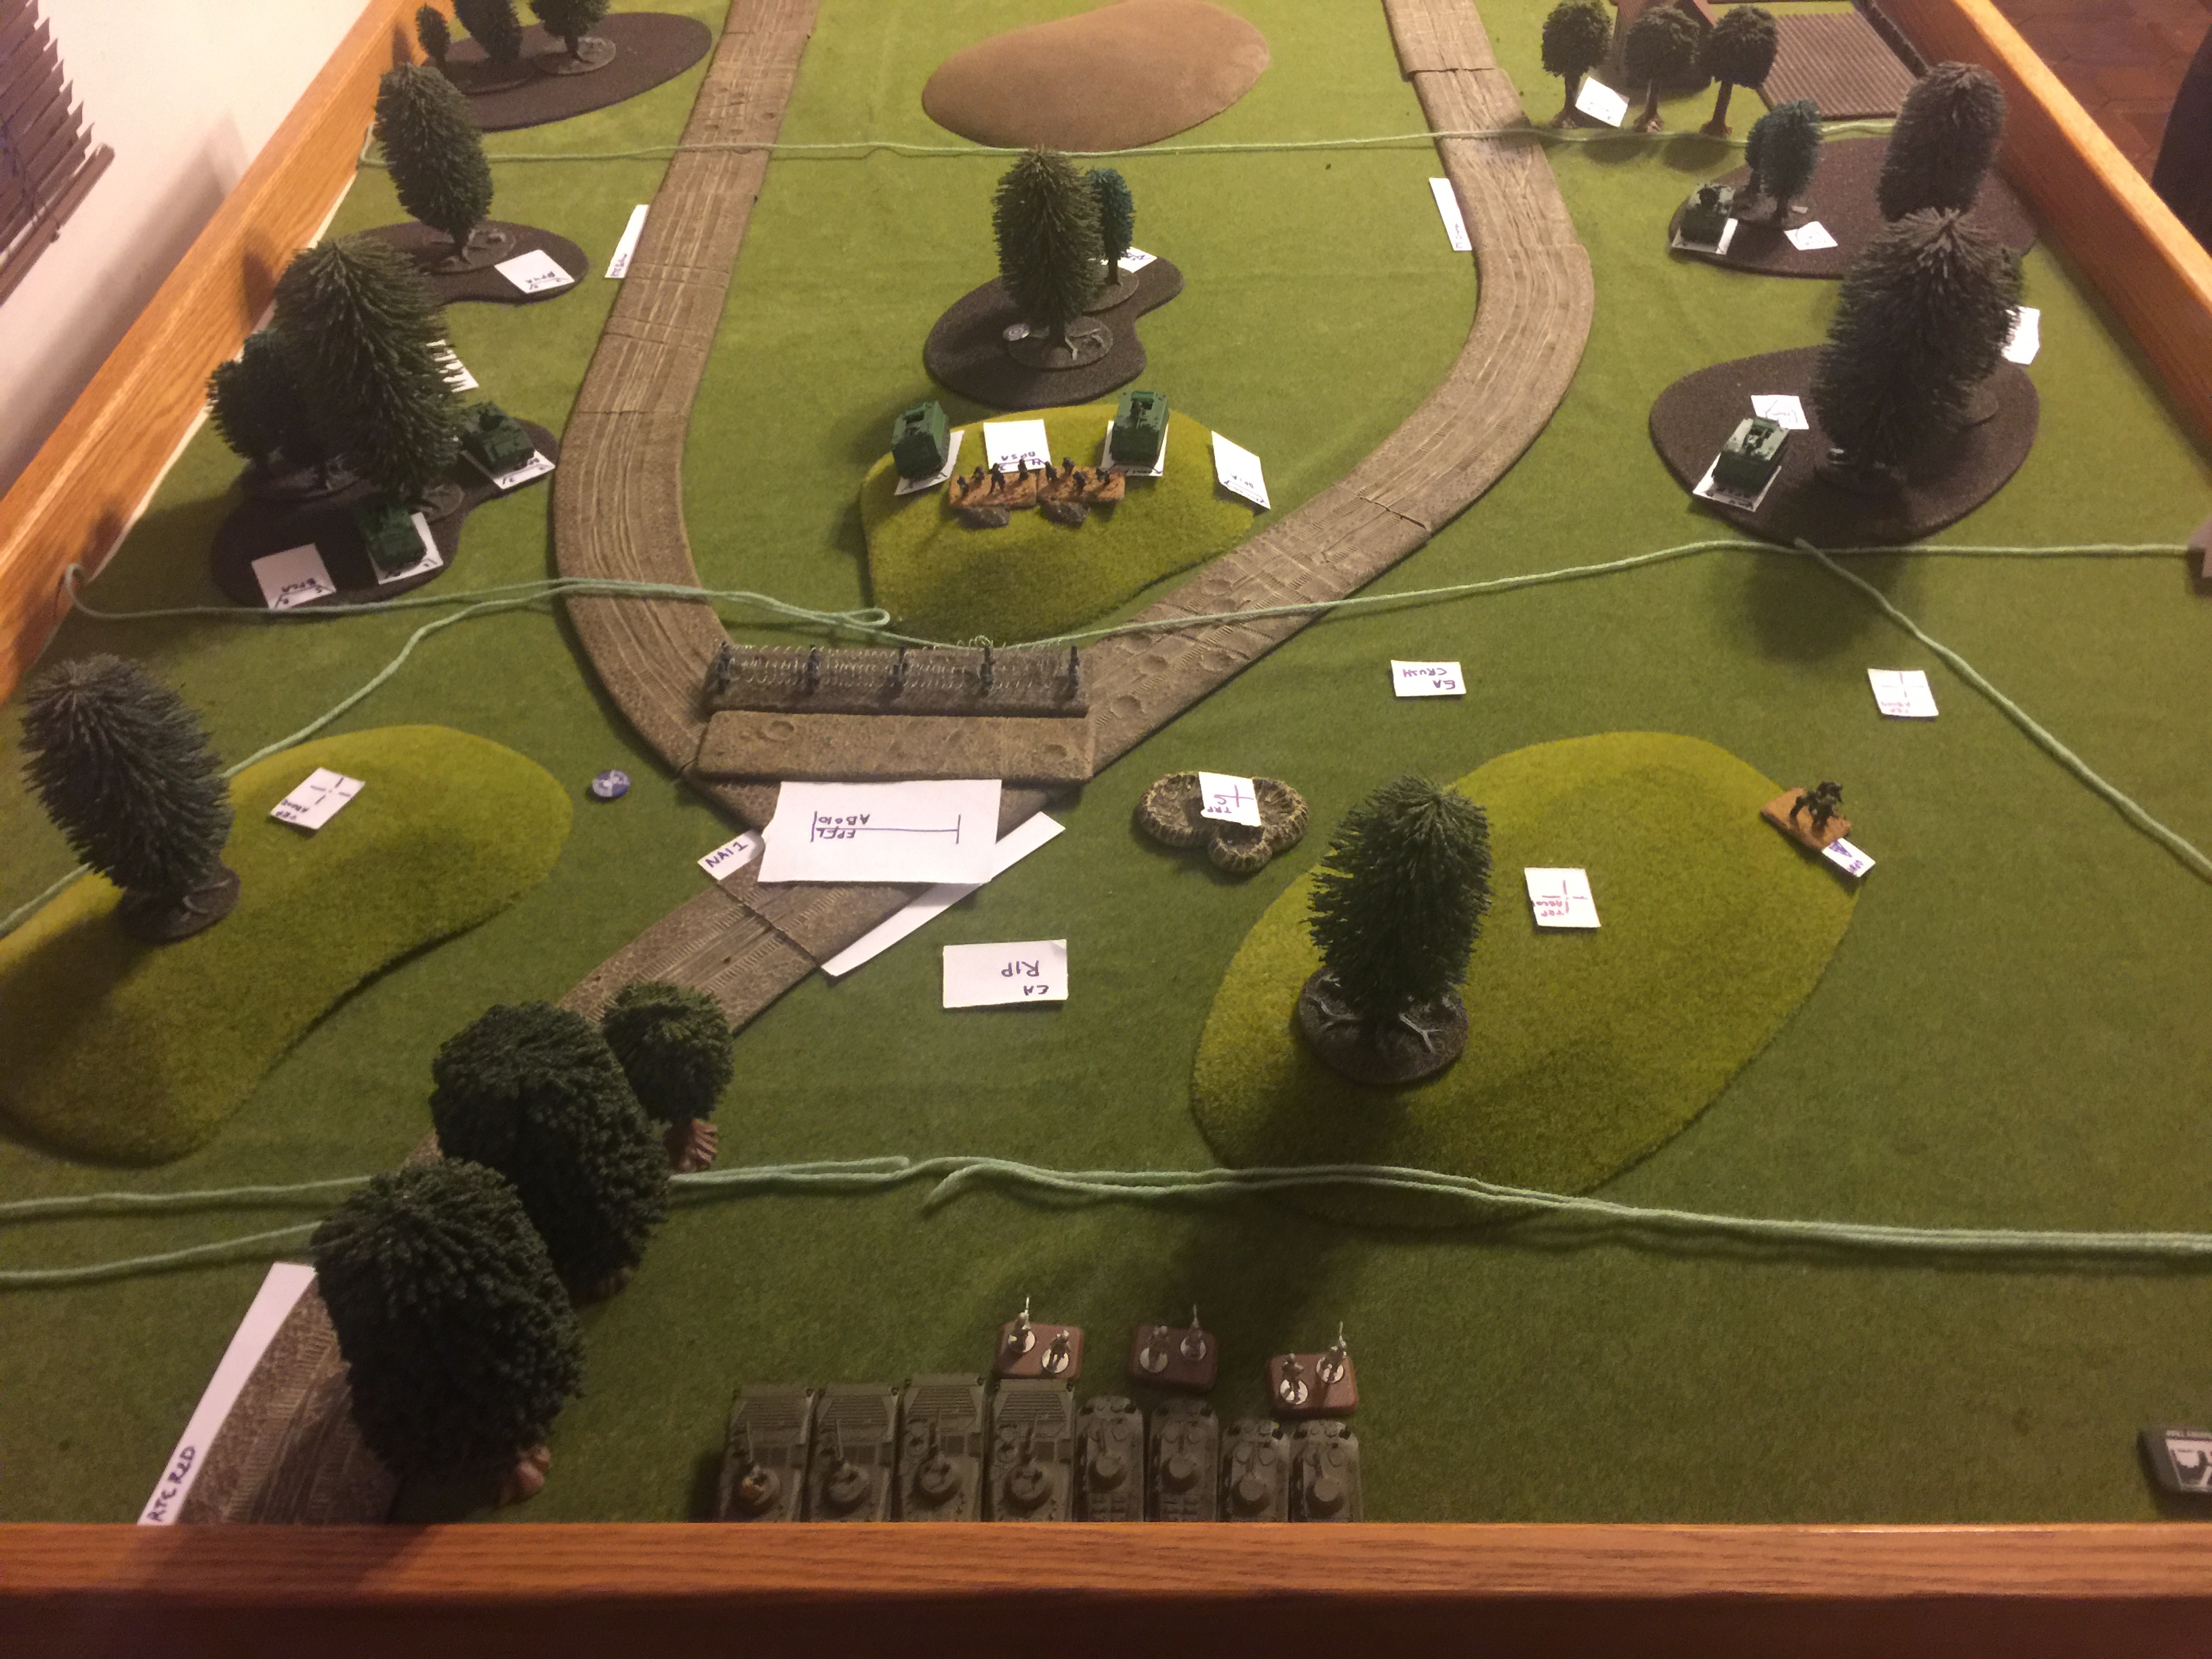
A note on DST development. As in the previous AAR, the LT conducted a rehearsal prior to the game to develop his decisions. While White 1 had focused on movement between battle positions, breaking contact while maintaining observation, and triggers to stage combat power, Red 1 focused on massing fires. Note that the PL asked for an adjustment to PL Buick so he could anchor his defense on the central hill. He also did not need a separate trigger line as his forward deployment allowed all emplaced weapon system to reach the Maximum Engagement Line (MEL). Consequently the MEL is also the trigger line. He did have the same battle drill for displacement of his tracks to alternate positions as White if they came under direct or indirect fire, however his alternate positions are much closer to the primaries in order to maintain massed fires on the engagement area.
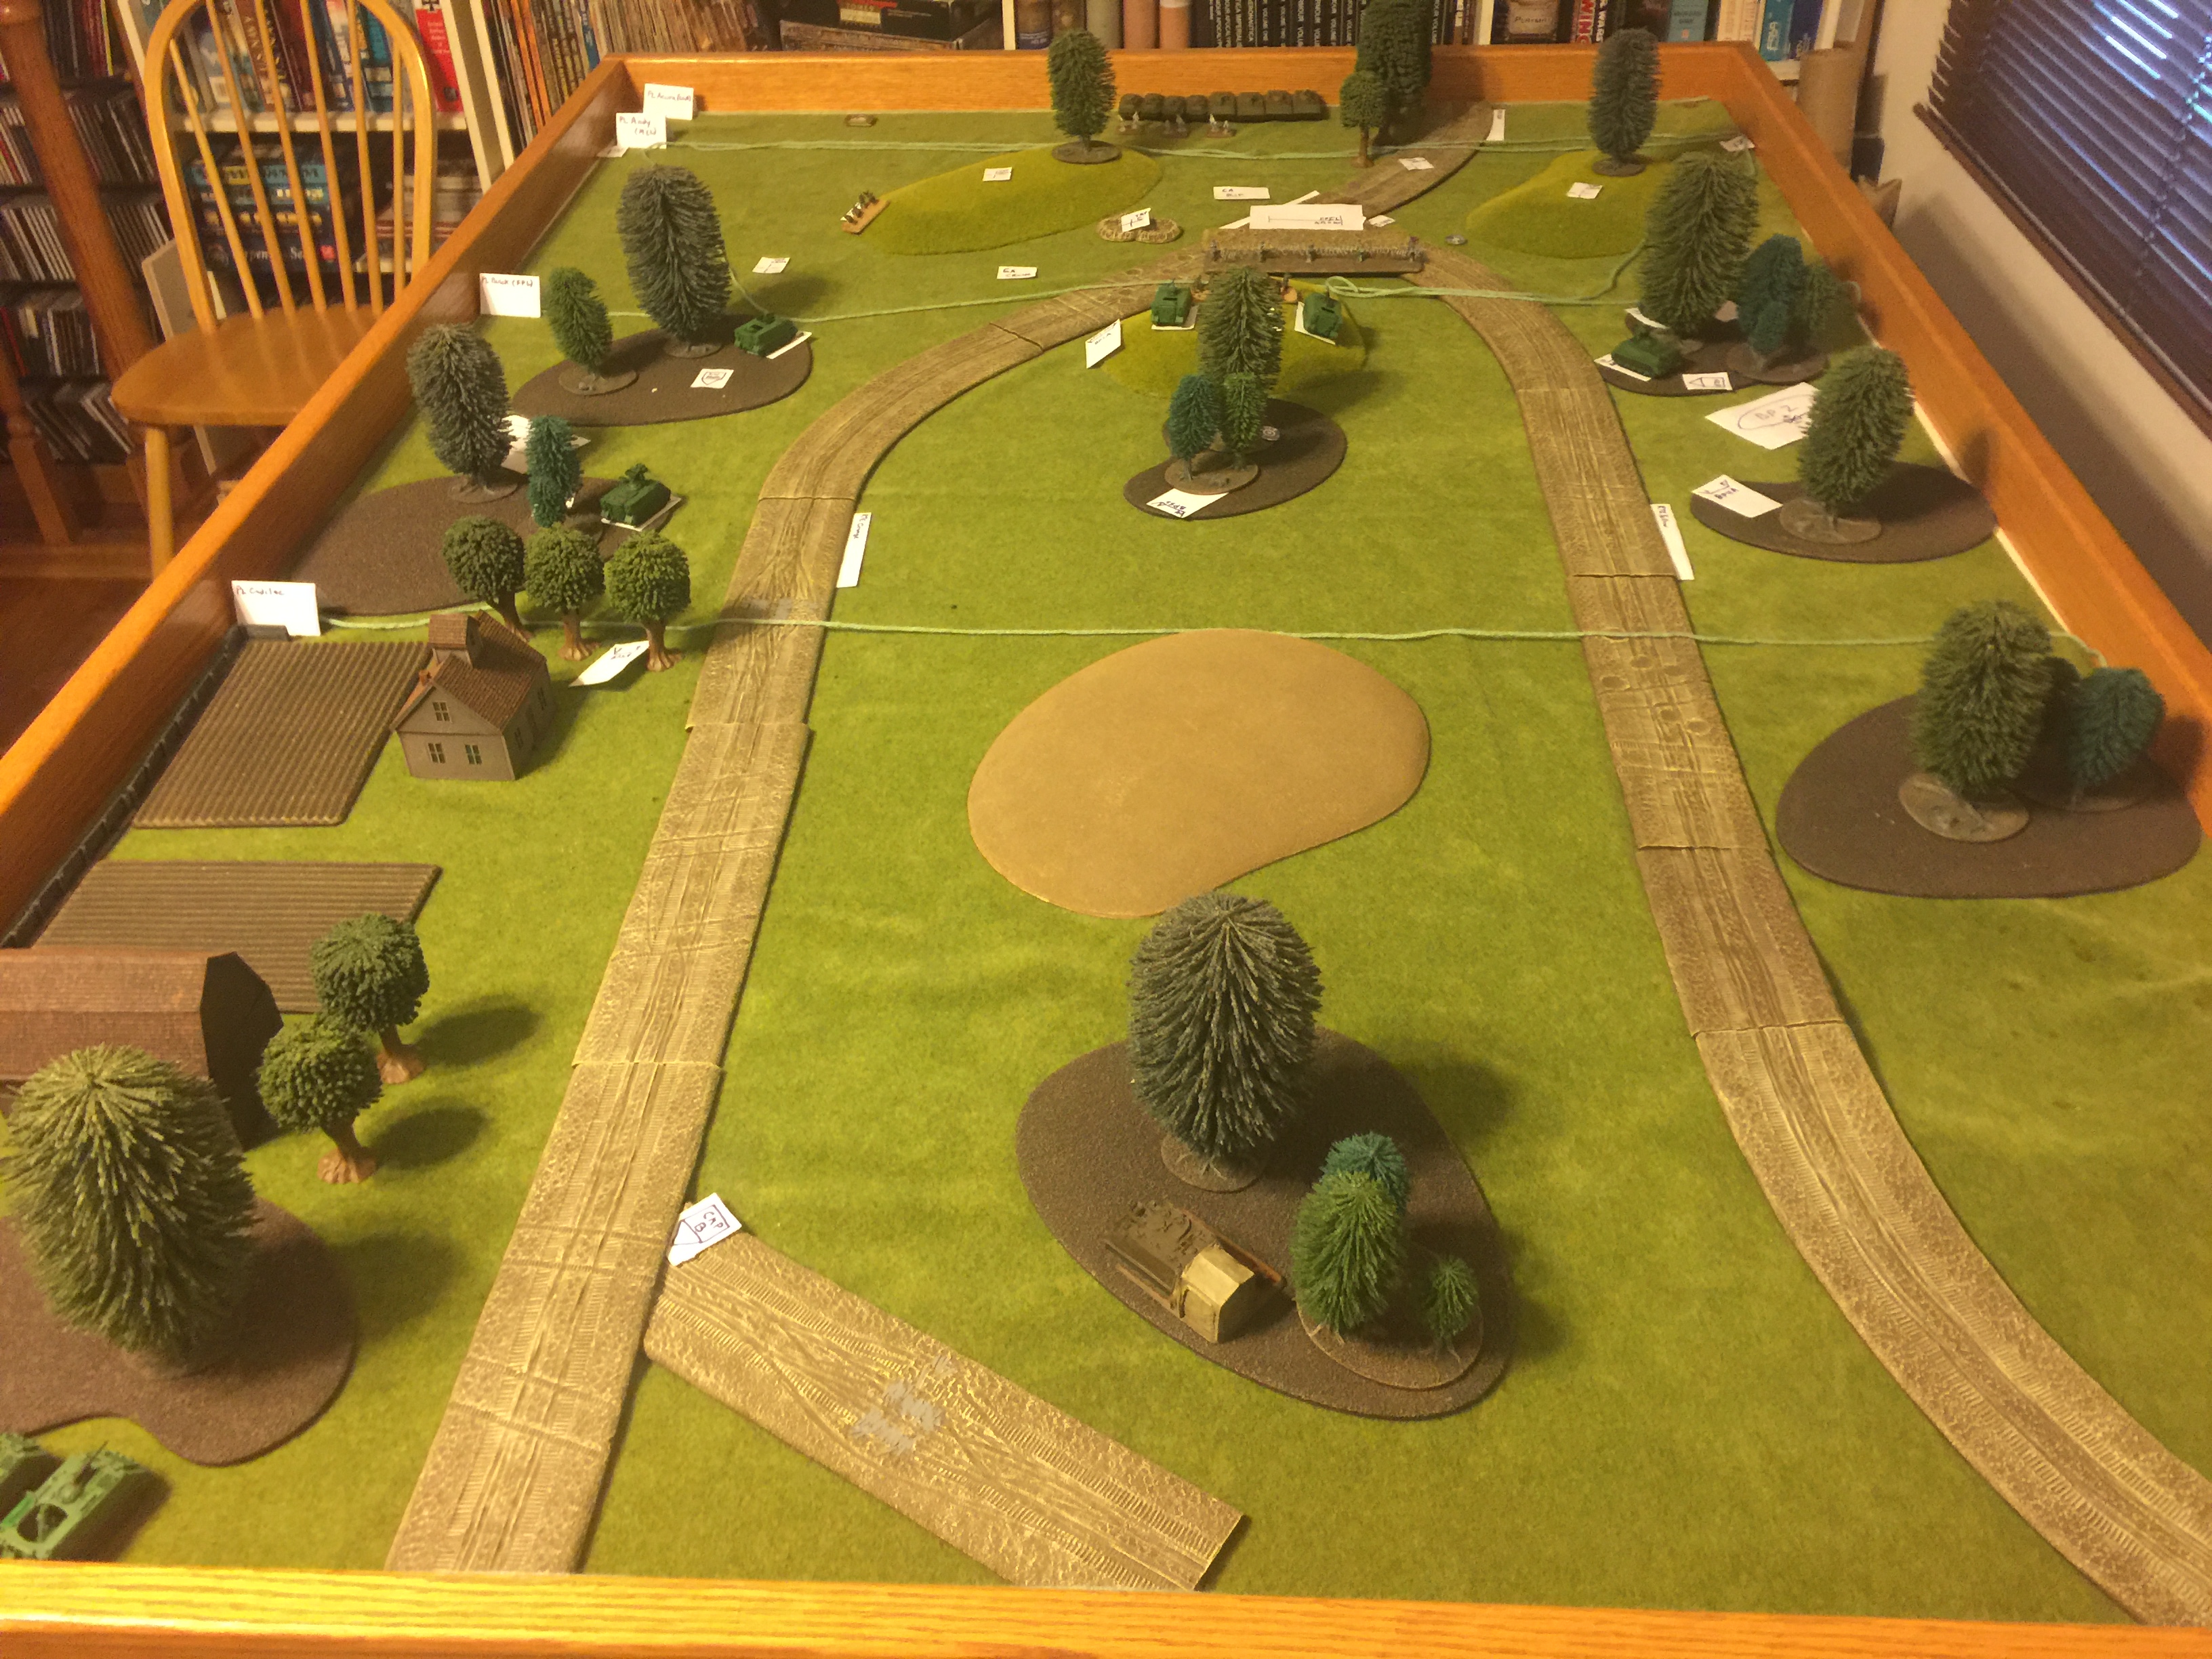
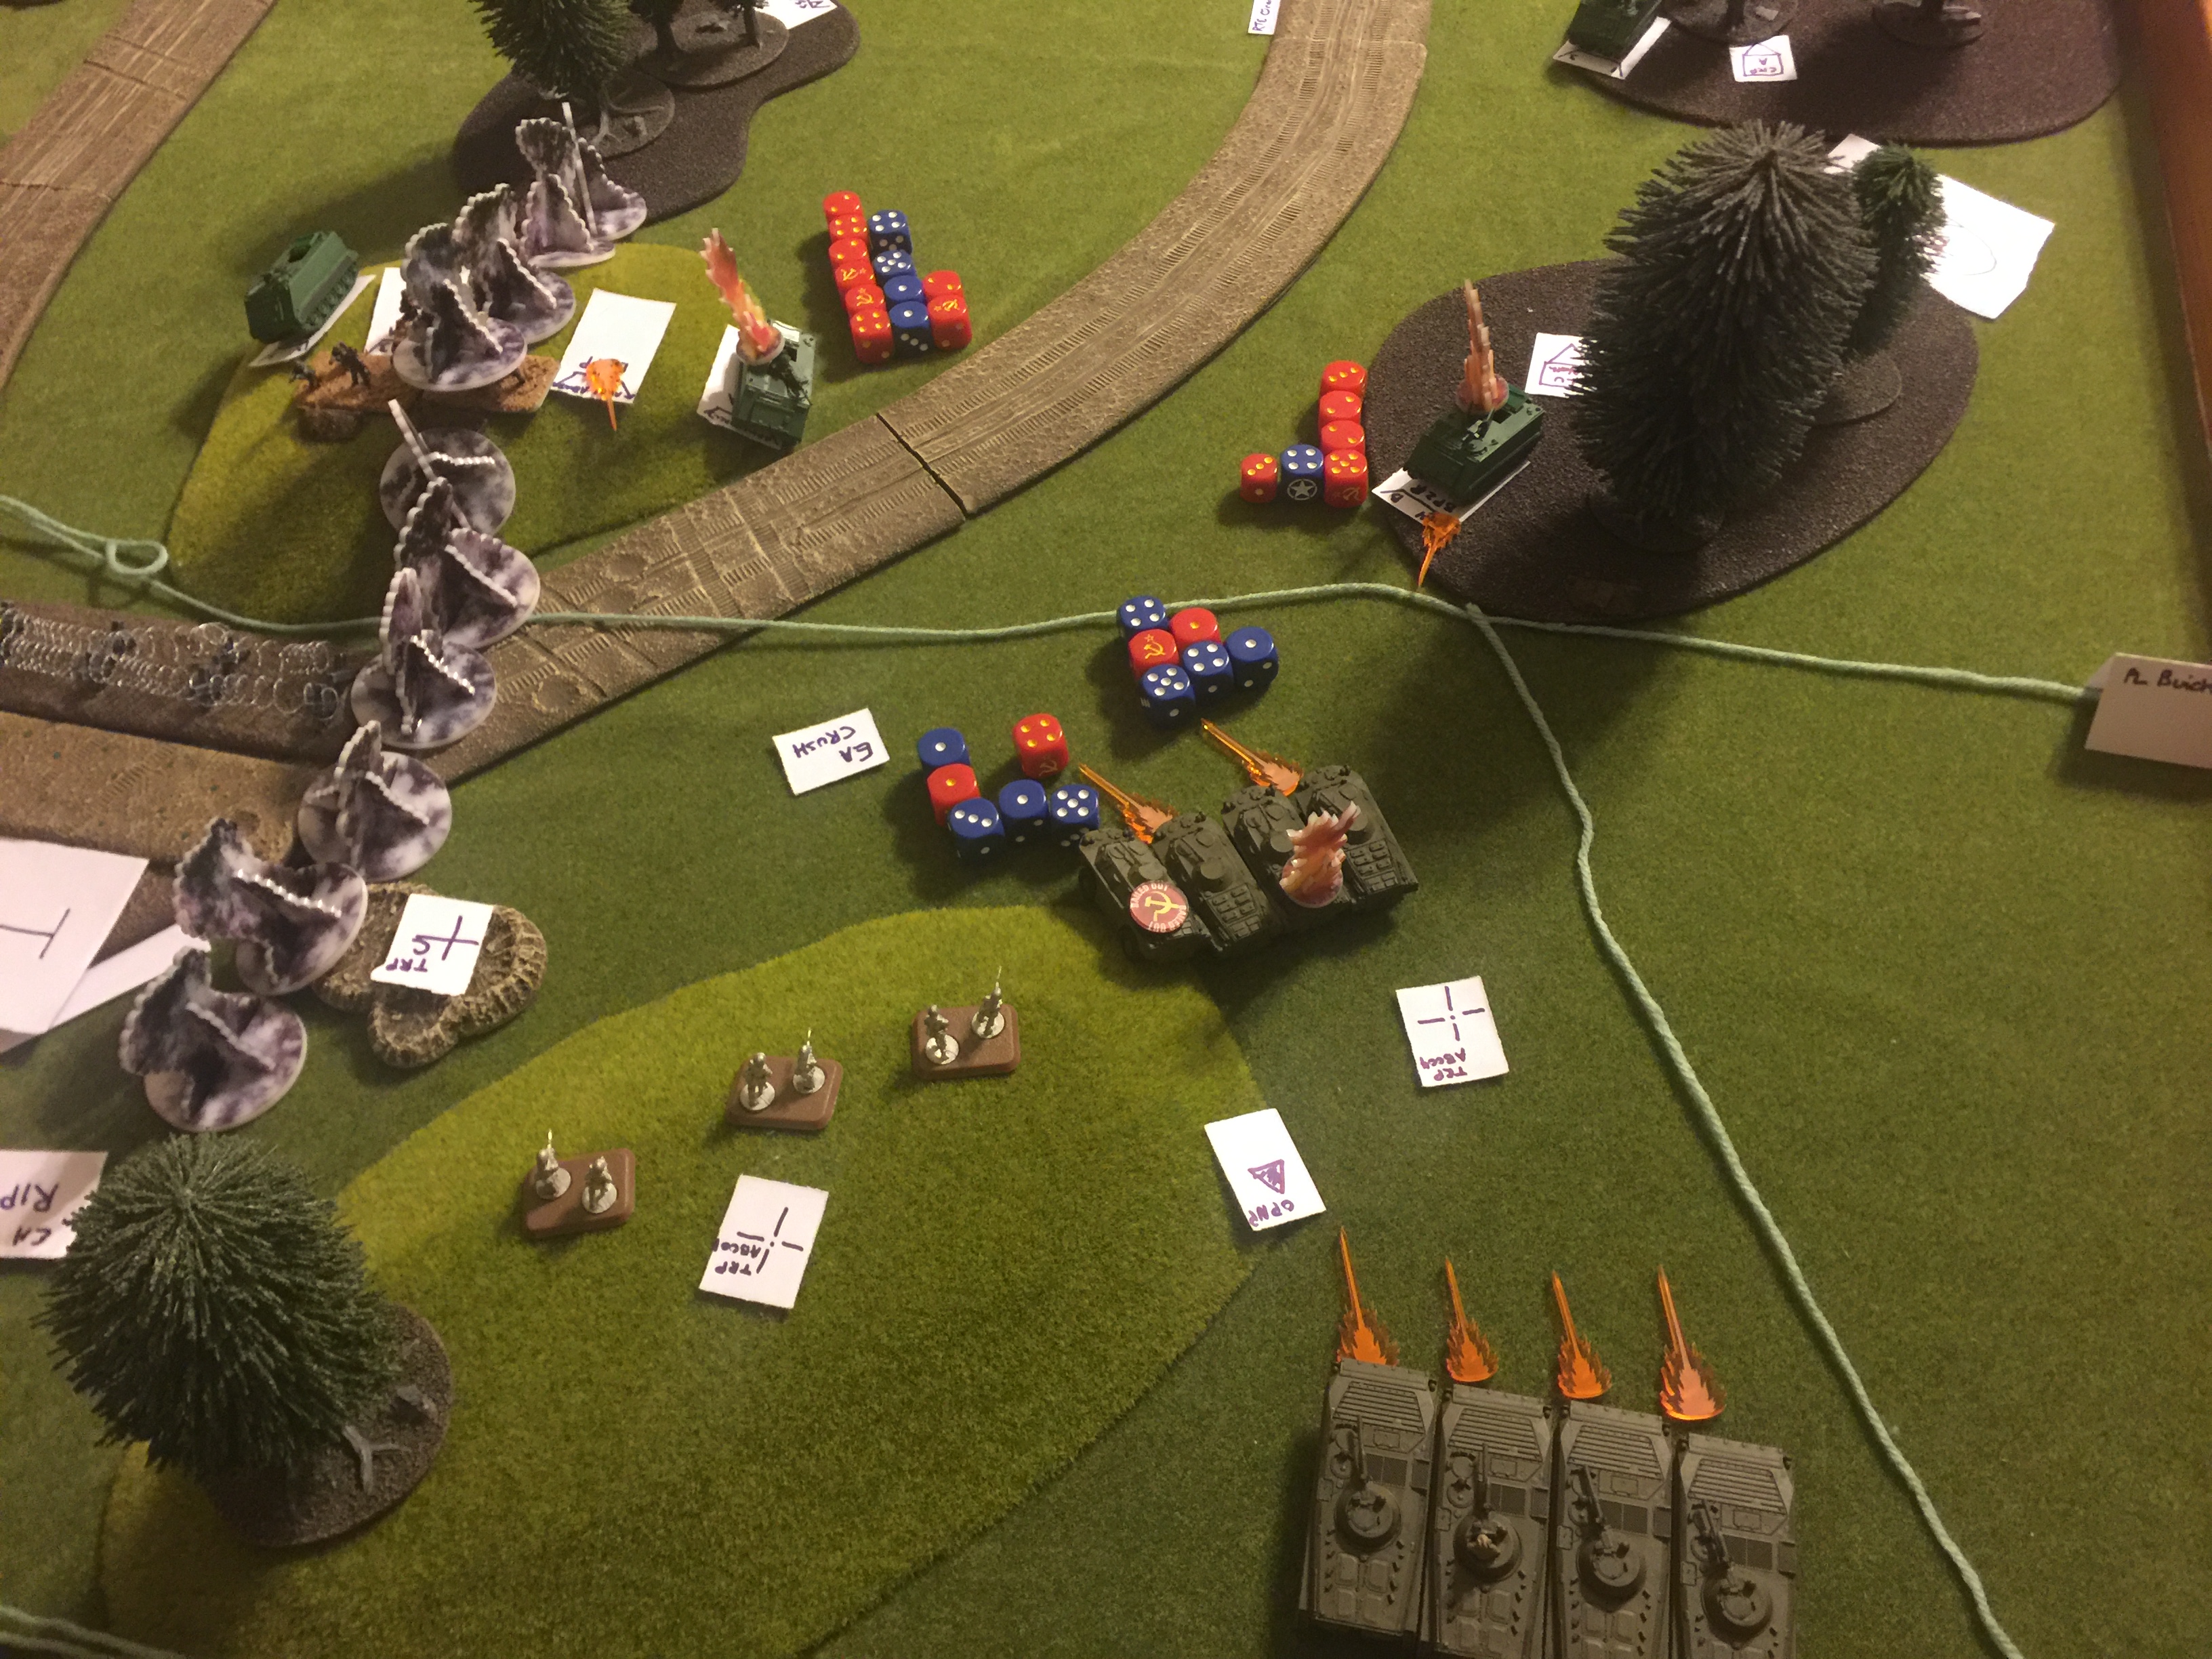
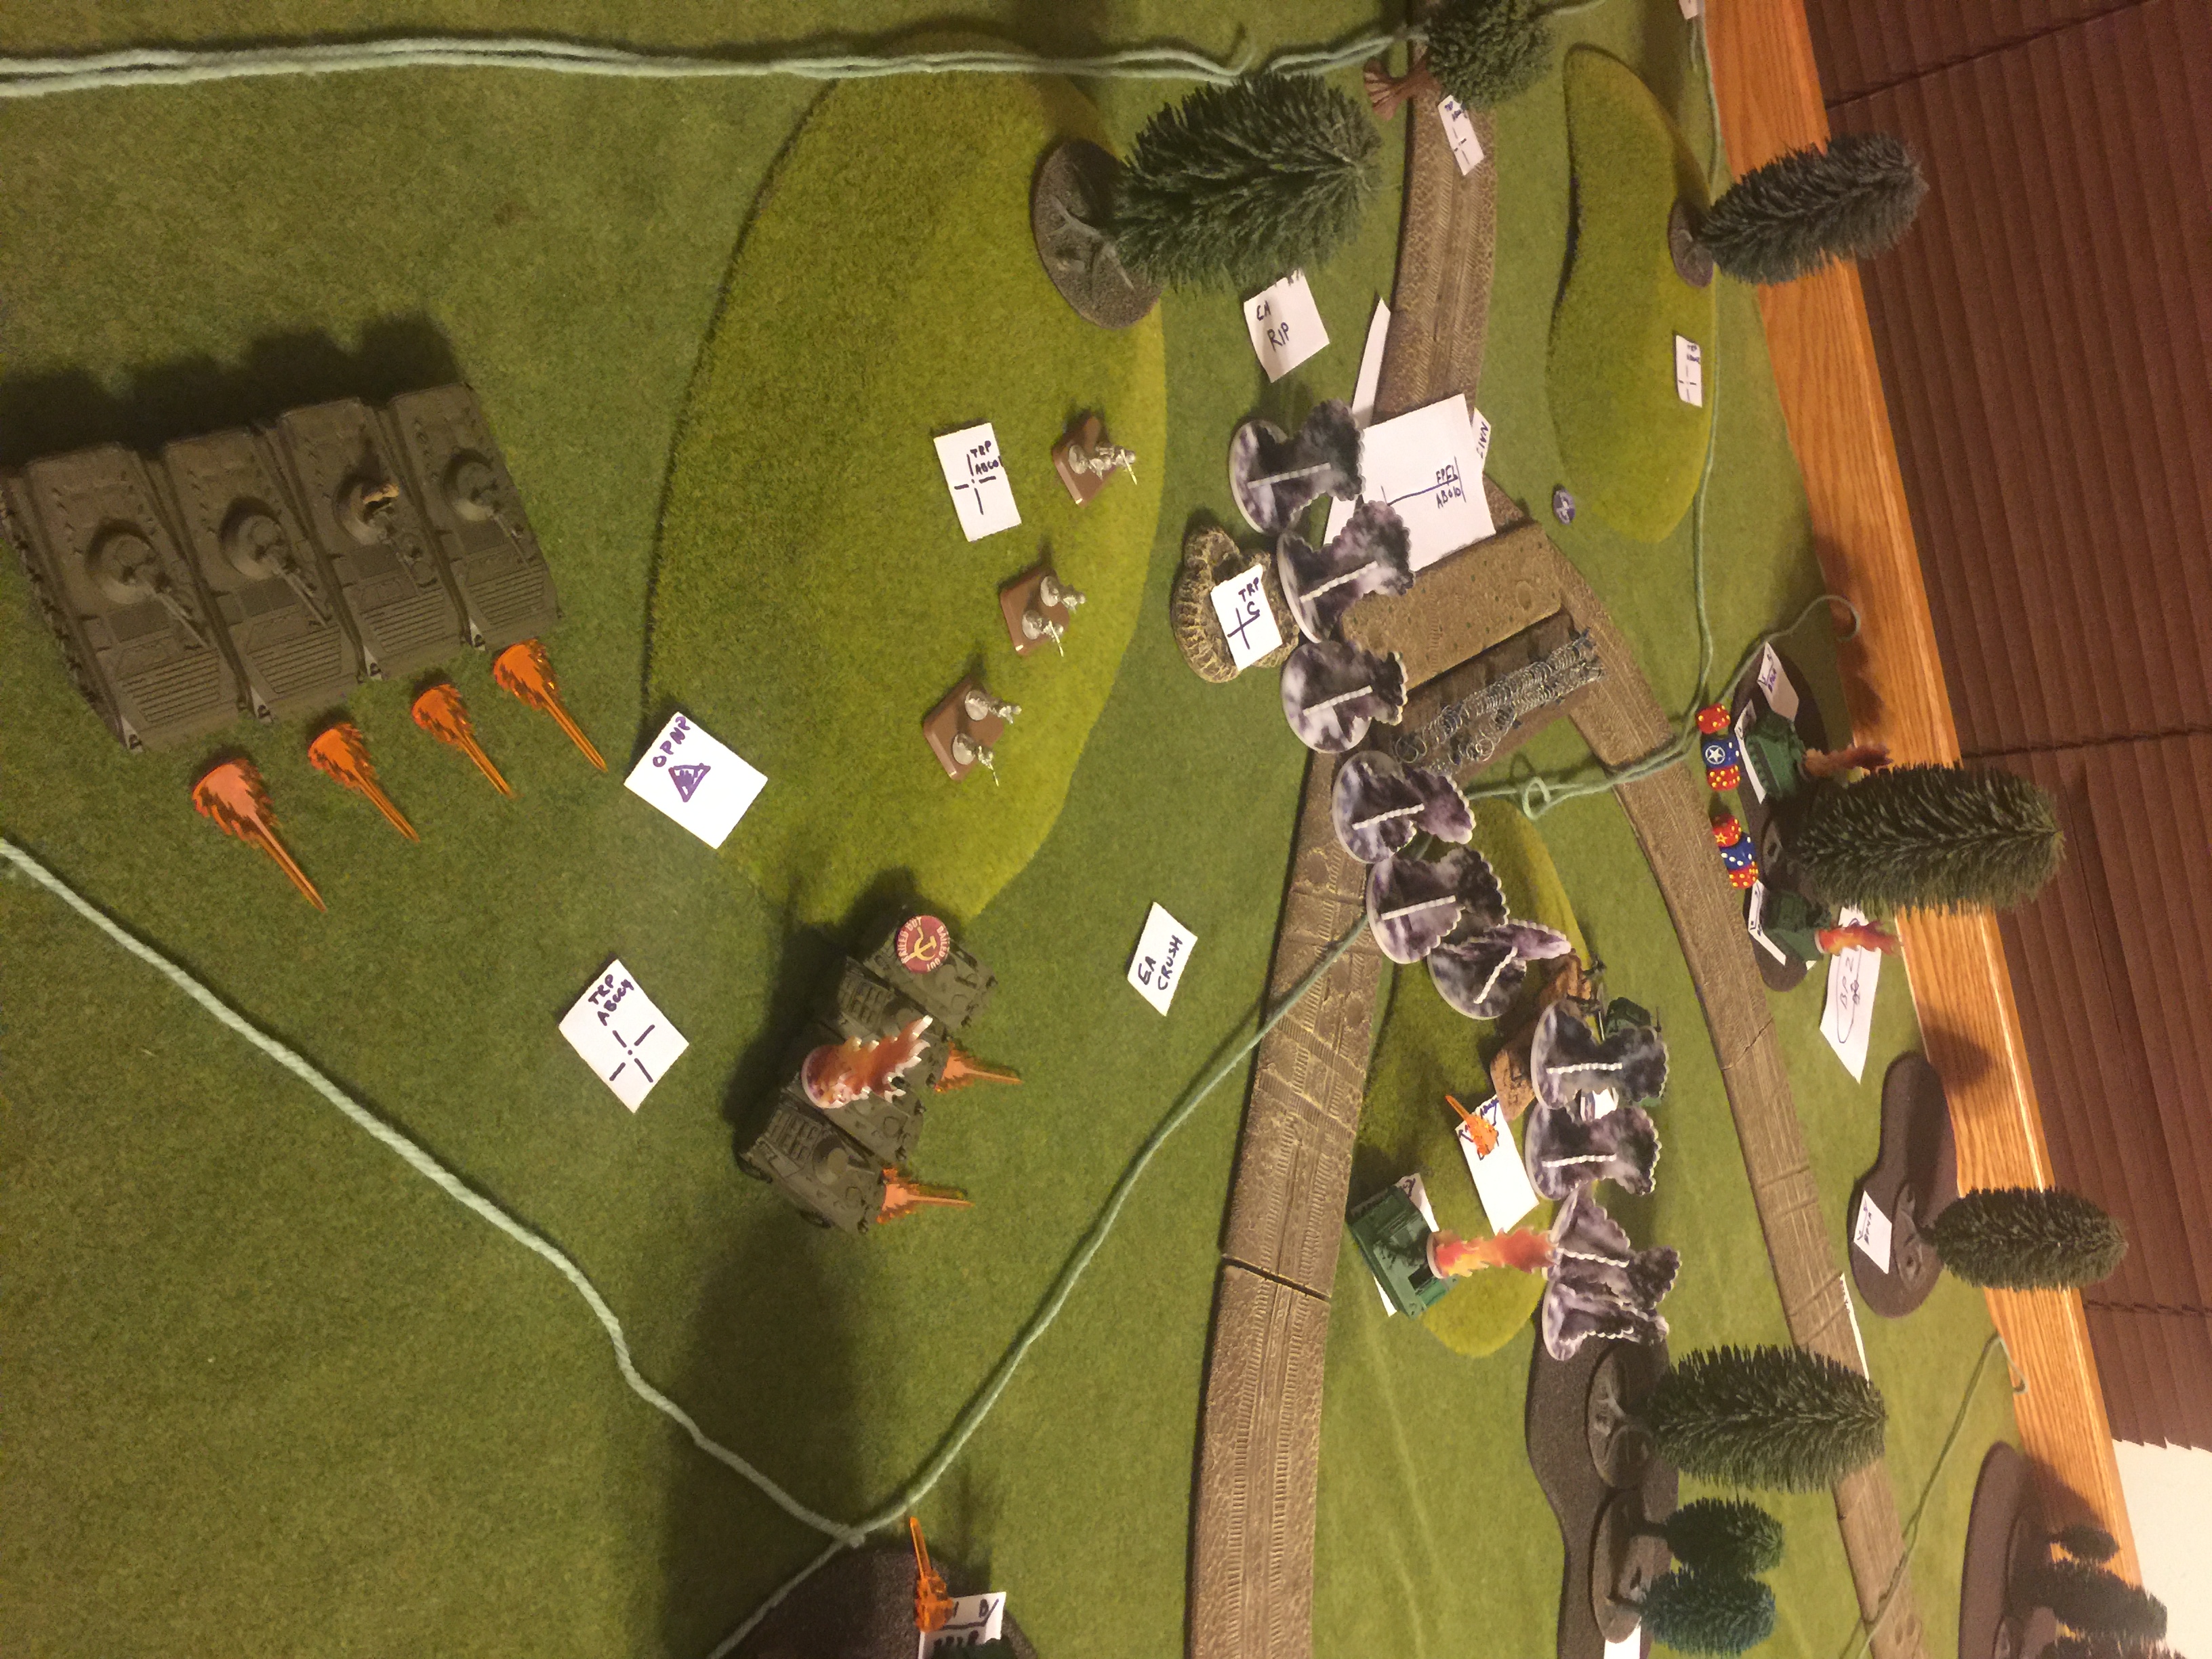
 Startex from Russian side (Russian vehicles are not commited to those locations, just sitting there before play)
1/A/1-18 CAV (Red Platoon) Screens from PL Acura to PL Dodge to provide early warning to the 79th IBCT, determine enemy axis of advance, and attrit enemy recon elements.
401th Recon Company of the 401th MRR conducts route recon of RTE Orange and RTE Yellow to facilitate the rapid movement of the advance guard to OBJ Sparrow.
1/A/1-18 CAV
A Section
1 x M113 with .50 CAL (Red 1 Platoon Leader)
FSO as separate dismount (Proxied by OP team)
1x M113 with MK 19 (Red 2 Senior Scout)
1x M901 ITV (Red 3)
B Section
1 x M901 (Red 4 Platoon Sergeant)
1 x M113 with .50 cal (Red 5)
1 x M113 with Mk 19 (Red 6)
In Support: A/143 FA (155mm) (6 x 155mm Howitzers), Mtr PLt A/1-18 CAV (2 x 107mm Mortars), One Section Cobra Attack Helo, One flight A10. 3 MOPMS, One Crater Charge, One Volcano, 2 Hornet Mines.
401st Recon Company (Task Organized)
Recon One (commanded by Company Commander)
1 x BRM
3 x BMP1
Recon Two (led by BRDM PL)
4 x BRDM
3 x Motorcycle (Proxied by unpainted RPG teams)
In Support 1 Battalion 122mm Howitzers (3 x Batteries each of 6 tubes)
Soviet Turn 1
Recon two crosses PL Acura and bounds motorcycles forward to Northern Hill. Spots OP. OP Spots. Recon 2.
Recon 1 Crosses PL Acura (Blitz move) and sets support by fire position. Spotted by OP. (Note vehicles do not cross MEL)
One battery (122mm) Smoke screens Northern Hill.
Recon 2 fires 4 BRDMs at OP. US interrupts move to execute DST decision to displace OP. 4 BMPs in over watch shoot and kill OP as it displaces. US loses spot on BRDMs, BMPS, and Motorcycles.
US Turn 1.
One battery 155 indirect on TRP 1.
Priority of Fire: A Section
Location: AB001
Observer: FO
Trigger: Motorcycles observed
Communication: Digital to Squadron
Restrictions: Danger close OPN, (Allowed because it is a preplanned TRP and rehearsed. Effects pins motorcycles.
Soviet Turn 2:
Recon 2 motorcycles unpin.
BMP1 Blitz move to new support by fire positon.
BRDM move edge of smoke.
Smoke lifts. Red 1 spots BRDMS and BMPs. Does not spot motorcycles. US DST Decision if Soviet vehicles cross MEL bring CAS on station, Call Helocopters forward to BP1, Shift B Section fires to northern portion of EA RIP. A Section Fire. Caliber .50 to Motorcycle, BRDM, BMP. Mk 19 to BRDM, Motorcycle, BMP. TOW to BMP, BRDM, Motorcycle. (This is automatic, no fire command necessary since the Soviets have crossed the trigger line and the engagement criteria for each weapon system was in the OPORD). However, the S2 has been careful with his maneuver, and B Section either does not have line of sight or is out of range. A Sections TOW is out of line of sight. Only Red 1 and Red 2 can shoot and the target priority means all shots go to BRDM. We use the stats for Tour of Duty for the MK 19, ROF 3, AT 3, FP 4. So 3 caliber .50 and 3 40mm HEDP rounds later, one kill one bail.
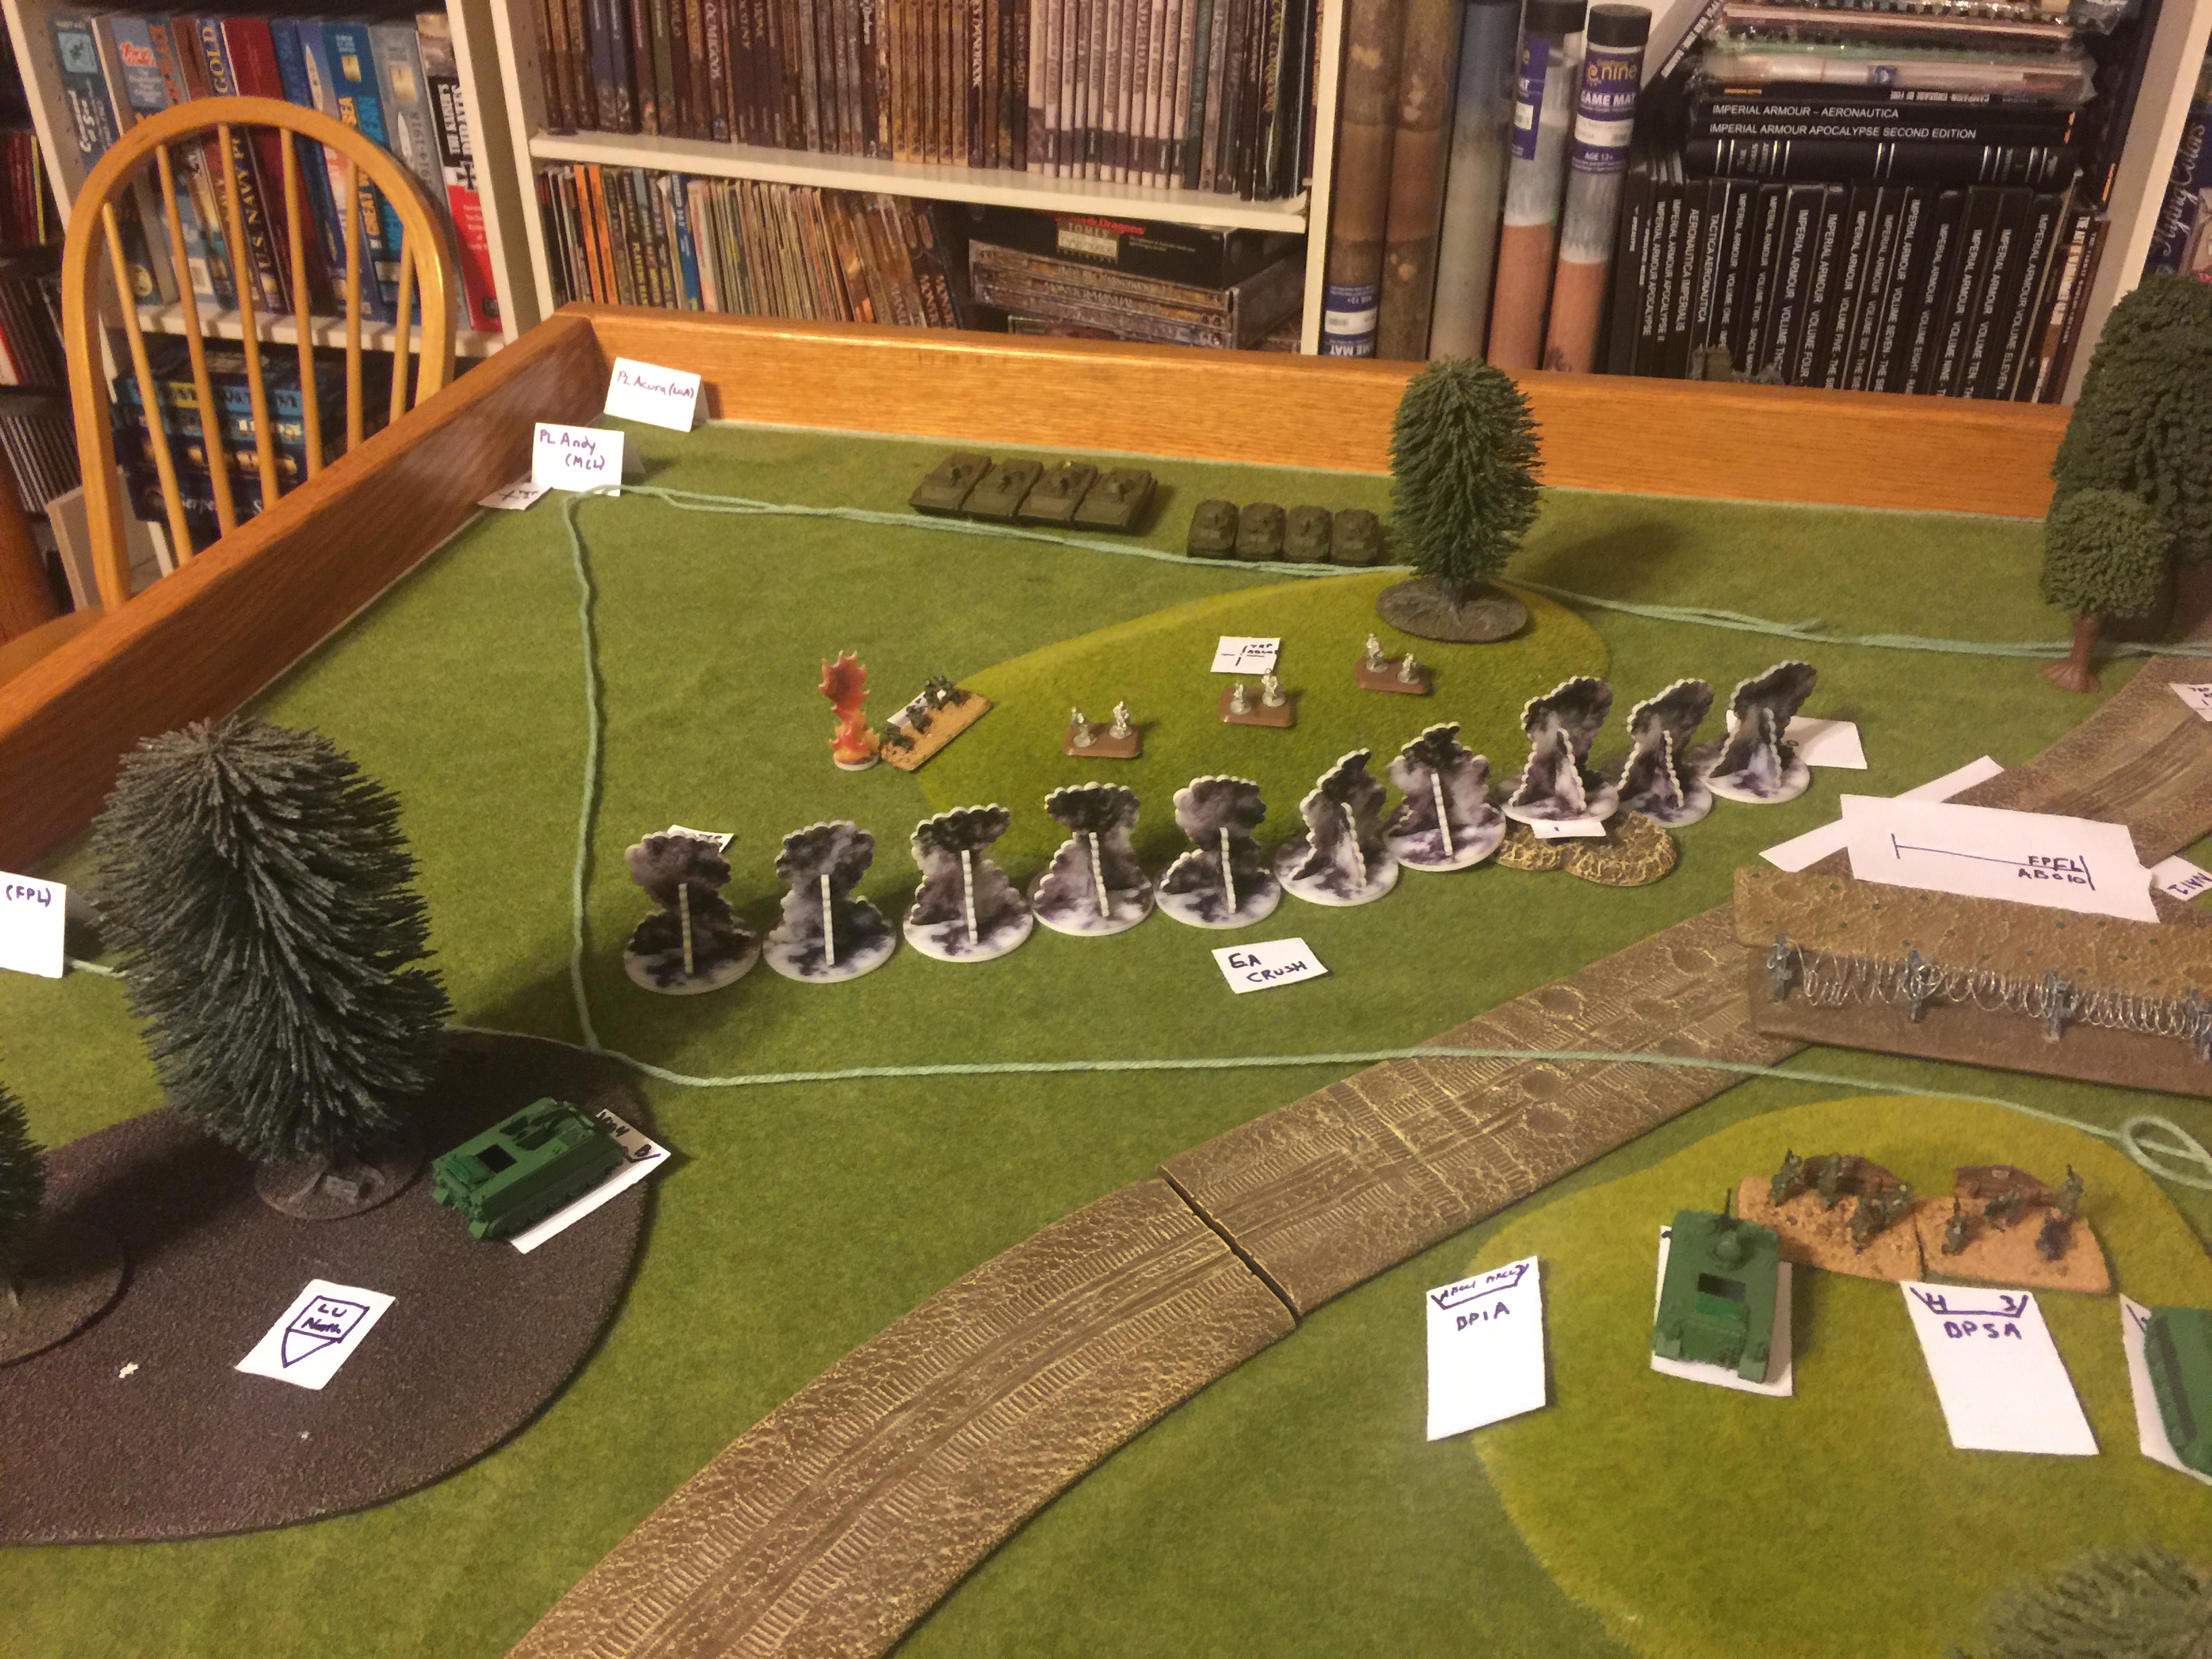
One battery 122mm Smoke on central hill
One battery 122mm fire on Red 1. US interrupt (DST Decision) If indirect then shift to alternate Position. Red 1 shifts to alternate position. Infantry and FO pinned.
2 BRDM fire Red 1. Kill. Red 4 takes over the fight.
One battery 122mm on Red 2. US interrupt (DST Decision) If indirect then shift to alternate Position. Red 2 shifts to alternate position. But....Soviet overwatch four BMPs fire on Red 2. Kill.
US Turn.
Infantry does not rally.
CAS to initial Point (IP).
Helos occupy BP1.
Red 4 gives verbal order to displace B Section. Takes way too long on the radio. Free 122mm fire on Red 4. Red 4 and Red 6 are killed. At this point, the platoon has lost all three major leaders, the PL, the PS, and the senior scout. With the loss of qualified leaders and the FO pinned and on the wrong side of the smoke, they lose air support and attack helicopter support. Effectively this ends the game, but their is one more lesson to learn.
Soviet Turn 3
BRDM Rallies.
BRDM move down RTE Orange. US Overwatch fire, but they are within TOW minimum engagement distance. End of match
Sustains:
1. The actual set up of the engagement area with integration of direct, indirect, and obstacles was pretty good. The DST decisions to mass effects in the EA were appropriate, flexible, and would have resulted in 2 TOWs, 6 MK19s, 6 CAL .50s in the Soviet movement phase, followed by another round of fire in the US Turn 3. If the Soviets had driven in to the heart EA RIP they had an excellent chance to do very serious damage to the Soviet Recon Company. Unfortunately, the enemy gets a vote.
2. The LT did a few things in preparation that were not apparent in the game. He asked for an artillery CFZ over his central hill battle position. This is a counter fire radar measure that would have triggered the 155 battery to shoot at the Soviet artillery if they had rounds impact on the hill. The reason you did not see 155 fire in the second Turn from the US was because they got to fire twice, one at the smoke battery and one at the battery firing on Red 1. This suppressed both batteries. The soviets would not have gotten to use those two batteries on subsequent turns, but by then it did not matter.
3. The delivered OPORD was extremely good, with good detail on fire control measures.
Improves.
1. Essentially, this was a forward linear defense, not a screen. While appropriate for a defensive mission or a guard mission, those are not platoon tasks. A platoon conducts a defense or a guard as part of a company. Just by noting that the table was 4800 meter wide, (1 inch = 100 meters), the PL should have instantly known he did not have the combat power density necessary to execute a defense or guard. The LT had trained defenses extensively as an infantry officer and understood the principles. He had even done some engagement area math to calculate the likely hood of stopping the attack and his probable casualties. However, he did not have the resources to cover the frontage assigned. Specifically, he needed turning obstacles to funnel the Soviets into the heart of EA RIP. He tried to use the crater and the MOPMs to that effect, but there was still a 1000 meters on either side of the obstacles for the Soviet to bypass. Second, with no depth, there was no ability to recover from the damage of the second turn. Not only did this cause a challenge in controlling the platoons maneuver to positions that suddenly had to be made up on the fly, but any penetration would have lost observation of the enemy within the AO. This is a key part of a screen. Finally, he did not have to stop the Soviets to win. He needed to influence them into committing to a RTE and report it. The heart of mission command is staying focused on your purpose and how it helps the rest of the team be successful. The LT tried to win the third world war on day one in his first platoon engagement. He truly was trying to be the Army of One. While it might have been his dream, it WAS NOT HIS PURPOSE.
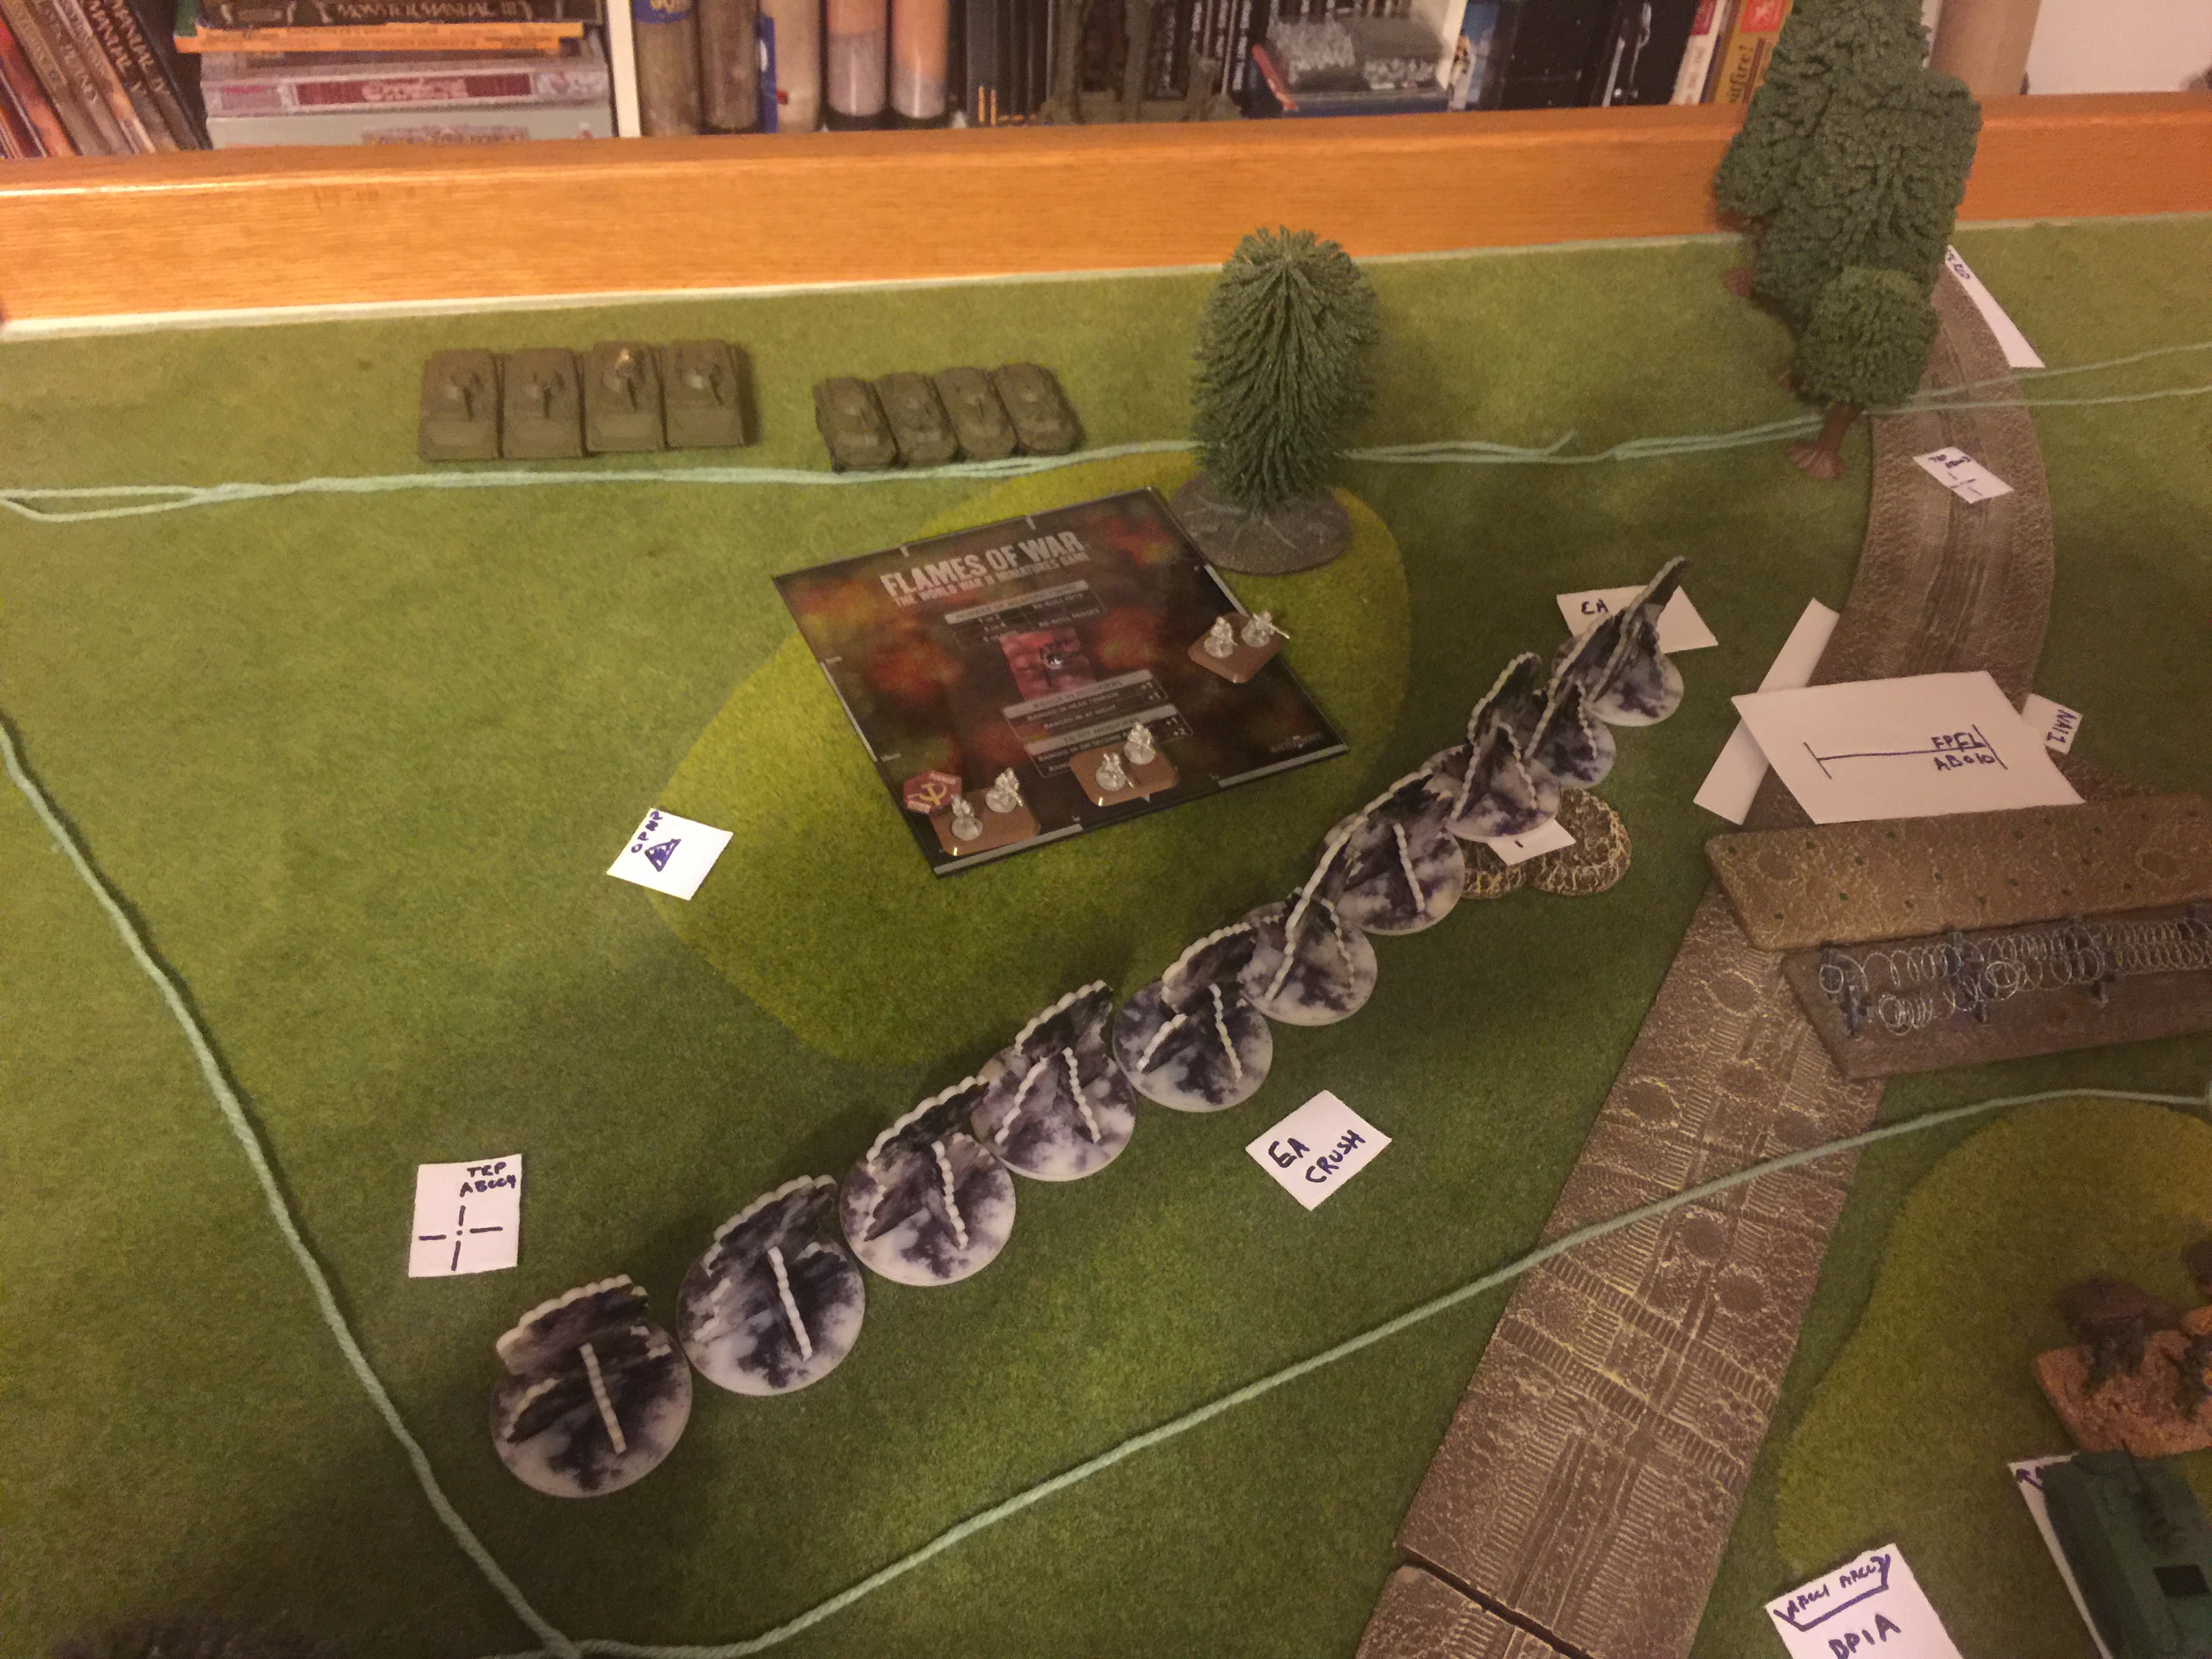
2. Light infantry guys really do hate vehicles because they draw fire. Red ones displacement brought down fire on his infantry on the hill. Even though the Soviet player did not have observation on the US infantry, they still had to embrace the suck of the 122mm battery sheaf that went after Red one. What is worse, the displacement distances for the alternate locations were still under the artillery template! Even moving was not going to help Red one from a repeat bombardment. You have to be smarter than the plan.
3. Mental Flexibility is essential. Red fell for the same trick twice. The DST allowed him to move out from under the artillery. But the Soviet anticipated this and had an over watch to engage the displacement. It worked. Twice. As we say, its OK to step on your Richard, just don't dance on it. Red was full up Fred Astair on that puppy.
Perversely, Red could have still gotten a draw out of this if some one had thought to report the break thru down RTE Orange. The multiple casualties in the leadership and focus on killing as opposed to reporting, ie, infantry vs cavalry, led no one to call the ball and tell the Troop commander "Ole', little help, they are coming down Orange." US LOSS. Do it again.
Battle Report Author
Recommend Commander For Commendation
Share this battle with friends
Squadron S2Wins

Well, they are not my Lieutenants. They are had receipted to the Troop Commander. He asked me come in as a training aid. Like most maneuver officers, they learn by seeing and doing, not lecture. Consequently, they seem to respond well to this format. The real pay off is the discussions in the AARs afterword. A few light bulbs seem to be illuminating.
Always good fun to read your reports.
And how do the Lieutenants like their training?
Well that was different! But a super cool way to use TY as a learning exercise. Thanks for tge report and the writeup.
Interesting use of the game to support learning and TLPs
Is it hard for NATO? It is realistic. This is the sort of mission a CAV platoon leader must master in order to be successful and survive.
The victory conditions are in the purpose. 1. Provide a contact report when the Sovits show up. 2. Get them to commit to one of the two roads and report which one. 3. Cause some damage to the recon company. Please not it does not say how much. A single motorcycle destroyed would qualify. The implied task is to survive, both as an individual and as a combat effective organization. For this exercise you have to stay “green” i.e. Above 90% strength. Given 8 to 10 stands, that’s one stand worth of casualties. Damage to aviation and artillery don’t count. So yes it can be won. White was very close in the first report. If he had just not run off to his death playing cowboys and Indians he would have had it.
Even Red could have gotten a DRAW if he had just reported properly.
A very nice read.
Do you feel like the mission is set up to be extremely hard for the Nato Forces?
An interesting read guys, sounds like a very tactical game you’re playing. Hope to read more soon (with more NATO success)
hello!
It’s very rarely that I get to see people use the markers alot 🙂
Aside from destroyed markers!
I do enjoy your battle report and looking forward to read more in the future, it was a quick game aswell!