Fought At Amsterdam
2422 days 7 hours 42 minutes ago
Battle Report
Failed Pincer Attack in the Netherlands
View Linked Report - CLICK HERE 100 POINTSBefore I begin:
Sorry, this Army is largely unpainted. Also, I "stole" most of the pictures from Weland (aka EmmyDragon).
As he mentioned, we wanted to see what the NVA could do. This is my first game with them and it was very informative. Not to mention fun.
There may be differences in the reports between us. I wrote mine today and in two days I tend to forget things. Lets ascribe it to different war correspondents.
Now to the Game:
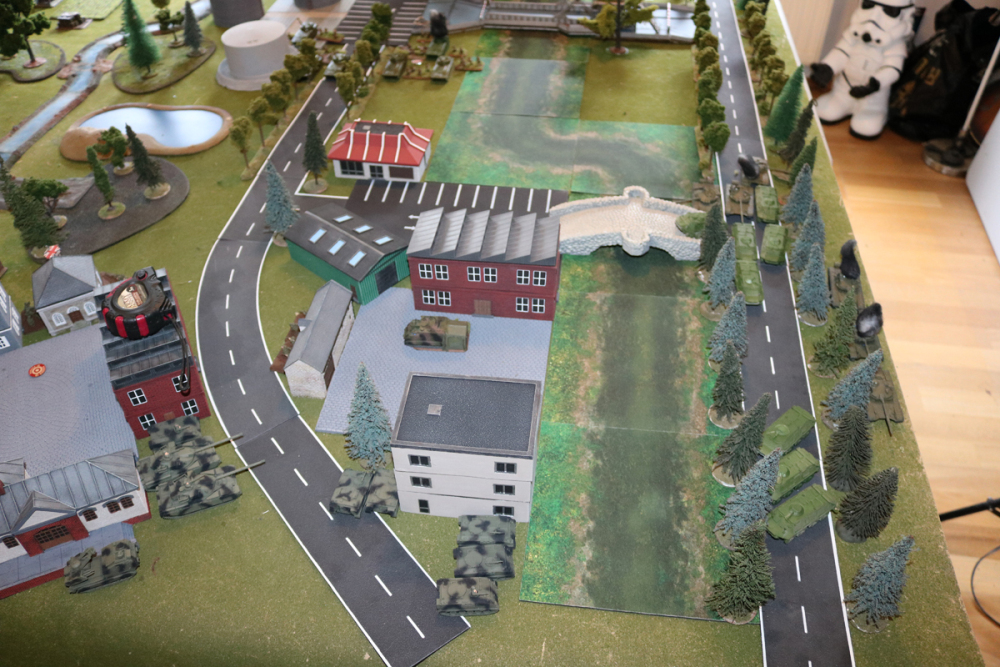
Turn 1: The East Germans started a general advance, keeping a Schützenkompanie in the center with the Carnations.
On both flanks BTR-60 and my T72M advanced. I brought in my Airlanding Assault Group and landed them in a town square near the Abbots.
Turn 1b: The British wasted no time and started to destroy T72s and BTRs on the Highway and the Bridge. Weland ambushed my T72s and BTR-60s with a Milan Group near the Abbots, lucky for me he had some less than successful shooting steps with them. His FV destroyed one Landed Hind, focing the last surviving one to flee.
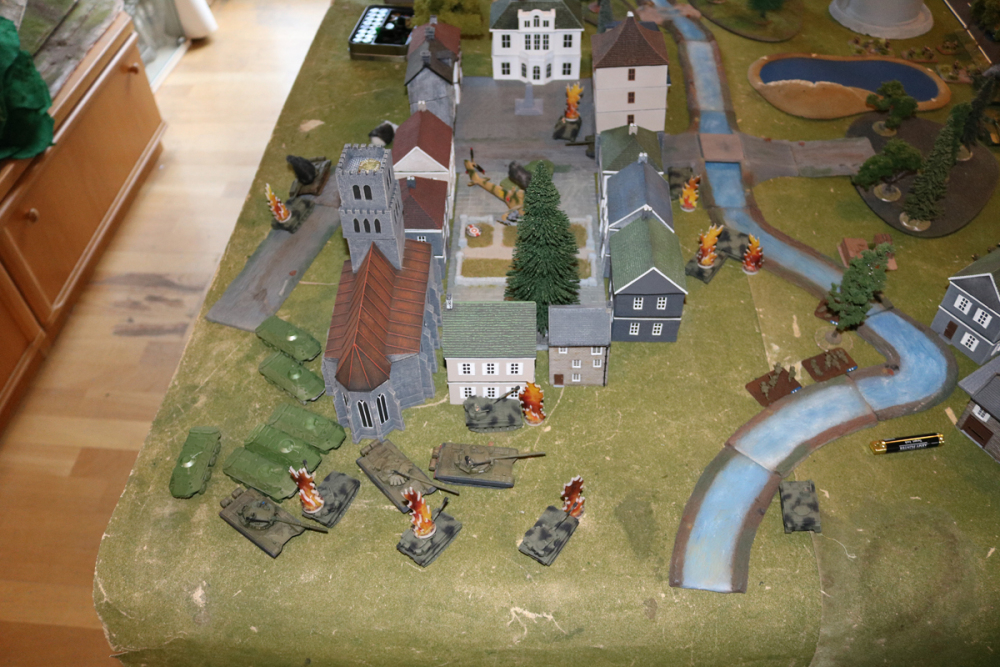
Turn 2: The East Germans pushed over the Bridge with the BTRs and brought the remaining T72s in Position for some some shots on the Chieftains. Which all missed. On the other flank were my force pushed on. I now decided to get the center going and moved the Infantry and Carnations up.
Turn 2b: The British soundly killed my Airlanding after some bad positioning from my side. And on the Highway the last T72s went up in smoke. Also, the Carnations in the Center began to get to take fire with almost no effect.

Turn 3: The NVAs last remaining BTRs from the Highway pushed in the center, firing at the Mechanised Infantry and to the suprise of both of us killing a few. In the center, I stopped advancing to fire. The force by the Abbots swung around town and destroyed them and most of the FVs here before he could advance them on my unprotected Objective. I get my first reserve, a small Carnation Battery and the BDRM Scouts which I let Dash down the center Highway to help my forces under Pressure here.
Turn 3b: The ignored Milan Group continued to fire at my T72s, bailing one. I realized now that I should have assaulted them in my turn. In the center the Carnations, BDRM Scouts and BTRs took more and more losses, leading to the rout of the Carnations.
Turn 4: The Volksarmee get the BDRM to attack the Rapier, hopefully opening the skies to the SU-25 at least, but in the end only two got destroyed. The Milan Group is finally assaulted and taken out and in suprising twist of events the Mechanised in the center die in a hail of concentrated fire.
Turn 4b: The British Mechanised Infantry from the Highway scramble to the center to guard the objective there while the first reserve, a Chieftain Platoon, is barreling down the Highway on the side to get to my objective. The BDRMs and BTRs in the Center blow up.
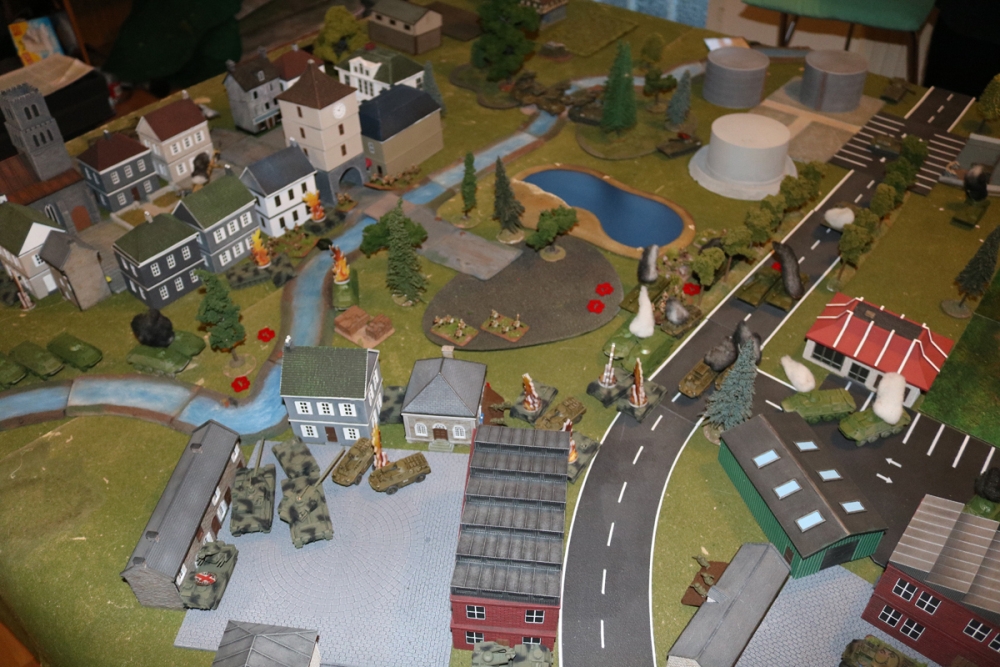
Turn 5: My Spiggots destroy the Chieftains on the Highway, the Schützenkompanie by the town fall back to a bridge to the center, being pinned down.
Turn 5b: Welands takes his freshly arriving Scimitars down the bloody highway, destroys all mobile elements in the center and starts shooting at my Schützenkompanie in the center in an attempt to kill the Spiggots with little effect.
Turn 6: I took the small Schützenkompanie forward in the Center to get shots at the British Mechanised. In a fateful turn, the large pinned Schützenkompanie fails to unpin and does not move.
Turn 6b: The last Chieftains turned up and together with the Mechanised Infantry destroyed the last BTRs coming from the flank with the Abbots. Also, there are small losses at the small Schützenkompanie due to the Chieftain HQ and Elements of the Mechanised.
Turn 7: The remnants of the NVA Forces clear the field, leaving it to the battered Nato Forces. We call it a game and I give up because I had almost no operational forces left that were able to beat his army.
My losses: All of the large Carnations, the BTR-60, Spandrel, T72, Hind, SU-25 (We were rolling after the Battle to see what would happen in Turn 7 if they really tried to do something. It wasn´t pretty.), Airlanding, BDRM Scouts, the Observer BMP and almost all of the small Schützenkompanie with the heavy weapon attachment.
The Survivors: The large Schützenkompanie, Gophers, the Gaskin SA-9, the small Carnation Battery
The Heroes of my Army were the Spiggots who proved invaluable.
On the British side the Command Chieftains were the heroes in my opinion.
(Just read Welands report, we came to the same conlusion here without talking about it. Nice.)
Food for thought:
T72M seems not good enough. The missing front armor and the lack of BDD Armor really make a difference. I might switch to T55AM.
The Schützen hold the Line and got work done. I underestimated them and their BTRs.
BTR-60 is a suprising nasty little bugger. It can reliably kill all support vehicles up to FA 1 and Infantry. Also better than I thought.
British Infantry is monstrously effectiv. They have the perfect weapon for every occasion. Might be the best unit the British have.
Chieftains are very vulnerable. Much more so than any other NATO MBT. They excel as support tanks though.
Battle Report Author
Army Lists Used In This Battle
Recommend Commander For Commendation
Share this battle with friends
Emmy DragonWins

Very cool looking Table and a nice Report
Have you been able to get any more battles in? Love your table
Really great table and good report.
This was one of memorable battles you go away thinking about for weeks. It really was a nail biter!
What a sweet looking table. Looks like it was very dense. Sorry for your loss, but great report
Very nice report. Brit infantry….I never leave home without 3 platoons.
that is a sweet looking table you got there! 😀
I’m sure Emmy Dragon is registered on the site, by linking your two reports you’ll both earn more XP and the battle will be able to count towards the ‘history’ of Team Yankee.
Good report
Nice report mate, Keep up the good work. Regroup and resupply for another attack!
Decent report, always appreciate some reflection at the end.
British have been really tough here lately. Thanks for posting the report, and hopefully there are some lessons learned that will serve you well in future games! 😀
A very nice report Comrade! Too bad about the outcome, but a great AAR.
good report