Fought At Hamburg
2428 days 10 hours 32 minutes ago
Battle Report
Breakthrough at Hamburg
100 POINTS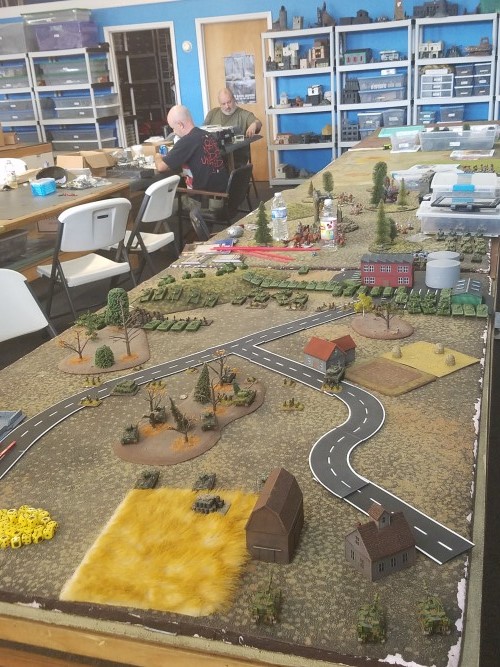
The day has finally come where we get to liberate our decadent western brothers! 9th Panzer is leading our assault and I, Oberst Waffen get to lead our spearhead towards Hamburg! I am to assault a forward deployed Bundi position ( No Retreat) and push through opening the gap for our forces.
Doing a map recon of the battlefield I identified two objectives, one is forward where the main line of resistance will most likely be and the second deep in the enemies rear in a wheat field. I have under my command the following 2 formations. The first has a T55 hq and 2 companies of 5 each T55's, 6 T72's, a small BTR company with 2 attached AT-4's and an AGS17 and 4 BMP1 scouts. The 2nd has a BMP1 hq, a small BMP1 company with attached AGS17, a medium BMP2 company with attached AGS17, 5 T72's and 3 BRDM Spandrels. Divisional support consisted of 3 more BRDM Spandrels, 3 heavy Acacia's ( yes we fudged this intentionally, 6 pts for the battery ) and an observer.
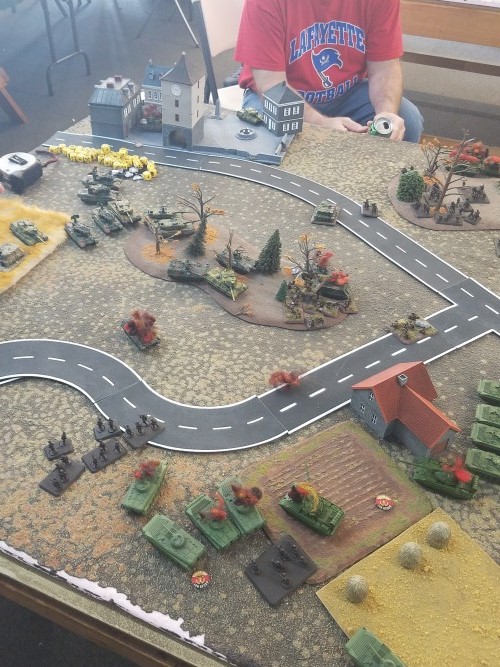
The West Germans had deployed 2 entrenched infantry platoons deployed well forward around my forward objective ( 8" back from the center line it was) as well as the Leopard 2 HQ and FO, who was in the woods. The 109's were around a farm house, 3 marders were towards the rear, 3 were in some woods along with the Leopard 1 hq. I felt 3 Leopard 2's were also well hidden somewhere. My plans were move forward quickly and hopefully do major damage before Bundi reserves could arrive.
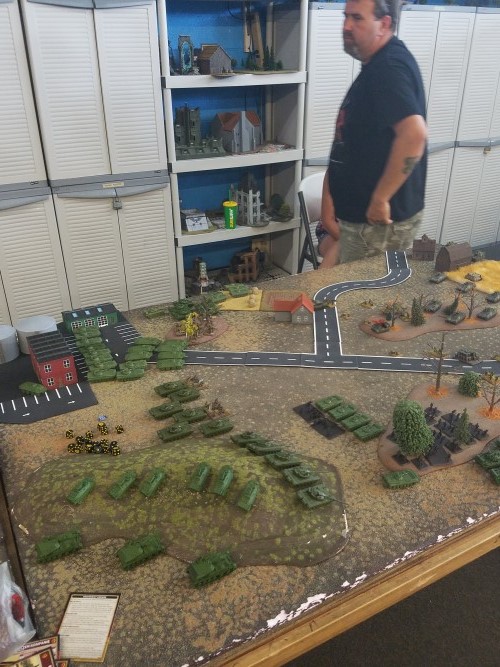
I put 5 T55's on each flank, all of the T72's, the BMP2's and all of the BRDM Spandrels in the middle for direct fire support with the arty giving indirect fires. The BMP1 infantry stayed mounted and went on my left flank while the BTR infantry went dismounted up the middle, while their Spigots stayed back dug in to also offer support. The BMP company followed the spearheading scouts into some woods near my right flank. This would allow them to advance quickly and hopefully take the lightly defended objective.
Our shooting was fairly successful at the beginning taking out a Milan team from each infantry platoon and one addition mg team from the platoon on my right and the Observer. A platoon of 3 Leopard 1's entered the fray on my right and took positions in a town near the rear of the battle area, but nothing else appeared. Return fire mostly shook up multiple with very few vehicles actually being destroyed. So far so good!
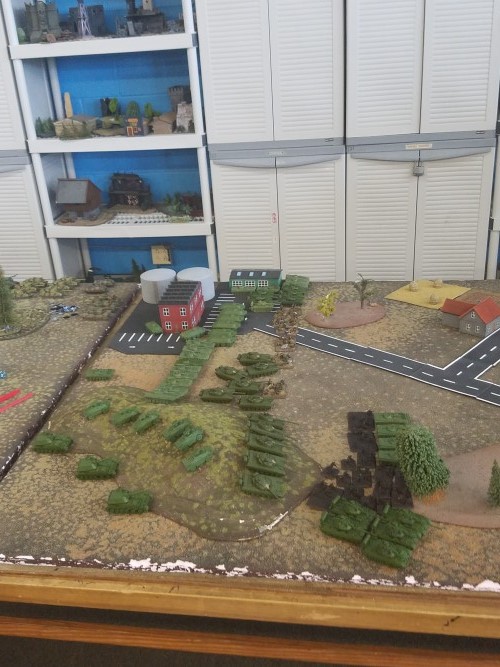
Turn 2, not all of my vehicle crews regained their senses, but enough did and the advance continued. My T55s on the right blew up 2 Leopard 1's in the town, but the last one stayed tough. Two of the T55's managed to get on the flank of the Leopard 2 hq and destroyed him as well! Some more infantry from both platoons were taken out leaving 2 mg stands on my right and 2 mg and 1 Milan in the middle one. All shots on the single Leopard 1 in the woods missed. My BMP2 infantry company assaulted the last MG teams killing them both ( after multiple ineffectual rounds of close combat by both sides) and taking the objective. The Bundi's were now on the back foot!
Now the Leopard 2's pop out to engage the right flank T55's smashing them. The Leopard one and a lone Milan manage to stop the T55's on the left while 3 Marders engaged the advancing BMP 1's. The other Marders kept getting stuck in the woods. Two MG teams from the last infantry platoon came over to try and hold on to the objective. German artillery was not able to fire this turn as they had no one who could spot.
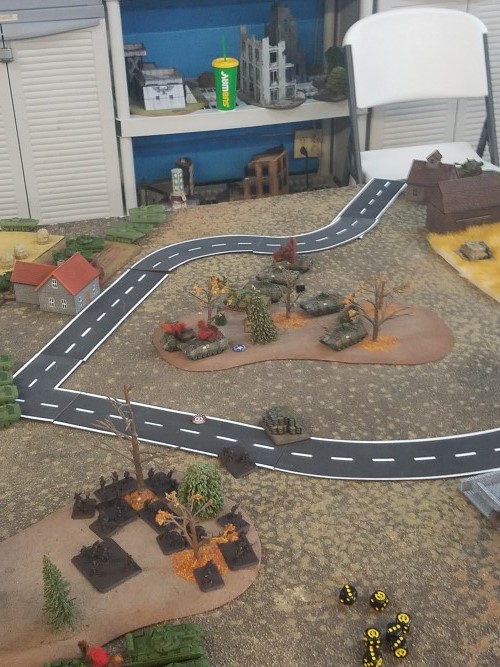
All sorts of fire knocked out the 2 mg teams giving me control over the objective again! The BTR Infantry assaulted the last Milan team killing them and moving into the forest to threaten the Leopard 1 and the Marders. The BMP's managed to kill 1 Marder and bail two-they lost their nerve and fled the battlefield. I could shoot at one Leopard with lots of Spandrels but bounced the few which hit it. I now just had to hold on.
All of the sudden 4 Gepards and 3 more Leopard 1's moved on. The Leo's moved in to a wheat field to shore the (my) left flank. The Gepards divided their fire to fire at my left and the troops holding the objective. The Bundi commander felt firepower could buy him time so he moved no one up to contest the objective. Fire power failed him as my troops had prepared their hasty fighting positions well and suffered no casualties on the objective! I did lose more troops and vehicles on my left but no matter as the Bundi's fled the battlefield! ( Actually I held the objective at the beginning of my turn 4 so I won). First Blood to 9th Panzer!

Battle Report Author
Recommend Commander For Commendation
Share this battle with friends
Oberst WaffenWins

Top notch battle report, I love it alot, nice amount of Pictures and good report 🙂
Wonderfull table, nice writing and great battle.
Shame for NATO loss, but, next time with shield?
To bad for the loss, but i know how it feels to play against East Germans. Hopefully they will start loosing soon
Well done. Great write up and that board looks sweet.
Nice write-up – good to see the NVA on the winning side – looks like a pretty decent list as well. I’m trying to get something similar painted up… (you know… paint all the things). Army lists would be helpful in a separate file, even though getting the PDF to upload can be a challenge from time to time…
Nice write up. That looks like a great place gaming
Nice. Lovely table and armies
Damn, another loss for the good guys, eh? 😉 Splitting up the text with the photos is a good visual break when reading, and uploading a PDF of your forces works well to clean up the text a bit too!
Sounds like a hard fought game, good write up guys. It’s possible to add your army lists through the upload system to make for easier reading.
And enjoy your victory while it lasts German traitor, your time will come. (all in good humour, of course).