Fought At Frankfurt
2432 days 10 hours 2 minutes ago
Battle Report
Running the Gauntlet at Butzbach
View Linked Report - CLICK HERE 100 POINTSRunning the Gauntlet at Butzbach
After successfully stopping the attack at Bad Hersfeld, Task Force Bayonet spent the next 24 hours redistributing ammunition, doing field repairs on the equipment and vehicles, and integrating replacement vehicles and men into the platoons. About 1900 hours on the follow day, LTC Thomas, our battalion commander, radioed for all company commanders to report to the Battalion TOC (Tactical Operations Center) for a meeting at 2000 hours. The meeting began with a briefing by the S-2, Captain John Rast, who stated that the Soviets had broke through in the Fulda Corridor and were moving on Frankfurt. The situation was fluid and the exact location of the Soviet forces was unknown. The S-3, Major Jack Peterson, passed out op orders, that basically stated that the 1st Brigade was falling back to cover the northeast approaches to the city. No air support could be expected since all assets were devoted to stemming the Soviets coming from the Fulda Gap approach. The S-1, Captain David Sierra, noted that no more replacements would be coming until the Soviets were contained. He also mentioned that the last of the Battalion’s dependents had been sent back to the States and that the NEO (Non-combatant Evacuation Order) was finished.
Task Force Bayonet was not to be disbanded but would lead the 3rd Battalion 36th Infantry as it pulled back about 100 kilometers to the vicinity of Kirch Goens where it would set up defensive positions to keep the Soviets away from the northern approaches to Frankfurt. The Battalion would refuel at Ayers Kaserne, where they had been stationed for the past 40 years. The battalion would leave at first light marching along Highway A-5 to Alsfeld to Giessen, where it would head south on Highway B-485 to Kirch Goens. Once there they would move just north of Butzbach.
Task Force Bayonet was left intact with a few additional assets:
Bravo Company HQ
1st Platoon Bravo Company with extra dragon team
2nd Platoon Bravo Company with extra dragon team
3rd Platoon Bravo Company with extra dragon team
ITV Section
Attached to the Task Force Bayonet were:
1st Platoon Alpha Company 2nd Battalion 32nd Armor of 4 M1 tanks
3 ITV Sections from the Combat Support Company 3rd Battalion 36th Infantry
In support
Charlie Battery, 2nd Battalion 3rd Field Artillery: 6 M109s and a FIST
2 Sections of VADs from the Division Air Defense Battalion
The move south started at 0500 hours and we made good time until we reached Kirch Goens about 1500. The next two hours were spent refueling at Ayers Kaserne and at 1700 I gave the order to mount up. Staff Sergeant Peter Hope and his section of scouts was screening our advance when he radioed back that a large Soviet force of 10+ tanks and 20 BMPs were approaching from the west. I immediately ordered the four sections of ITVs to deploy in the wood line to the north and the artillery to take up positions to overlook the town of Butzbach, a key crossroads for any force moving through the Harz Mountains north of Frankfurt. The 1st Platoon Alpha Company 2nd Battalion 32nd Armor, Bravo Company’s 1st Platoon, and one section of VADs were ordered to move as quickly as possible to Butzbach and sieze the southern crossroads and to hold it until the rest of the task force could move up. The 2nd and 3rd Platoons, plus one section of VADs were to maneuver their way along the northeastern approach to Butzbach and siege the other crossroads.
The battle did not start well. The Soviets were able to bring a T-64 company and several scouts to within a kilometer of the southern crossroads and the M-1 Platoon and the VADs brought them under fire to no effect. The Soviets returned fire and knocked out two of the M1s. The 2nd and 3rd Platoons moved within about 500 meters of the northern crossroads and the 2nd Platoon dismounted their infantry. The VADs were able to bail one of the scouts but do no other damage. Two sections of ITVs were caught maneuvering into position and were destroyed. The Soviets were able to seize the southern crossroads with a company of BMPs and destroyed one of the VADs and forced the other to pull back.
True to his orders, Lieutenant Kevin Goodwin and his 2 M-1s, charges straight to the crossroads followed by the 1st Platoon. The 2nd Platoon dismounted and deployed their dragoons. The lead T-64 Company was brought under fire by four ITVs, the remaining two M1s, and the M109 Battery using Copperheads. Despite this overwhelming fire, they only bailed one of the tanks. The Soviets dismounted their infantry from their BMPs and brought the 1st Platoon under fire. B-12 and the 2nd Squad was destroyed. B-13 and B-14 were damaged and the infantry quickly dismounted. The remaining M-1s were shot at and one was destroyed. Rather than withdrawing, Lieutenant John Barnes stayed and fought on. The Soviets continued to press forward and seized the northern crossroads. Another T-64 Company was brought up to support their attack.
The 1st Platoon’s two damaged M113s were in poor shape. Their crew tried to repair them but to no avail. All priority of fire was given to destroying the two T-64 Companies. They were hit by four Dragons in the side and rear, four ITVs, Lieutenant Barnes’ M-1 and the M109 Battery firing Copperheads. The original T-64 Company had two tanks destroyed and two bailed, out of five tanks, while its supporting company lost all five tanks either killed or damaged. Both companies withdrew at the first opportunity. The 3 mech platoons brought the BMPs under fire and succeeded in destroying three and bailing several others. The Soviets continued to feed in reinforcements, including a scout platoon and an anti-tank platoon and destroyed our last M-1. They attempted to attack the 1st Platoon, but the attack was beaten back with heavy losses.
Task Force Bayonet continue to maneuver to hold the two crossroads but there were so many destroyed vehicles around them that regardless of who held them, it would take several days to clear them all. A bitter fight continued between our Mech Platoons and the BMPs, although we were able to destroy a few of them, enough remained to prevent us from taking the crossroads. Our last two VADs were destroyed, as well as the 1st Platoon’s M113s. I decided to concentrate on destroying all of the Soviet armored vehicles to the west of the town and between the ITVs, the M109s Copperheads, and the 2nd Platoon’s Dragons and LAWs, we succeed in destroying four scout BMPs, the Soviet task force commander’s T-64, and two ZSU-23-4s. We now controlled the western approach to Butzbach. The Soviet commander tried to get his infantry company to attack the 1st Platoon, however having taken so many casualties in their previous assault, they refused to move.
At this point the Soviets were down to the anti-tank platoon, a company of ZSU-23-4s that were moving up, and an infantry company of two platoons (about 10 stands). We continued to spar with the Soviet BMPs and the artillery destroyed their remaining AT Platoon. The situation was beginning to stabilize. The Soviets were down to five BMPs and four ZSU-23-4s, plus the battered infantry company. The Soviet infantry commander brought the 1st Platoon under fire and killed the squad overlooking the crossroads. At this point I realized that even though the Soviets held the crossroads they were rendered impassable and we could by-pass them as we moved south. After consulting with the battalion commander, I ordered Task Force Bayonet to withdraw. Soviet Victory: 4- 3
Casualties:
Soviet destroyed:
Soviet Commander (T-64)
2 T-64 Companies (10 T-64s)
2 Scout Platoons (8 BMPs)
1 Anti-tank platoon (2 BRDMs?)
1 ZSU-23-4 platoon (2 Vehicles)
6 BMPs plus another 4 damaged
U.S.
4 ITVs
1st Platoon Alpha Company 2nd Battalion 32nd Armor (4 M-1s)
1st Platoon Bravo Company 3rd Battalion 3th Infantry (4 M113s and five stands of infantry)
Notes: This was a hard fought battle. In the end, the Soviet commander shot the 1st Platoon off of the objective and thus met his victory conditions. He played the game extremely well by using the Spearhead rule to bring his scouts, a BMP Company and a T-64 Company within 8 inches of the objectives on the first turn. I was forced to sacrifice the M-1 Platoon and a VADs Section by sending them to contest the objective in the second turn. If I did not the game would have been over. I have no idea how many turns the game lasted. . . either 5 or 6.
After Action Report:
I was not confident I could prevent the Soviets from seizing and holding the objectives by the end of Turn Two. I did but at the sacrifice of my M-1s. I made three major mistakes that might have changed the outcome of the battles:
1. Instead of placing all of my ITVs in position to prevent them from being shot at on the first turn, I left two sections exposed and they were destroyed. If I hid them and then used the Blitz move to bring them up, they would have been in a position to damage the T-64 Company that decimated my M-1 platoon.
2. I was lucky and rolled a six for time of day and got a dusk. We forgot to keep track of when night would fall. I am not sure how much impact this would have had since I am not 100% sure how many turns we played. I think it was either 5 or 6, my opponent thinks it was 3 or 4. Either way we were fighting at such close quarters (usually under 10 inches) by the 3 turn that night would not have matter much.
3. On the last turn I had the choice of bringing his infantry under a salvo from my artillery or using Copperheads to take out his anti-tank platoon. I thought I could hold the objective with my 8 M113s in support. I chose to take out the anti-tank vehicles. If I had fired at the infantry I might have prevented them from destroying the 1st Platoon. Instead they killed enough of the platoon so that I was no longer contesting the objective.
Overall a fun game.
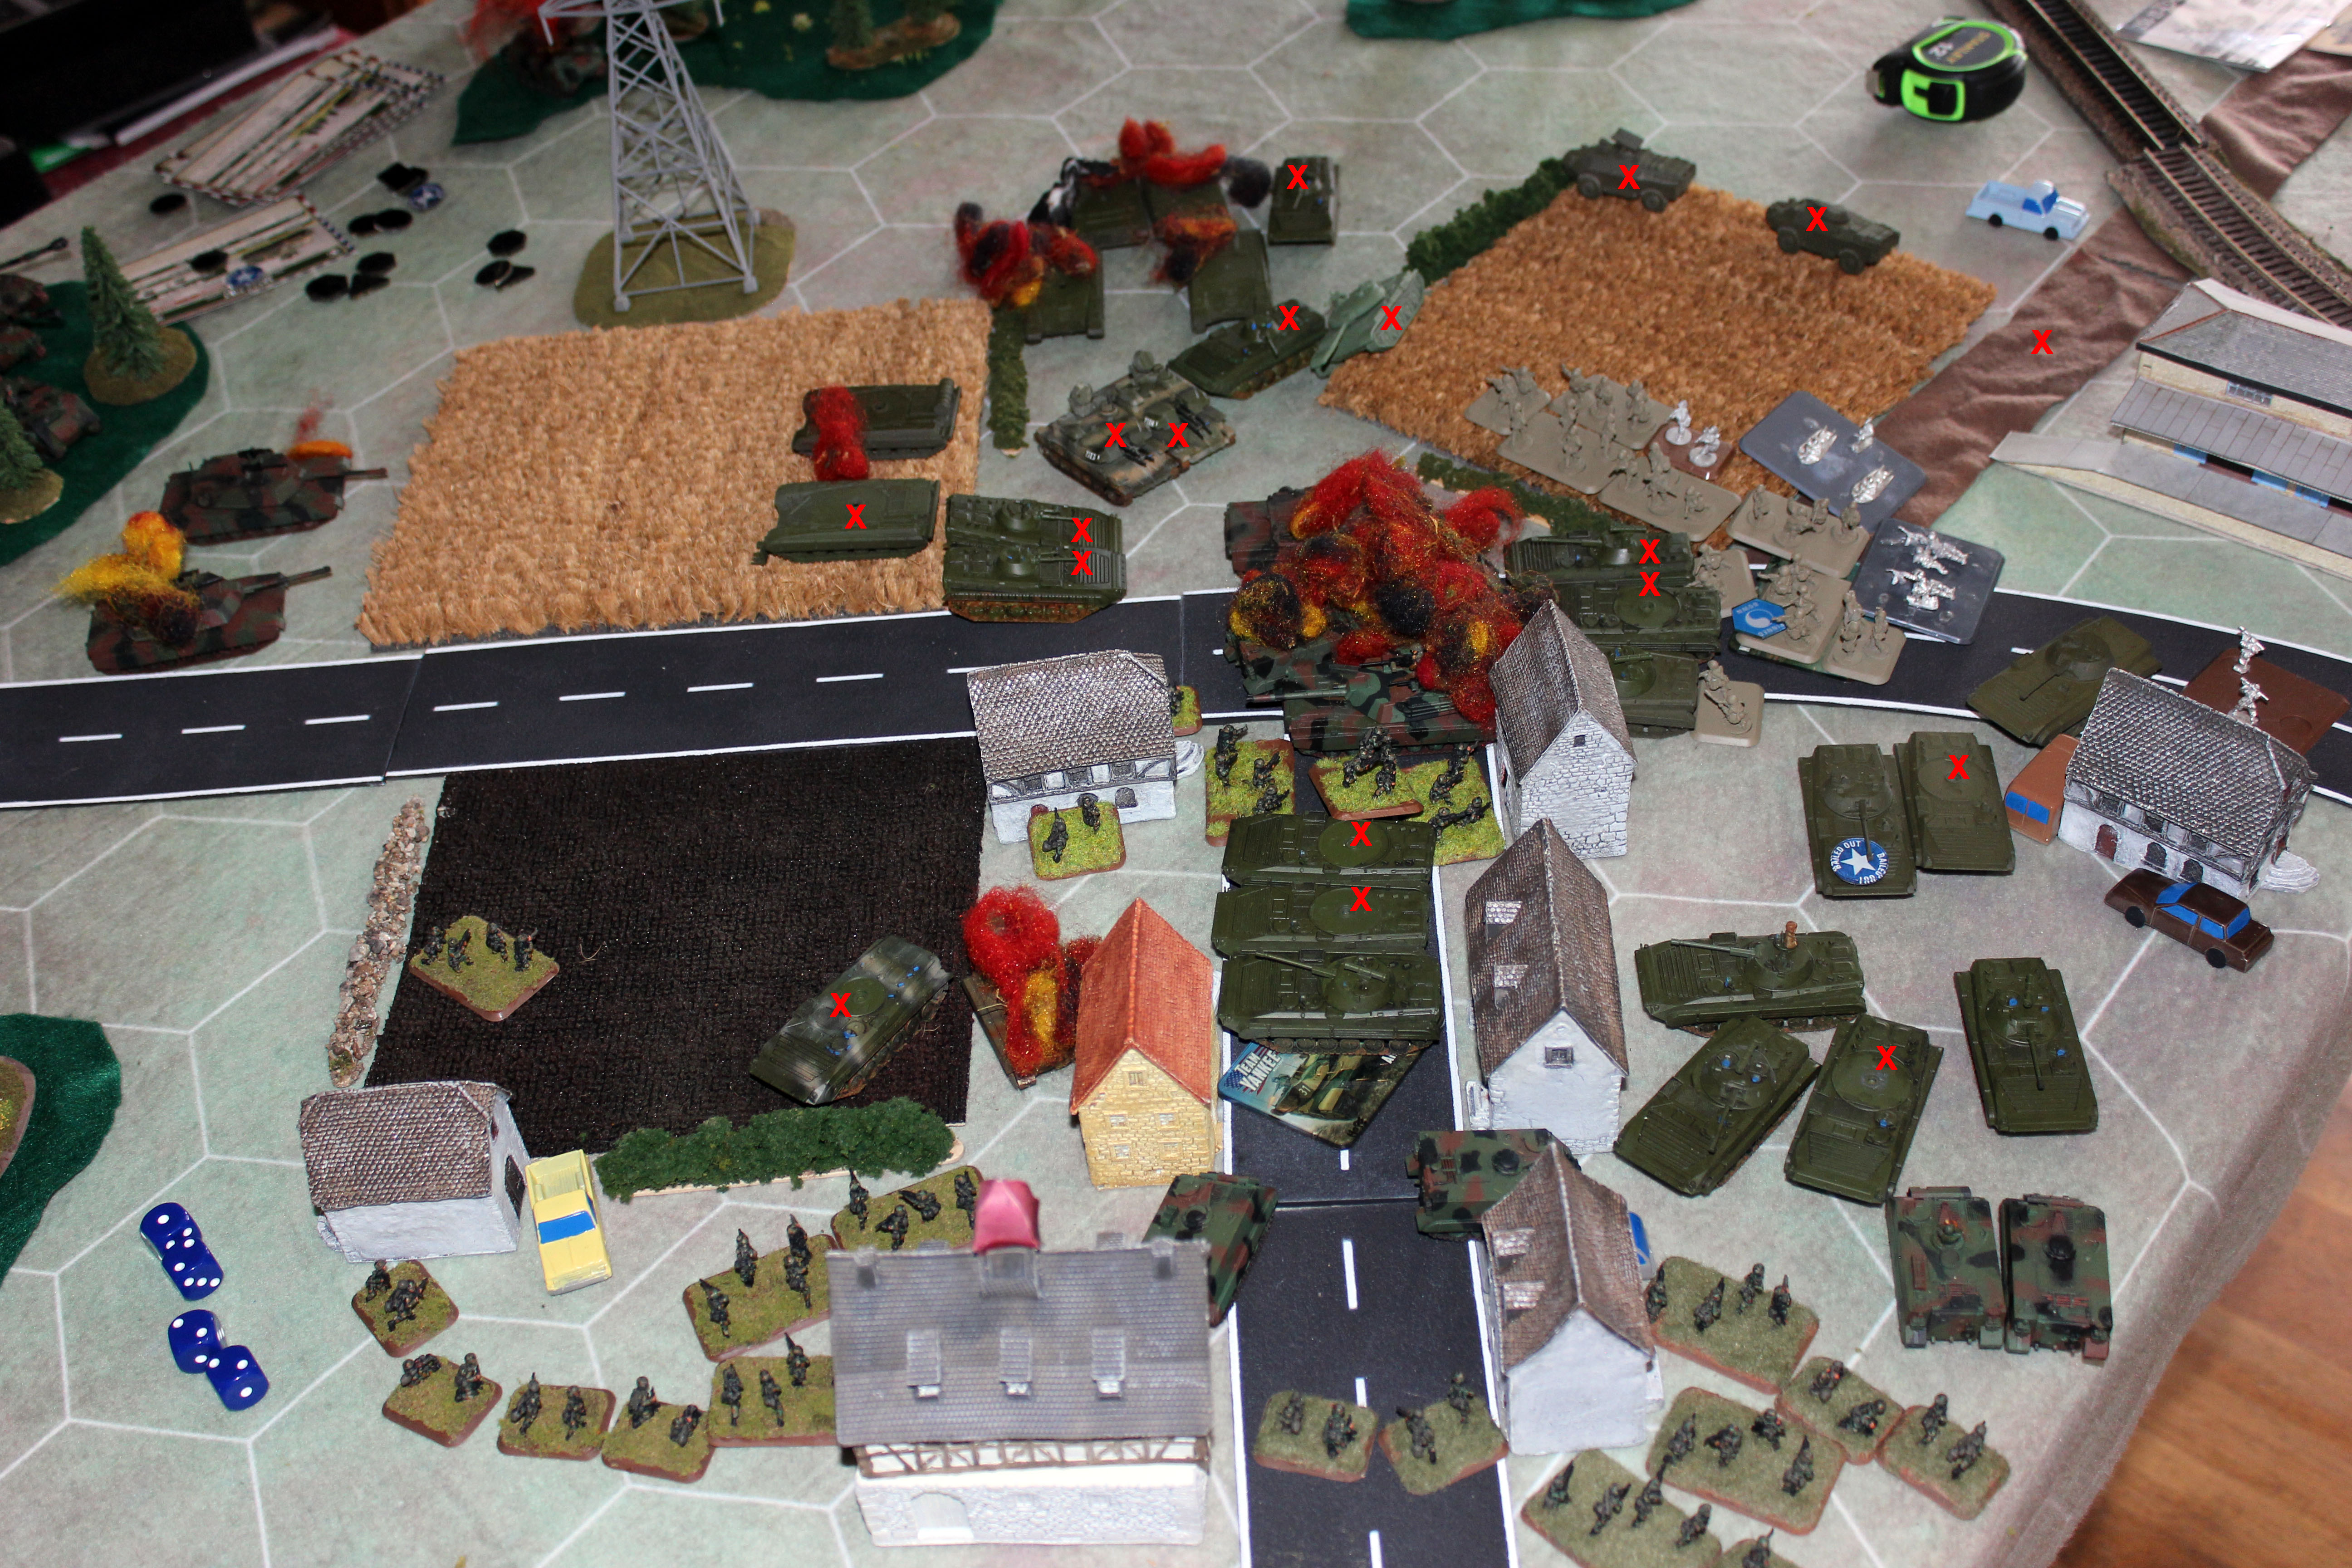
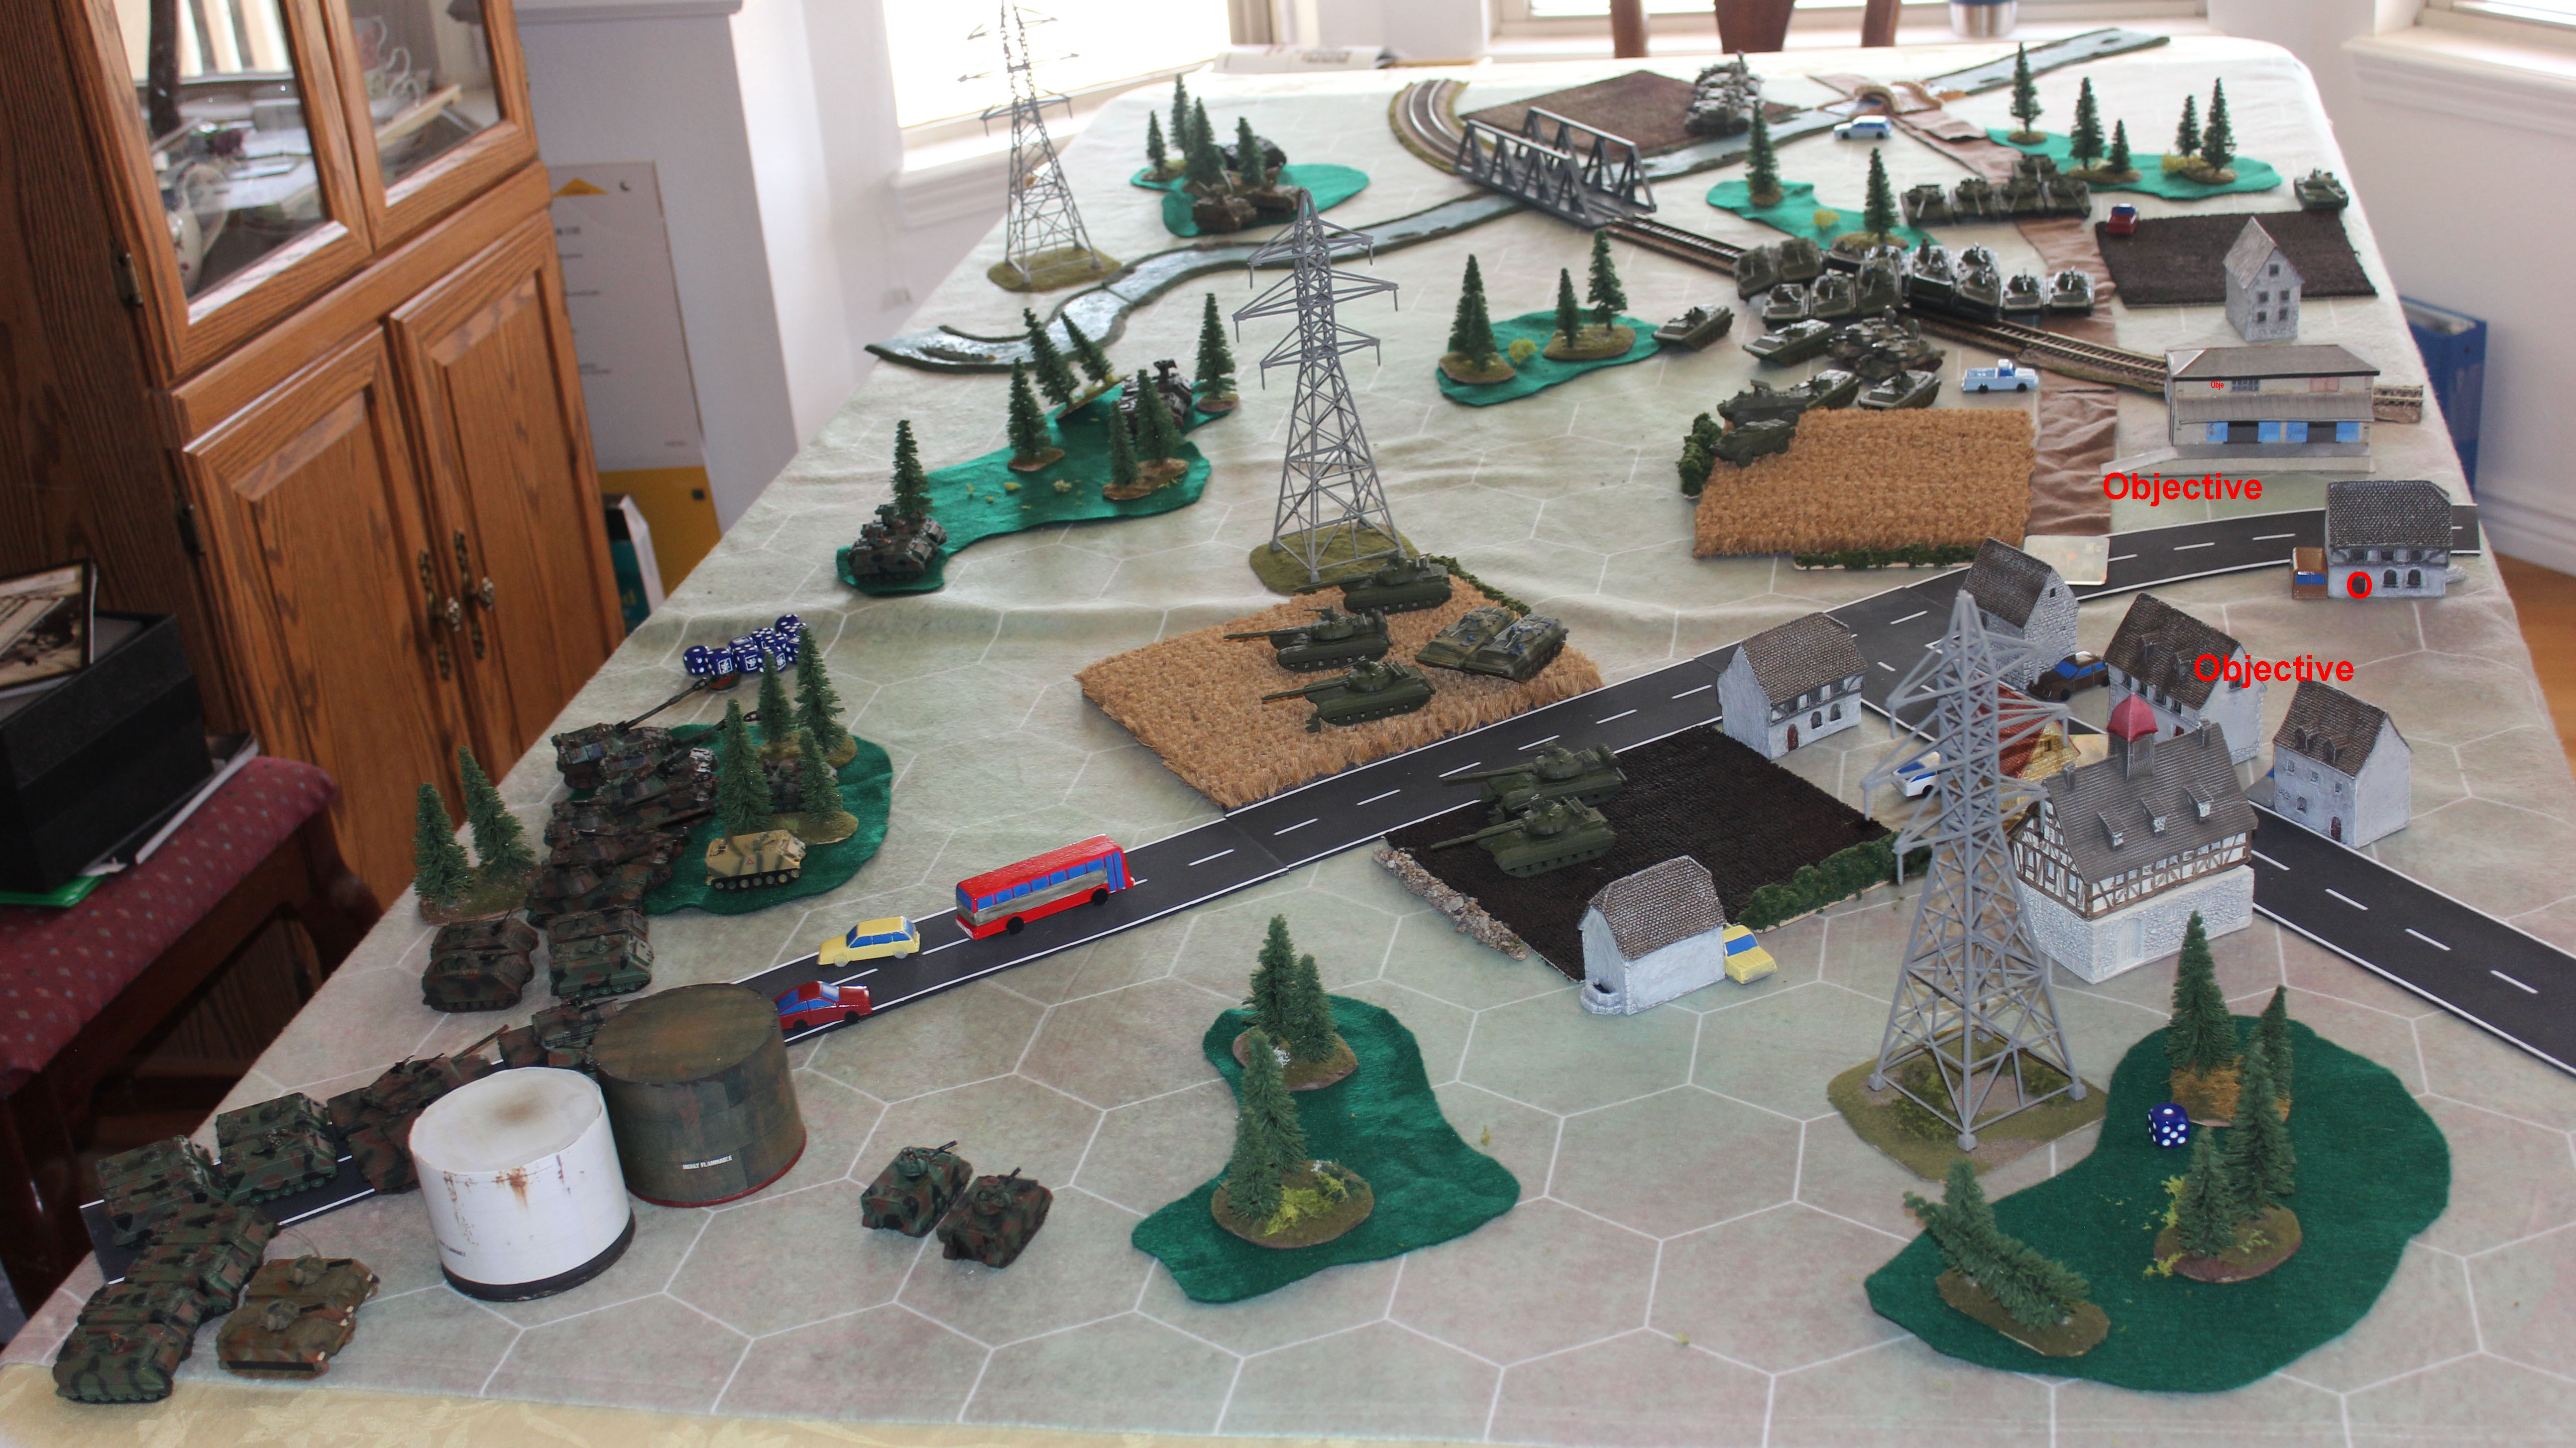 The view from the American positions at the beginning of the 1st Turn. Note how far the Soviets had advanced using the Spearhead Move.
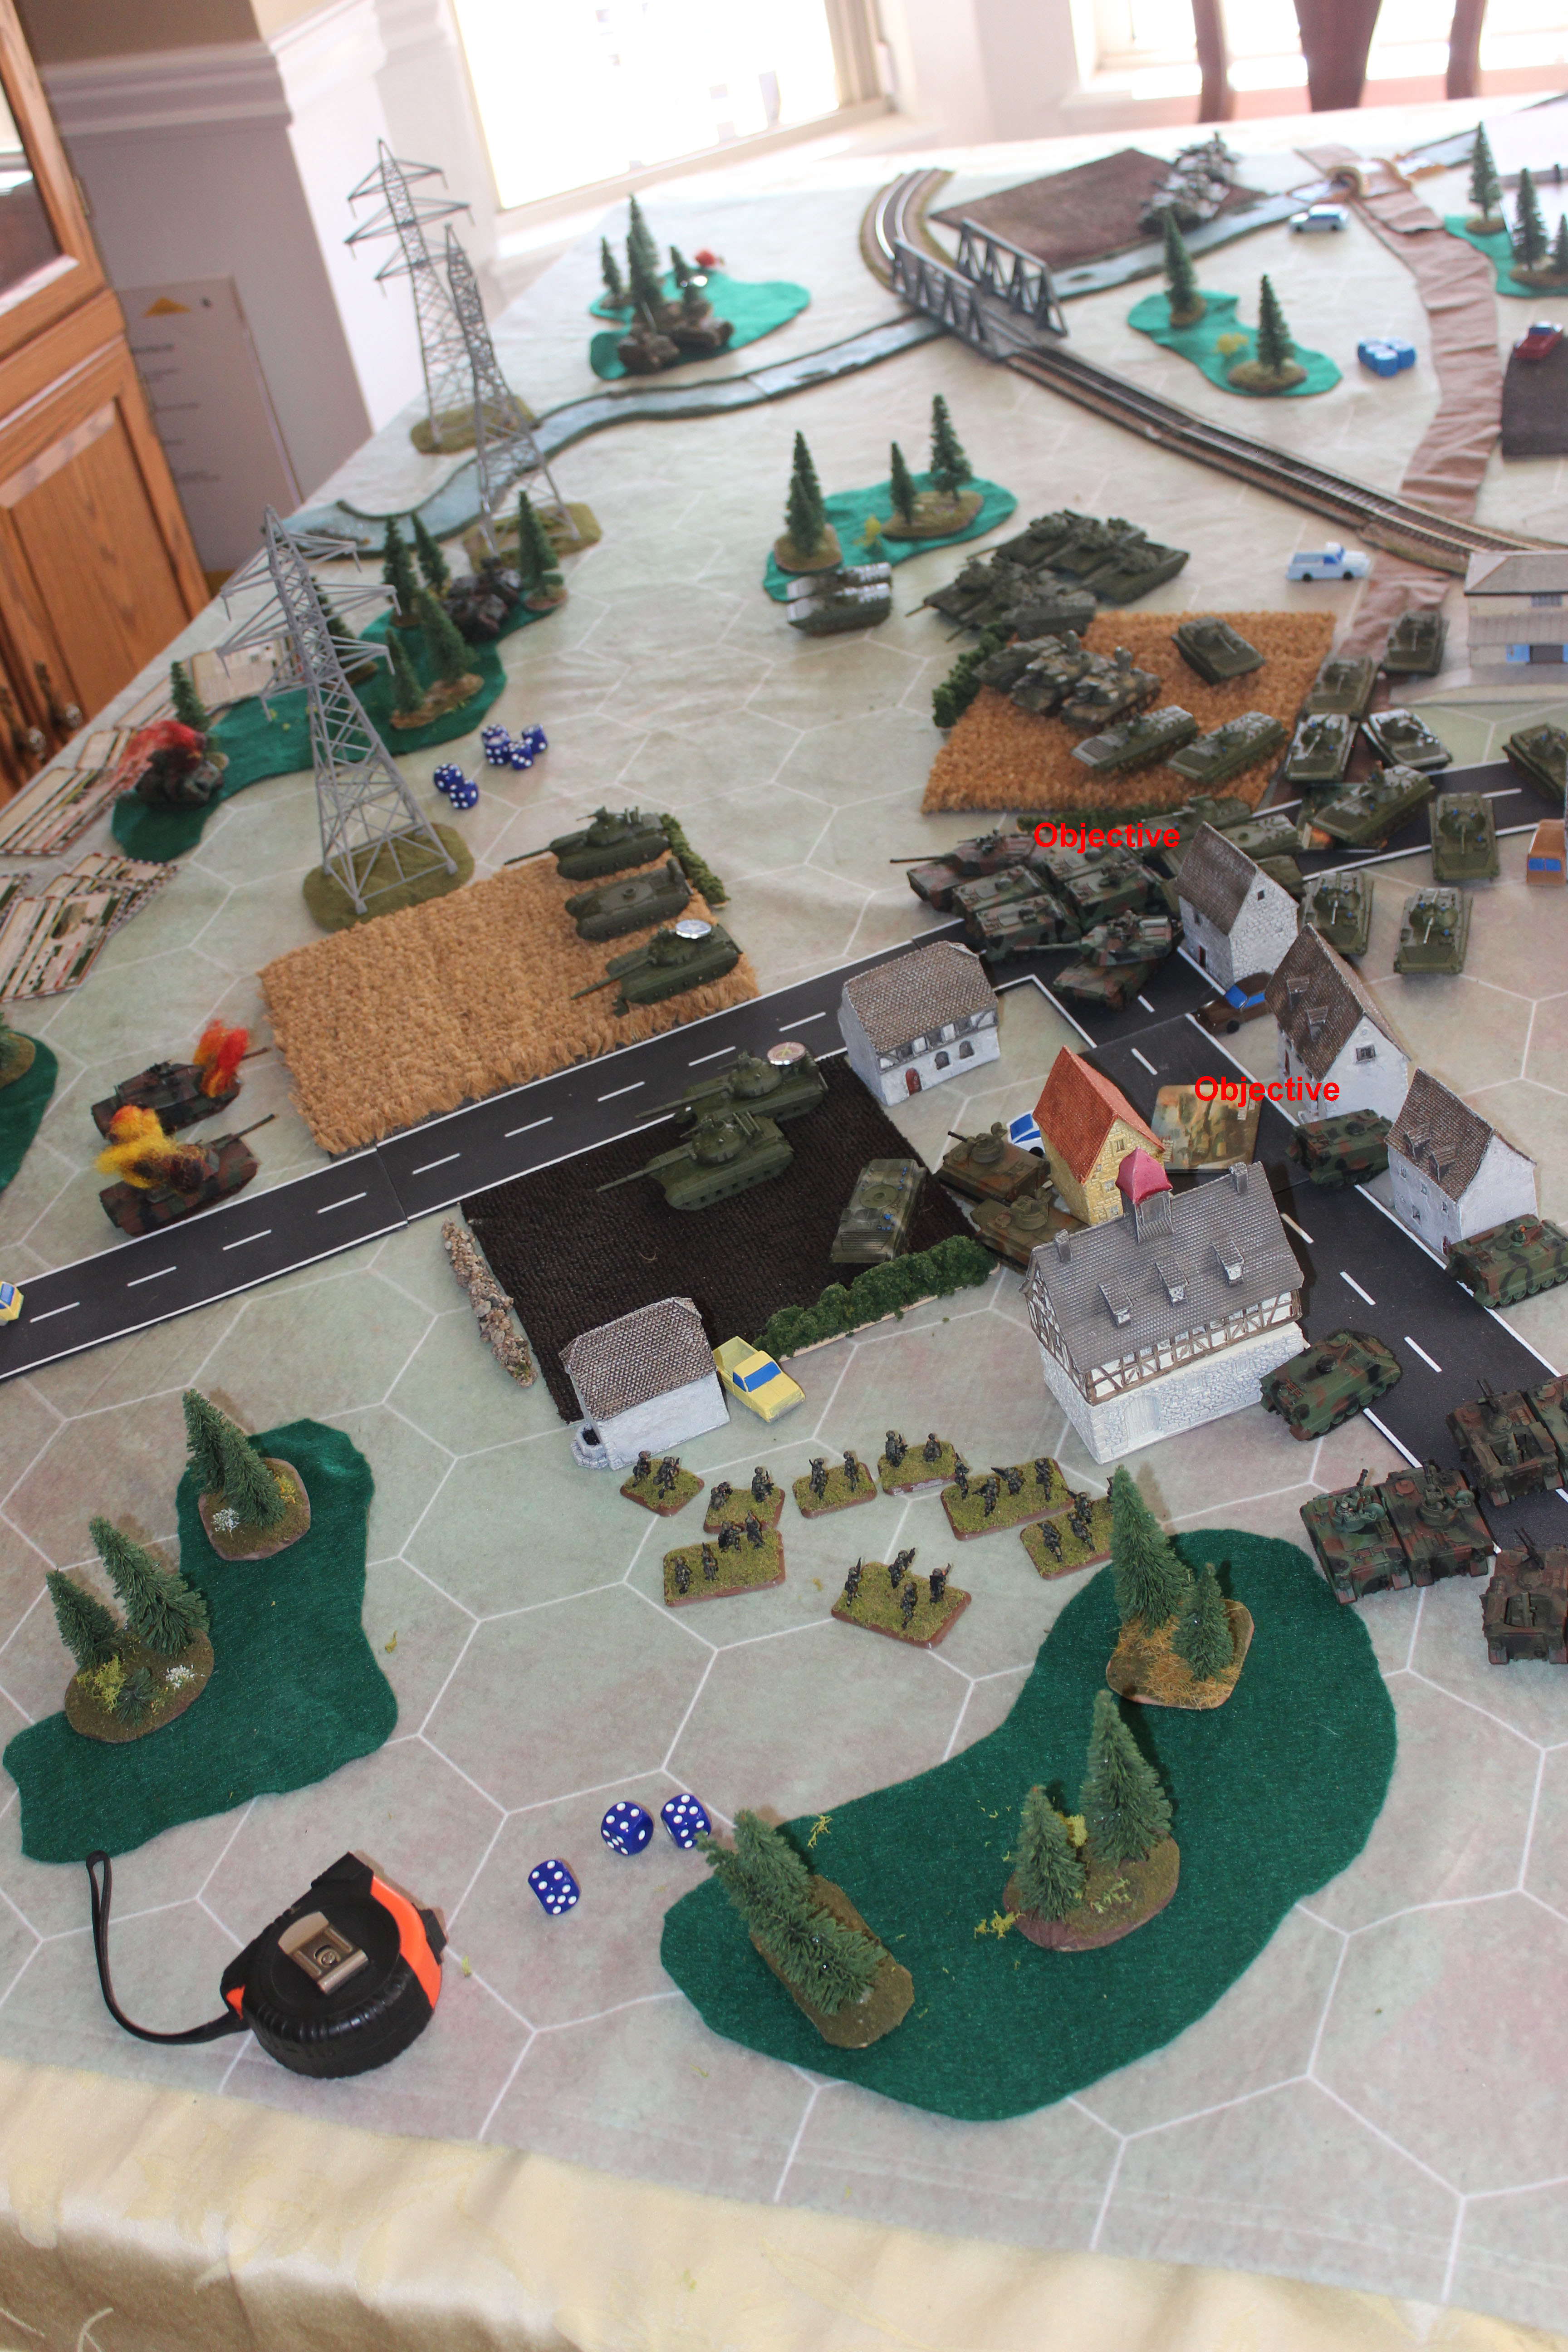
Battle Report Author
Army Lists Used In This Battle
Recommend Commander For Commendation
Share this battle with friends
AlohaRoverWins

Great Job Bob,
This is a tough Mission for NATO against the Horde. We commend you for Battle and efforts. This was the longest turn Gauntlet battle I have read yet. You deserve a Medal.
When you figure it out, let us all know. It’s defeated me, too.
“Overrun” is a key word here. Good report.
I haven’t figured out how to integrate the pictures into the report. Maybe the next one.
Very nice battle report!
I would’ve prefered if you could swing in the pictures after each phase, if it was possible since than the pictures would make more sense with the phase they where in 🙂
Otherwise a really good report with lots of pictures for me to look at ! !
Awesome narrative. Thanks again.