Fought At Hanover
2422 days 5 hours 50 minutes ago
Battle Report
Ambush In Hanover
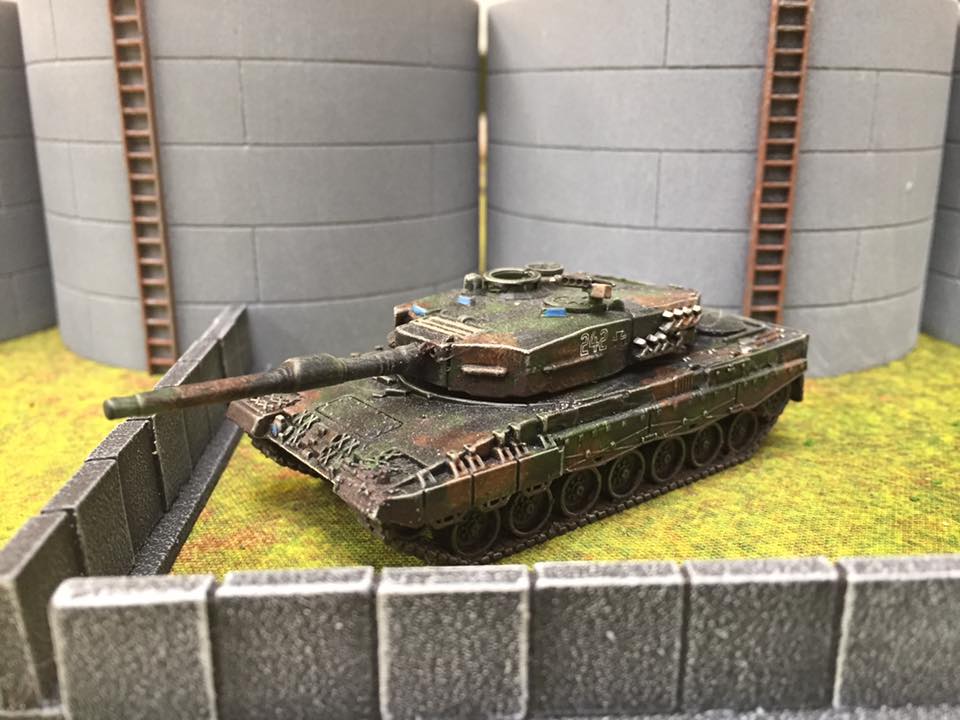
70 POINTSSTEVE: This is my first army for Team Yankee so I’m starting off with the Kampfgruppe Muller box set. This gives me the core elements of a Leopard 2 Panzerkompanie plus helicopter support.
JONATHAN: I’m hoping my superior numbers will swamp Steve’s force as I outnumber him nearly 2-1. Points wise Steve has nearly 20 more points worth of troops on the table, but hey, not every battle is “equal”. This game will represent the smaller West Germans strike force ambushing the Soviets.
You can check out our army lists on the attached PDF.
We played using the Ambush rule, meaning that Steve only placed his HQ unit, holding back his Panzer Zugs and choppers until the right moment to strike. Jonathan's mission was to get clear of the town, as his forces had vital information needed for the war effort, but their comm's were down.
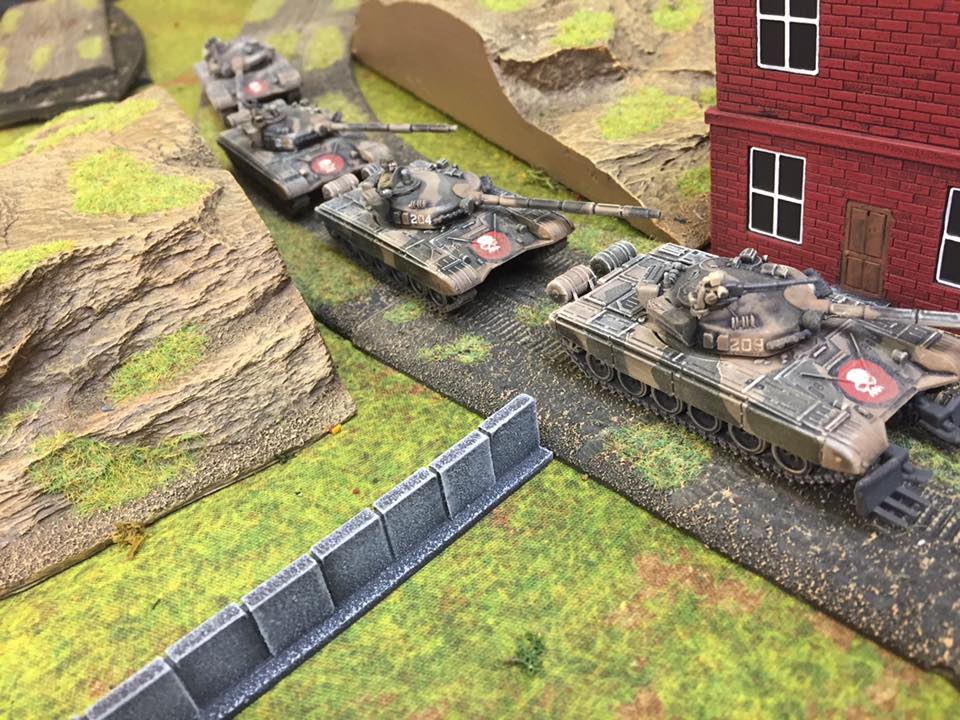
JONATHAN: Moving into the town, it was immediately apparent that something was wrong. No enemy troops were visible, just the single track leading through the industrial sector, past the oil tanks.
Even the Hinds couldn't detect any -- wait one, wait one! there, beside the oil tanks. The enemy!
I launched missiles from the Hinds but so shocked at the sudden appearance of the West German HQ, they went wide.
STEVE: I really thought my HQ unit was done for. It was a risk placing it on the battlefield on its own but it had drawn the Hinds towards it, which was all part of the plan. I now placed my two kompanies of Leopards, flanking the single road and began my attack.
JONATHAN: We exchanged fire for a couple of turns, but our tank crews were obviously either green or badly trained as most shots went wide of the mark (I am buying new dice...just saying!). With the correct encouragement (a pistol to the head) the last two shots of this turn took out a tank from each platoon forcing unit morale checks. Lets hope Steve's dice rolling is as bad as mine.
STEVE: After a couple of turns where pretty much nothing happened, all hell broke loose. Jonathan's (lucky) shots took out two of my tanks, but worse, from different platoons meaning both had to take morale checks.
**Activate Rimmer mode from Red Dwarf**
My platoons need a 3+ to continue the fight. I rolled for the first, a 5 - but it was cocked so I rolled again. A 1...! I rolled for the second platoon - a 3, success, but again, a cocked dice so it could have easily been a 2 so I rolled again. This time it WAS a 2. I'm too honest for my own good!
**Deactivate Rimmer Mode**
Both Units were destroyed leaving just my HQ (both chopper units had been taken out by each other during a previous round) to face off against the remaining Soviets.

JONATHAN: With only the West German HQ remaining, I continued my advance down and out of the town. the new motivation programe continued to work as shot after shot peppered the enemy tank. Unfortunately the factory workers hadn't made decent shells as most bounced off. One penetrated but only forced the commander to bail. Should be good enough.
STEVE: We got this. 2+ morale and we fight on for --- a 1! Well, I suppose that makes sense; seeing the oncoming tide of Soviet tanks it's better to bug out and fight another day.
JONATHAN: that was a great, fun game. I really thought I was actually going to lose at one point, down to these pesky dice (I'm definitely buying some proper Soviet dice to bring me some better luck).
STEVE: As a first game, I really enjoyed that, despite the terrible dice rolls and result. I need to increase the size of my Zugs to the full three to stave off those pesky morale checks. Adding a few more Panzer Zugs as well will also prevent formation morale checks having to be taken so soon. I will have my revenge!
Battle Report Author
Recommend Commander For Commendation
Share this battle with friends
Jonathan @ BattlefrontWins

The Leo 2 is awesome. If you can limit it to tank on tank, I think the FRG wins. But doing a low point game and bringing in this heavy hitter is going to be difficult
No surprise there in the WarPac win, using Leo IIs in a small list is suicide. You get extra points for the Red Dwarf reference 😉
Nice report for a small action, and I like the two way banter as it presents a more balanced report. Agreed with Jagdpanzer on force comp. Leopard IIs are the crown jewel of a Bundeswehr force, but you still need the crown to set it on.
Great looking paint jobs
+++
Nice win Totenkopf
The commissar wants a word on that…
Keep winning!
+++
Great photos
Grats on the win
Leo 2 will generally make mincemeat of anything out there, but it isn’t invulnerable, and it seems like it almost has to be reserved for higher point value battles…
Leo Is give me more trouble than Leo IIs.
Hi, great pics! Leo 2 is a great tank, but as you can see, even if you lose one or two, they are so expensive. Also having them run of due to morale sucks, get some new dice!! Luckily I know a guy!
If you can flesh out your force a bit more as West Germans with small platoons of Leo 2’s really rely on their dice, bad dice means you lose.
Better luck next time. Also look at Leo 1’s hint!!