Fought At Fulda Gap
2440 days 1 hours 7 minutes ago
Battle Report
The Defense of Bad Hersfeld
View Linked Report - CLICK HERE 100 POINTS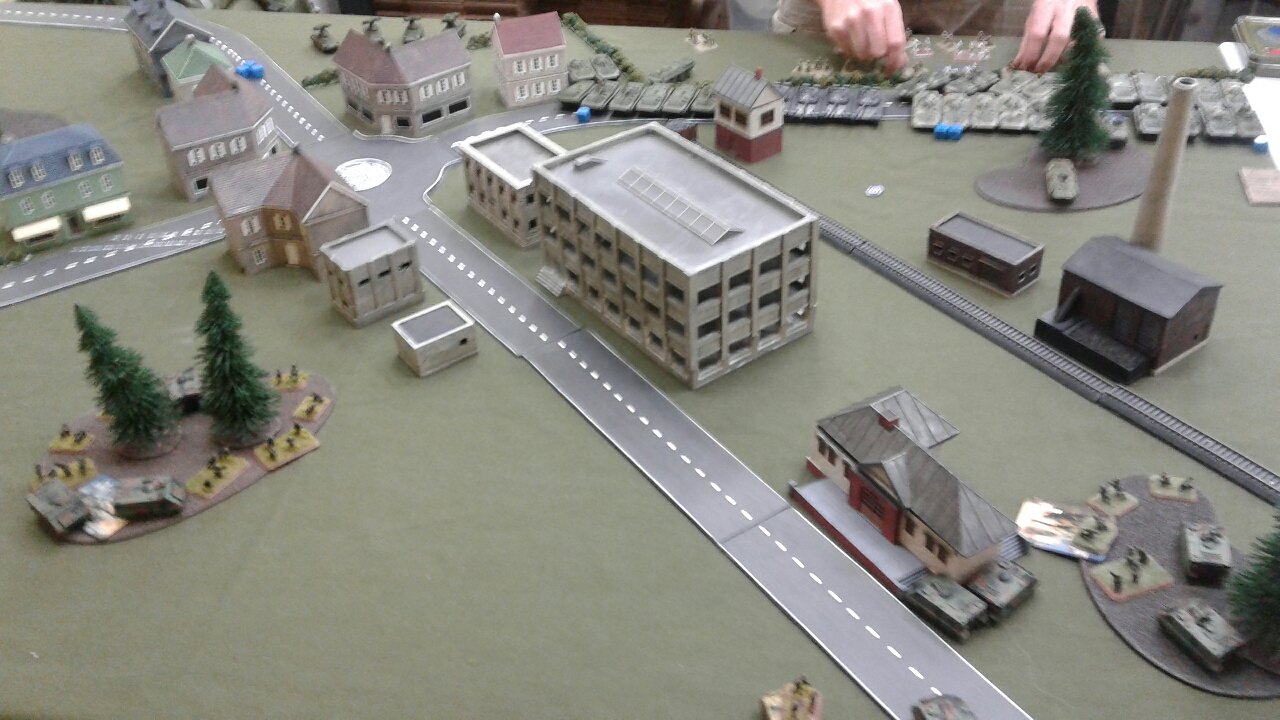 Image of the advancing Soviets. 3rd Platoon is on the right. 2nd Platoon is in the woods on the left.
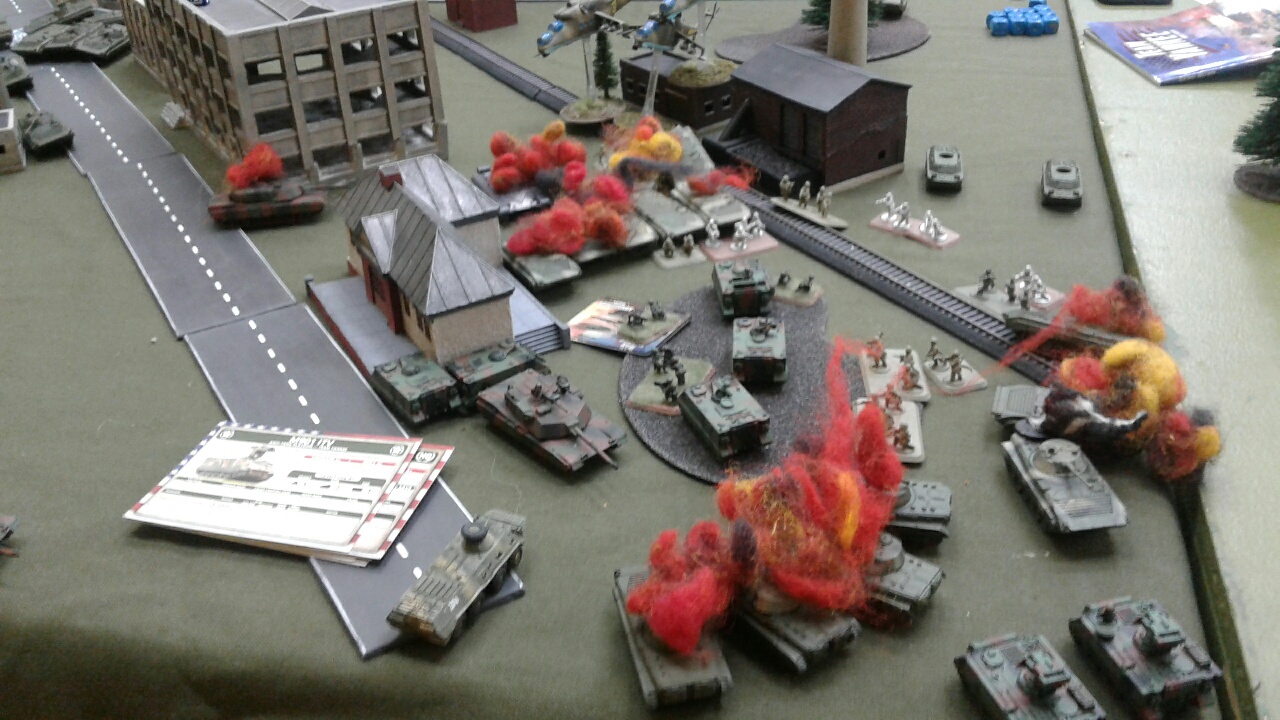
 The M1s move to face the advancing BMPs from the right. The 3rd Platoon is consolidating its position.
The Defense of Bad Hersfeld
The town of Bad Hersfeld is in the northern sector of the Fulda Gap and is about 10 kilometers from the border with East Germany. Before the war started it had a population of 25,000 people.
As the commander of Bravo Company 3rd Battalion 36th Infantry, 1st Brigade, 3rd Armored Division I knew that should war breakout we would deploy in the vicinity of the town. For the 18 months that I have been the commander of Bravo Company, I have done numerous terrain walks with my battalion commander, my platoon leaders and sergeants. I had a fairly good idea what my area of responsibility was and how I would defend it. Seven days before the war began, we were placed on alert for movement to our general defensive positions.
After arriving there, I was called into the battalion HQ and told by my commander that my mission had been changed. Instead of defending west of Bad Hersfeld I was to position my company on the western outskirts of the town to cover the withdrawal of the 3rd Squadron 11th Armored Cavalry which was screening the border to our east. My command was expanded and would be known as Task Force Bayonet. It included:
Bravo Company HQ
1st Platoon Bravo Company with extra dragon team
2nd Platoon Bravo Company with extra dragon team
3rd Platoon Bravo Company with extra dragon team
ITV Section
Attached to the Task Force Bayonet were:
1st Platoon Alpha Company 2nd Battalion 32nd Armor of 4 M1 tanks
2 ITV Sections from the Combat Support Company 3rd Battalion 36th Infantry
1 Section of VADs from the Division Air Defense Battalion
In support
Charlie Battery, 2nd Battalion 3rd Field Artillery: 6 M109s and a FIST
A-10s if available. We did not have priority.
Because of the restrictions of the terrain, I chose to keep all three mech platoons on a line running north to south, with the 1st Platoon on the left in some buildings and behind a hedge line, the 2nd Platoon in the center with the company HQ in a wooded park, and the 3rd Platoon on the right in woods and an old train station. Because of the defensive positions were in the southern part of the town and with no clear shots for our TOWs, I kept the ITV Sections, the VADs, and the M-1 Platoon in reserve. Behind my three mech platoons in the northwest corner, of the defensive positions I had my artillery battery.
The day after the war started we were warned that the Armored Cavalry Squadron would be withdrawing through our positions. I quickly passed the word to my platoon leaders to be on the lookout for them and to expect enemy contact shortly afterwards. Around 2300 hours the last elements of the squadron had passed through our lines. The only thing between us and the enemy was our battalion’s scout platoon. I ordered the platoons to go on 50% alert and but stand-to would be at 0400. At 0350 hours, Staff Peter Hope of the 1st Section of the Scout Platoon reported hearing a large number of tracked vehicles. He stated that they could see BMPs a few kilometers to his front but very few tanks. At 0430, I received a call from SSG Hope that he was withdrawing.
At 0445, the 3rd Platoon reported a large number of BMPs to their immediate front. First Lieutenant John Parker, our FIST, also reported several tanks. Shortly after that the BMPS opened up at short range but everyone were in well camouflaged positions and we took no casualties. Our FIST called in Copperheads and after two salvos destroyed four T-64s. The 3rd Platoon continued to hold their fire, letting the artillery do their work. The initial artillery barrage revealed the location of the battery and six Hind Helicopters came in to deal with them. They destroyed one of the M109s and caused a fire in a second one which forced the crew to bail out of it until it was brought under control a few minutes later. The artillery was able to bring down one of the M109s with .50 cal fire. The 1st Platoon reported hearing BMPs to its front.
The number of BMPs – estimated at 15 – 20, continued to fire at the 3rd Platoon and destroyed B-33, its 3rd Squad’s M113. The driver and gunner were killed. The platoon still held its fire and let the artillery do its work. It called in another copperhead strike and destroy two BMPs. Our calls to battalion for air support went unheeded. One of the BMP companies began to maneuver around the southern flank of the woods that the 3rd Platoon was holding. I ordered the M-1 Platoon and my two VADs to move quickly to support the 3rd Platoon. The VADs caught the BMP Company maneuvering around the flank of the 3rd Platoon in the flank and was able to destroy two of them and bail another two. The M-1 platoon brought the other company under fire and destroyed four of them. The 1st Platoon continued to report that they could see BMPs to the front.
Dawn finally broke and the five remaining Hinds moved to our right flank to engage the M-1 Platoon. It destroyed A-11. The BMPs by the 3rd Platoon were able to remount the two bailed vehicles and returned fire on the VADs. Staff Sergeant Joseph Davis, the VAD section leader was killed when his M113 blew up. The resulting explosion damaged the Vulcan on the other M113 and Sergeant Dusty Miller requested permission to withdraw, since he could not fix it. Permission was given. The Bravo Company’s ITV Section, led by Jon Stevens was sent forward to support the 3rd Platoon and was able to destroy two BMPs. The M-1s continued to destroy the BMPs but were brought under fire by them to no affect. The Soviet commander decided at this point that he needed to assault the 3rd Platoon. First Lieutenant Joel Jones, had position his remaining M113s in such a way to provide all around fire support. Despite being pinned down by the Soviet covering fire, and with the help of the FIST track and the two M-60 machine guns on the ITV, they stopped the attack in its tracks inflicting heavy casualties. After beating back the attack, Lieutenant Jones ordered the three dragons to fire on the Hinds and one to fire on the ZSU-23-4s which were about 100 meters away. The dragons destroyed two Hinds and one of the ZSUs. The ITV also attacked the ZSUs and destroyed one.
By this time the BMPs in our center came alive and started bringing the M1s under fire. Although hit many times in the flanks, none were able to penetrate. The remaining three Hinds fired at the M1s and missed. The Soviet infantry in front of the 3rd Platoon were too shaken by the failed assault and decided to remain in place and not fire at the platoon. By this time they had no BMPs left and no hope of knocking 3rd Platoon off of the positon. My concern was now on the BMP Company moving towards my right through the town. The 3rd Platoon Dragoons took out another ZSU-23-4 and the final one decided to pull back, plus a Hind. ITV Platoon fired at the Hinds, destroying one. My remaining 3 M1s, the combined Dragoons and LAWs of the 1st and 2nd Platoon brought the center BMP Company under fire destroying seven of them. No infantry dismounted from the burning vehicles. Air support finally arrived and fired at the remaining BMPs. The remaining HIND withdrew.
Shortly after this, the Soviet commander ordered his troops to pull back. In the two hour battle TF Bayonet had the following casualties:
1st Mech Platoon: 1 M113 destroyed, with both crewmen killed.
3rd Mech Platoon: 1 M113 destroyed, with both crewmen killed, and one dragon team destroyed.
1st Platoon Alpha Company 2nd Battalion 32nd Armor: 1 M-1 destroyed, two crewmen killed, two wounded.
VADs Section: 1 M-113 destroyed with 3 crewmen killed and one 1 M-113 damaged but repairable.
A survey of the battlefield found the following burning vehicles
27 BMPs
4 T-64s
1 BRDM
5 Hinds
3 ZSU-23-4
75 dead infantry
Recommendations for Commendations:
Distinguished Service Cross: First Lieutenant John Parker for conspicuously gallantry by refusing to pull back his vehicle from the front line. His timely calling in Copperhead strikes while under continuous BMP cannon fire and an assault by infantry, was instrumental in breaking the back of the Soviet advancement.
Silver Star (Posthumously): Staff Sergeant Joseph Davis, the VAD section leader, who fearlessly exposed himself to enemy fire and by skillful maneuvering was able to stop a BMP Company from over-running the 3rd Platoon.
An observation on Soviet Gunnery and munitions: many of M1s and M113s had to expose themselves to bring fire onto the enemy. The M1s in particular were a prime target. Several times they had to expose flanks to one enemy in order to bring another under fire. Many were hit multiple times, but only one was destroyed. None of the others sustained enough damage that would have forced them to bail out. Tank A-12 reported to have been hit five times by AT-5 and AT-6 missiles and none had penetrated. It also reported finding the wires of another three missiles across its chassis.
We were able to destroy five Hinds: 3 with Dragons, one with a .50 cal machine gun, and one with a TOW.
On a personal note: Both the Soviet player - Peter Hope and I had served in the 3rd Battalion 36th Infantry during the 1980s.
Final score was: 5 -2
Battle Report Author
Army Lists Used In This Battle
Recommend Commander For Commendation
Share this battle with friends
Robert BurnhamWins

Nice report and a good amount of Pictures, I’d prefer even more 😉
But congrats on the win aswell!
Another win for US, and another nice batrep, keep goin 🙂
Great report… bummer on the outcome… 😉
You both did an amazing job on your Battle Reports. Medals for both of you….
Great report. Gamer’s Haven gang is leading the way in these AARs. Really makes me miss being out there for campaigns like this.
Nice Batrep. I like the urban terrain.
Great Battle. Here is my view
https://firestorm.warconsole.com/battles/aloharover-vs-bob-1503331915
And Report ID
zqrivR4N1xJORr7
Well done!
A good report and nice game i see.
Best regards, Frank.
Great Battle Report Bob, I like you put names to section leaders. This was a fun and nail biting game to watch. Every roll of the dice counted, and great strategy put forth between you and Aloha Rover. As an observer of the game it looked like both of you had a good time and enjoyed the game. 10+ on Sportsmanship watching in.
Keep NATO moving forward.
Aloha Robert,
Good report and read. Sounds like the Warsaw player had his game plan correct, but It just couldn’t get it to muster.
Great Job all around!
-Quicksilver